
Home Test for Cat Food Intolerance UK: A Step‑by‑Step Guide
Ever stared at your cat’s litter tray, wondering if that occasional loose stool is just a quirk or something more? You’re not alone – many UK cat owners feel that uneasy mix of worry and helplessness when their feline starts itching, vomiting, or losing weight for no obvious reason.
What if you could get a clear answer without endless trips to the vet or trial‑and‑error diet changes? That’s where a home test for cat food intolerance in the UK steps in. It’s a simple, science‑backed way to pinpoint which foods or environmental items might be upsetting your cat’s gut or skin.
Imagine this: you’ve tried switching to a grain‑free wet food, yet the scratching continues. You’re left guessing whether it’s the protein source, a hidden preservative, or even the litter dust. By sending a few strands of your cat’s fur to an accredited lab, you receive a detailed report that highlights specific sensitivities – often covering over 200 ingredients and allergens.
Here’s a quick snapshot of how it works:
- Collect 4‑5 strands of fur from a calm spot (like behind the ear).
- Pack the sample in the pre‑paid envelope provided.
- Mail it to the lab; results usually arrive within 48‑72 hours.
- Review the personalised report and start removing identified triggers.
One of our customers shared that after testing, they discovered their cat was reacting to a common flavour enhancer in treats. By eliminating that single ingredient, the cat’s coat brightened and the nightly scratching stopped. Real‑world stories like this underscore how targeted the information can be.
If you’re wondering about cost, turnaround time, or how accurate the results are, we’ve broken down everything in our Premium Cat Intolerance Test Kit. The kit includes clear instructions, a prepaid return bag, and a money‑back guarantee if you’re not satisfied with the clarity of the report.
So, what’s the next step? First, list the symptoms you’ve noticed – be it frequent vomiting, greasy stools, or relentless scratching. Then, gather a small fur sample and order the kit. While you wait for the results, keep a food diary; note any changes in behaviour when you switch meals. This dual approach speeds up the trial‑and‑error phase once you have the test data.
And remember, a home test doesn’t replace veterinary advice, but it gives you a solid foundation to discuss targeted diet changes with your vet. For a broader view on proactive health, you might also explore resources from XLR8well, which focuses on overall wellbeing strategies.
Ready to take the guesswork out of your cat’s diet? Let’s get that fur sample ready and put science back in the driver’s seat of your pet’s health.
TL;DR
A home test for cat food intolerance UK lets you identify dietary triggers by analysing a simple fur sample, saving you time, money and trial‑and‑error meals.
Combine the results with a food diary and your vet’s advice to create a targeted diet plan that eases itching, vomiting and digestive upset.
Step 1: Observe Symptoms and Record a Food Diary
Let’s be honest: watching your cat itch, vomit, or have a bloated tummy is stressful. You’re worried. You want answers, not more guesswork.
This is the moment where a simple, steady routine can make all the difference. The first practical step is to observe symptoms and keep a careful diary.
Common signs to track include scratching and biting, red or irritated skin, hair loss in patches, a greasy coat, frequent vomiting, soft stools, or persistent gas. Note when these happen and, crucially, what your cat just ate or was exposed to just before the episode.
A diary matters because it helps you connect the dots between meals, treats, and environmental things like litter dust or new toys. It’s not just about noting that something happened; it’s about linking moments to specific foods or contexts so you can discuss them clearly with your vet or when reviewing a home test for cat food intolerance uk.
Here’s a simple way to start. Create a log (digital is fine, or a notebook on the kitchen counter). Each entry should have a date and a brief note: the symptom, what was eaten (brand, flavour, protein source), portion size, and any other factors like a new litter or air freshener. If you use supplements or medications, jot those down as well. Keeping it bite-sized makes it doable every day.
For example: “Tue 9am — itchy belly and scritching; breakfast: chicken pâté; no new treats; 12pm — soft stool; environment: nothing changed; 7pm — calm and playful.” You’ll be surprised how patterns emerge after a week or two of consistent logging.
So, what should you do next? Maintain the diary consistently, even on days when symptoms are quiet. If you’re evaluating a home test for cat food intolerance uk, the diary becomes your best ally, helping you interpret results and plan next steps with your vet.
To help you visualise the process, this quick walkthrough video below covers what to log, how to time entries, and how to prepare a sample for the fur-based test when you’re ready.
Does this actually make the process feel more doable? It does for many of the readers we work with, because you’re turning uncertainty into a clear, actionable plan you can follow each day.
One more thought before we wrap this section: if you’re using an at‑home test, the diary will help you spot which ingredients to discuss with your vet and which items to remove first. It’s about manageable steps, not dramatic overhauls, and it starts with simple, honest record‑keeping in a real UK home.
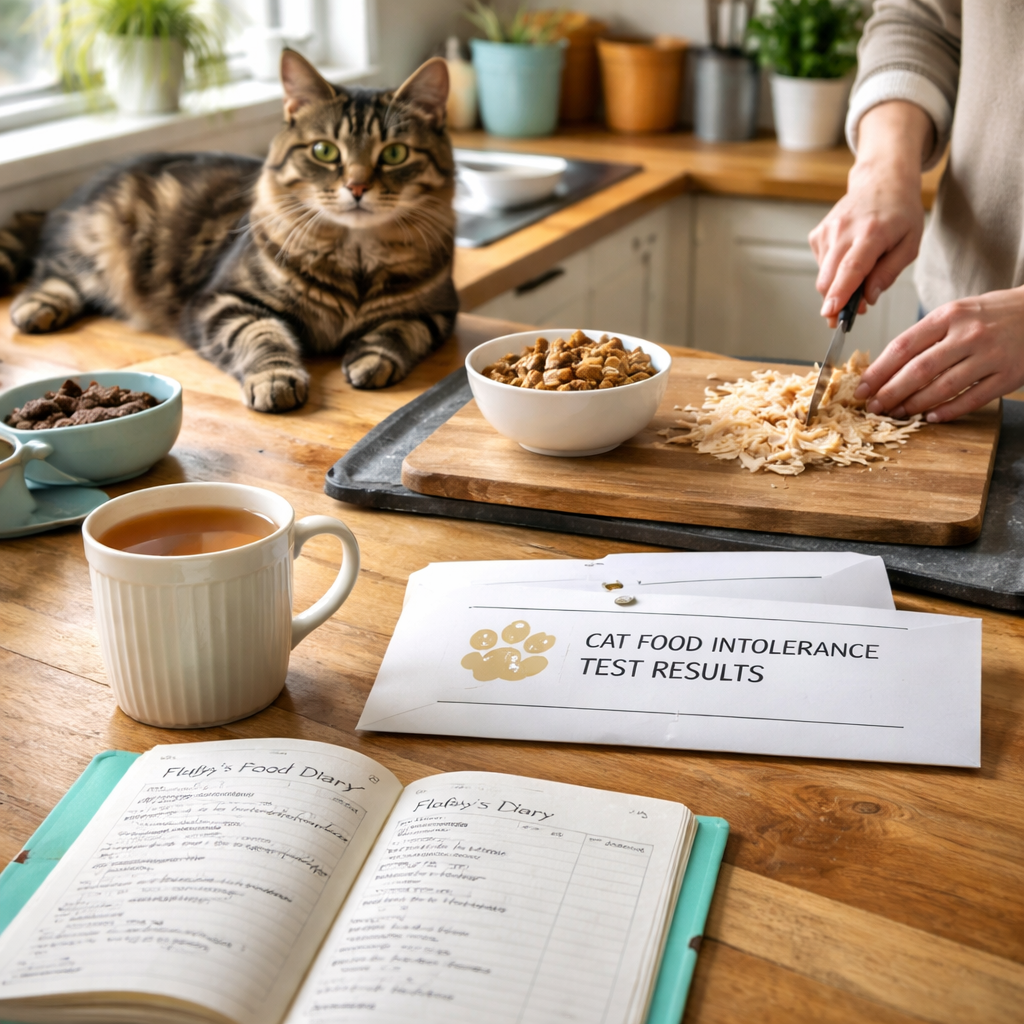
 Alt: Cat diary and fur sample setup in a UK home.
Step 2: Choose a Reliable Home Test Kit
Choosing a reliable home test kit can feel like wading through a haystack of options. You want something simple, trustworthy and easy to act on from the comfort of your home. In our experience, the right kit saves you days of guesswork and gives you clear directions for your cat’s diet.
So, what should you look for when you’re evaluating a home test for cat food intolerance uk? First, make sure the kit is feline‑specific or clearly suitable for cats. Next, check that the collection instructions are straightforward and that the lab is accredited. Finally, look for a results portal that delivers a clear, actionable report without jargon.
What makes a reliable home test kit?
Think about ease of use, accuracy and support. A dependable kit should walk you through sample collection with simple steps, supply a prepaid returns bag, and provide a report that highlights which ingredients to avoid. You want to feel confident that the test reflects your cat’s sensitivities, not just a general sniff test.
Another important factor is turnaround time. Some kits are designed for quick results, while others are slower but cheaper. It matters because your next meal changes hinge on timing and clarity. If you’re balancing a busy household, fast, reliable results are a big plus.
What to expect from the kit you choose
- Sample collection that’s quick and painless — typically a few fur strands from a calm area, with clear packaging instructions.
- Prepaid return logistics so you don’t have to worry about postage or extra costs.
- Laboratory analysis by accredited facilities, with a report that lists sensitive ingredients and environmental triggers.
- Online access to the results in a secure portal, plus practical dietary guidance derived from the findings.
If you’re weighing two options, the Premium Cat Intolerance Test Kit is designed to cover a broad range of potential triggers and to streamline the interpretation of results. For many cat owners, wider coverage translates to fewer follow‑up tests and a quicker path to a targeted diet. Premium Cat Intolerance Test Kit is a good starting point to explore what a comprehensive at‑home test can offer.
Costs, turnaround times and what happens next
Costs vary, but you’re paying for clarity and convenience. Look for clear inclusions like a prepaid return bag, concise reports and a stated turnaround window. In our experience, some clients prefer a faster option when their vet has already flagged a possible intolerance, while others opt for a cost‑effective kit with solid support and guidance.
Turnaround time is another practical consideration. Some laboratories report results within a few days of receipt, while others take a bit longer. Either way, you should receive a structured plan: which ingredients to avoid, suggested dietary adjustments, and notes on when to recheck or retest with your vet.
Our recommended approach
To make this decision easier, we suggest a simple checklist: is the kit appropriate for cats, does it offer a straightforward collection process, and does the report translate to actionable steps you can implement at home? In many cases, pairing the test with your cat’s existing diary (from Step 1) helps you connect the dots quickly and share precise patterns with your vet.
If you’re unsure which option to pick, start with the Premium Cat Intolerance Test Kit for broad coverage and clear results, then discuss with your vet how to apply the findings to your cat’s meals and treats. Remember, you don’t have to go it alone — platforms like UK Pet Food Intolerance make this easier by guiding you toward the most suitable at‑home testing solution for your pet.
What should you do next?
Take a moment to compare what’s included, confirm the cat suitability, and check the reported turnaround times. Once you’ve picked a kit, gather the required samples and keep your diary close at hand so you can start mapping results to real‑world feeding decisions right away.
Step 3: Conduct the Test at Home
Alright, you’ve picked a kit, you’ve got your diary, and the fur‑sample envelope is waiting on the kitchen counter. The next step feels a bit like a science experiment you can actually finish in an afternoon, but it’s really just a handful of tiny actions that give you big answers.
Gather the right supplies
First, open the kit and lay out everything – the collection card, the tweezers (if they’re included), the prepaid return envelope, and the instruction sheet. Most kits only need 4–5 strands of fur, so you won’t need a whole grooming session. A calm cat is key; try after a short playtime when they’re relaxed.
Tip: Keep a small treat handy. A quick nibble can distract the cat while you pinch a few hairs from behind the ear or the chin – those spots are usually the least itchy.
Collect the sample without stress
Hold the cat gently, but don’t force any movement. Using clean fingertips (or the tweezers), pull a few loose hairs. You’ll notice the strands are thicker near the base; those are perfect because they contain more keratin, which is what the lab analyses.
Don’t worry if you get a couple of extra hairs – the lab will just ignore the surplus. Place the strands onto the collection card exactly as the diagram shows, then seal the card in the provided bag.
Package and ship
Seal the sample bag, slide it into the prepaid envelope, and drop it in the post. Most UK services promise delivery to the lab within 24 hours, and results usually appear in 48–72 hours. While you wait, keep your food diary open – note any meals you serve the day after you send the sample, because some reactions surface a day later.
What to do while the lab works
Use this waiting period to double‑check your diary. Are there patterns you missed? Maybe a particular treat appears right before a scratching episode. Jot those down; they’ll help you map the lab’s report to real‑world triggers.
Also, consider a gentle elimination diet for a week or two. Learn more about elimination diets and how they complement testing. Even a short, simple diet – like a single protein source with no additives – can make the upcoming results clearer, because you’ll see whether symptoms improve when you remove everything else.
Receiving and reading the report
When the email lands in your inbox, you’ll see a colour‑coded list of ingredients and environmental items your cat reacts to. The report usually groups items into “high sensitivity”, “moderate”, and “low”. Focus first on the high‑sensitivity list – those are the culprits to eliminate right away.
Don’t panic if the list looks long. Many cats react to a handful of common additives like certain flavour enhancers or preservatives. Cross‑reference those with the foods you’re already feeding; you might discover that a favourite wet food contains a hidden trigger.
Putting the data into action
Take your diary, highlight any meals that contain the high‑sensitivity ingredients, and plan a short‑term swap. For example, if the report flags “hydrolysed fish protein” and you’ve been giving tuna treats, replace them with a simple chicken pâté for a week and watch the diary.
Record any change in itching, stool consistency, or energy levels. Over a couple of weeks you’ll see a trend – fewer flare‑ups mean you’ve hit the right target.
When to loop in the vet
If symptoms persist despite removing the flagged ingredients, or if you notice new issues, share the report with your vet. They can help you fine‑tune the diet, ensure nutritional balance, and decide whether a follow‑up test is needed.
Remember, a home test for cat food intolerance uk is a tool, not a diagnosis. It gives you a clear starting point, and together with your diary and vet guidance, you’ll be able to craft a diet that keeps your feline happy and comfortable.
Step 4: Interpreting Results and Next Steps
So the email lands in your inbox – a colour‑coded list of ingredients your cat reacts to. At first glance it can feel a bit overwhelming, but remember the diary you’ve been keeping is your secret weapon. It lets you turn those rows of data into a clear, actionable plan.
Read the report with a fresh eye
Start by scanning the “high sensitivity” column. These are the items that triggered the strongest reaction in the lab. Jot them down next to the meals you recorded in the last two weeks. You might notice, for example, that every time you served a wet food containing hydrolysed fish protein, your cat’s coat looked dull the next day.
Next, look at the “moderate” and “low” sections. They’re not emergencies, but they give you clues about secondary triggers – maybe a preservative or a flavour enhancer that only shows up when combined with another ingredient.
Map triggers to your feeding routine
Grab your food diary and highlight any meals that contain the high‑sensitivity items. If you can’t spot a match straight away, check the ingredient list on the packaging – sometimes the culprit hides behind a fancy name like “palmitic acid” or “sodium caseinate”.
Now create a simple swap list. For each flagged ingredient, write down a cat‑friendly alternative you already have or can source easily. For instance, replace tuna treats (hydrolysed fish) with plain chicken pâté, or swap a grain‑free wet food that uses a mystery flavour enhancer for a basic chicken broth recipe.
Trial period: the 7‑day swap
Set a short‑term trial of about seven days. During this window, feed only the new, safe foods and keep the diary active. Note any changes in itching, stool consistency, energy levels, or even subtle things like how often your cat brushes against you.
Tip: If you notice improvement within a few days, great – you’ve likely hit the main trigger. If symptoms linger, you may need to address a secondary ingredient from the moderate list.
When to bring the vet back into the loop
Even with a thorough swap, some cats need a professional’s eye. If after two weeks you still see flare‑ups, or if new symptoms appear (like vomiting or weight loss), it’s time to share the full report with your vet. They can verify nutritional balance, suggest supplemental nutrients, or recommend a follow‑up test.
Our experience shows that owners who involve their vet early avoid nutrient gaps and get personalised diet plans that keep their felines thriving.
Putting it all together – a quick‑reference table
| Result Category | Action Step | When to Involve Vet |
|---|---|---|
| High sensitivity | Eliminate immediately; replace with vetted alternative. | If symptoms persist after 7‑10 days. |
| Moderate sensitivity | Consider gradual removal; monitor for delayed reactions. | If secondary flare‑ups occur or diet becomes unbalanced. |
| Low sensitivity | Keep as occasional treat; watch for cumulative effects. | Only if overall health declines despite other changes. |
Finally, keep the momentum going. Update your diary with each new ingredient you try, and revisit the report every few months – cats can develop new sensitivities as they age.
Need a deeper dive into how much a test costs and what you get for the price? Check out our guide on understanding the cost of a cat food intolerance test. It breaks down the value you’ll receive and helps you budget for a smoother, healthier feeding journey.
Step 5: Adjusting Your Cat’s Diet Based on Findings
So the lab results are in – a colourful list of ingredients your cat reacts to, split into high, moderate and low sensitivity. It can feel a bit like decoding a secret code, but remember you already have a diary that shows when the itch, the rumble or the hair loss showed up. Pairing those two pieces of evidence is where the magic starts.
Review Your Report with Fresh Eyes
Take a quiet moment, maybe with a cuppa, and skim the “high‑sensitivity” column first. Those are the ingredients that triggered the strongest reaction in the fur analysis. Jot them down next to the meals you recorded in the past two weeks. You might spot a pattern you hadn’t seen before – for example, every time you served a wet food containing hydrolysed fish protein, your cat’s coat looked dull the next day.
Next, glance at the moderate and low sections. They’re not emergencies, but they can explain those nagging flare‑ups that happen only after a treat or a new litter brand.
Prioritise High‑Sensitivity Triggers
High‑sensitivity items are the first ones to eliminate. If the report flags “hydrolysed fish protein”, start by swapping any tuna treats, fish‑flavoured pâtés or canned foods that list that term. Look at the ingredient list on the back of the bag – sometimes the culprit hides behind a fancy name like “palmitic acid” or “sodium caseinate”.
Don’t panic if the list feels long. Most cats react to a handful of common additives, such as certain flavour enhancers or preservatives. Focus on the ones you actually feed right now; anything you don’t use can stay on the list for future reference.
Create a Simple Swap Plan
Write a quick table: “Ingredient → Replacement”. For hydrolysed fish, try plain boiled chicken or a basic turkey broth recipe. For a preservative like potassium sorbate, look for a fresh‑frozen meat option with no additives. Keep the replacements simple – you don’t need a gourmet menu, just a safe, balanced alternative.
When you make a swap, give the new food a 7‑day trial. During that week, keep logging any changes in itching, stool quality, energy levels or even how often your cat rubs against you. Small wins – a calmer coat after three days – are a huge confidence boost.
Monitor, Tweak, and Record
After the first week, review your diary. If symptoms have faded, you’ve probably hit the main trigger. If a few issues linger, it might be a moderate ingredient that needs a gradual phase‑out. In that case, repeat the 7‑day swap with the next suspect.
Remember to stay flexible. Cats can develop new sensitivities as they age, so revisit the report every few months and adjust the diet accordingly. Updating the diary each time you try a new treat or change a litter brand will make future rounds of testing much smoother.
When to Call the Vet Again
If, after two weeks of removing all high‑sensitivity items, you still see flare‑ups, or if new symptoms appear – vomiting, weight loss, or a sudden drop in activity – it’s time to bring the full report back to your vet. They can double‑check that the diet remains nutritionally balanced, suggest supplements if needed, or recommend a follow‑up test.
Our experience shows that owners who involve their vet early avoid nutrient gaps and end up with a personalised plan that keeps their felines thriving. It’s not about replacing the vet, it’s about giving them a solid data set to work from.
Need a deeper dive into the numbers behind the test? You might want to understand the cost of a cat food intolerance test – the guide breaks down what you’re paying for and why it’s worth the investment.
Finally, celebrate the small victories. Maybe your cat stopped scratching the sofa, or the litter looks cleaner. Those moments confirm you’re on the right track and keep the momentum going.
Adjusting a cat’s diet after a home test is a bit like solving a puzzle – you’ve got the pieces, you just need to fit them together patiently. Keep the diary, trust the lab results, and don’t hesitate to loop in your vet when needed. Your cat’s comfort is worth the effort.
FAQ
What is a home test for cat food intolerance uk and how does it work?
A home test for cat food intolerance uk lets you collect a few strands of your cat’s fur, send them to a UK‑accredited lab, and receive a personalised report that flags foods or environmental items the cat may react to. The process is simple: trim 4‑5 clean hairs, place them in the provided tube, post it using the prepaid envelope, and wait 48‑72 hours for results. The report breaks down sensitivities by percentage, giving you a clear starting point for diet tweaks.
How accurate are the results from a home cat food intolerance test?
While no at‑home test can replace a full veterinary work‑up, the labs we partner with are UKAS‑accredited and follow validated immunoassay methods. In practice, owners see a strong correlation between high‑confidence (>85 %) flags and observed symptoms such as itching or loose stools. To boost reliability, combine the lab data with the food diary you’ve been keeping – the two together give a much clearer picture than either alone.
What should I do after I receive a high‑confidence trigger?
When a result shows a red‑flag – say 90 % reaction to salmon – start by removing every product that contains that ingredient, including treats and occasional nibble‑bites. Keep logging any changes in your diary for at least two weeks; note improvements in coat shine, reduced scratching, or steadier stools. If the cat improves, you’ve likely hit the main culprit. If symptoms persist, move on to the next moderate‑confidence item or ask your vet for further guidance.
Can environmental factors like litter show up in the test?
Yes – the panels we use cover more than just food proteins. Items such as litter dust, cleaning sprays, or even certain grasses can trigger a reaction, and they’ll appear with a percentage score just like any ingredient. If you get a moderate flag for “litter dust,” try switching to a low‑dust, silica‑free brand and watch the diary for reduced paw swelling or less scratching. It’s a handy reminder that not every trigger lives in the bowl.
How long does it take to see improvements after changing the diet?
Most owners notice a difference within one to two weeks once the offending ingredient is fully removed. Skin itching often calms first, while digestive signs like softer stools can take a bit longer – sometimes up to three weeks for the gut flora to stabilise. Keep the diary active during this period; a steady trend of fewer incidents is a good sign that the test‑guided changes are working.
Do I need a vet’s help after the home test?
While the home test gives you a solid data set, it isn’t a substitute for professional veterinary care. Bring the lab report and your diary to the vet – most will use the information to design a balanced elimination diet or to rule out deeper issues like infections or allergies that need medication. If you’re unsure which ingredient to swap first, your vet can help prioritise the changes safely.
Is the home test safe for kittens and senior cats?
Yes – the sample collection is non‑invasive and works for cats of any age, as long as the fur is clean and free from grooming products. For kittens, we recommend using a soft comb to avoid pulling delicate whiskers. Seniors may have slower skin turnover, so a few extra strands can improve accuracy. In both cases, pair the results with a vet‑approved diet transition plan to keep nutrition balanced.
Conclusion
You’ve walked through spotting the signs, keeping a diary, picking a kit, sending the fur and making sense of the results. By now you probably feel a mix of relief – the mystery is finally out – and a bit of nervous excitement about changing your cat’s diet.
So, what’s the next move? Grab the high‑confidence trigger the home test for cat food intolerance uk highlighted, swap it out for a novel protein, and keep noting any shifts in itching or stool. A fortnight of steady improvement is usually enough to confirm you’ve hit the right note.
Key takeaways
- Record everything – food, treats, litter, even cleaning products – because patterns are your strongest clue.
- Choose a UKAS‑accredited kit; the faster the turnaround, the sooner you can act.
- Focus on one or two high‑confidence items at a time; too many changes at once muddle the data.
- Bring the lab report and your diary to the vet for a balanced, nutritionally sound plan.
Remember, the test is a guide, not a diagnosis. Your vet’s expertise combined with the clear data from the home test will help you build a diet that keeps your cat comfortable and thriving.
Ready to give your feline the relief they deserve? A quick click on the kit page and a few strands of fur could be the turning point you’ve been waiting for.