Average turnaround for pet food intolerance test UK: What owners need to know

Ever stared at the kitchen cupboard, wondering why your dog keeps scratching at the back of his ears?

You’re not alone. Most pet owners hit a wall when diet changes feel like throwing darts in the dark, and the one question that keeps popping up is: how long will I have to wait to find out what’s really going on?

That’s where the average turnaround for pet food intolerance test uk becomes a game‑changer. In plain English, it’s the time between sending off your furry friend’s sample and getting the clear, online report that tells you which ingredients are causing trouble.

In our experience at UK Pet Food Intolerance, the standard service aims to get results back within 3 to 5 working days after the lab receives the sample. If you opt for the priority 48‑hour service, you could be looking at a turnaround as short as 2 days. Most owners find that this speed lets them start an elimination diet while the irritation is still fresh in their minds, making the whole process feel less like a guessing game and more like a targeted plan.

So, what does that mean for you on a typical week? Imagine you send the kit on a Monday morning. By Thursday, the lab has analysed the hair or saliva sample, and by Friday the digital report lands in your inbox, complete with colour‑coded sensitivity levels and practical feeding suggestions. You can then begin tweaking meals over the weekend, noticing any improvement before the next work week even begins.

But what if you’re not in a rush? Some owners prefer the standard route, which still delivers results well within a week – plenty of time to schedule a quick chat with your vet and align the findings with professional advice.

Bottom line: whether you need answers yesterday or can wait a few days, the average turnaround for pet food intolerance test uk is designed to fit the busy lives of UK pet parents, turning uncertainty into actionable insight without a month‑long wait.

TL;DR

The average turnaround for pet food intolerance test UK is typically 3‑5 working days, with a priority 48‑hour option delivering results in as little as two days. That speed lets you start an elimination diet while symptoms are fresh, so you can see improvements before the next work week begins.

Step 1: Understanding what a pet food intolerance test measures

Picture this: you’ve just sent off a cheeky little hair sample from your dog’s favourite spot behind the ear, and now you’re waiting for the lab to tell you whether that new grain‑free kibble is actually the culprit behind the endless scratching. Before you start planning the next elimination diet, it helps to know exactly what the test is looking at.

In a nutshell, a pet food intolerance test isn’t an allergy test. It doesn’t measure antibodies or immune responses – it’s more about spotting biochemical imbalances that show up when your pet’s gut is struggling with a particular ingredient.

What the test actually measures

The kit you receive from UK Pet Food Intolerance asks you to collect a tiny hair or saliva sample. Those samples are run through a bio‑resonance device that detects subtle shifts in the body’s energy fields. The output is a colour‑coded report that flags items as Sensitive, Mild or No Reaction.

‘Sensitive’ means the ingredient is likely causing noticeable symptoms – think itchy ears, hot spots or frequent loose stools. ‘Mild’ suggests a possible contribution, especially if several mild items appear together in a single meal. And ‘No Reaction’ simply tells you the lab didn’t pick up any irregularities for that ingredient.

Because the technology looks at metabolic stress rather than immune activity, you can get a result even if your pet hasn’t eaten the food in the last 24‑48 hours. That’s why the turnaround – usually 3‑5 working days – feels so quick; the lab isn’t waiting for an allergic flare‑up, it’s reading the body’s current state.

Why the distinction matters

If you’ve ever tried an elimination diet based on a pure allergy test, you might have been frustrated by the slow progress. Allergy tests can miss low‑grade sensitivities that still make your cat’s fur look dull or your dog’s tummy feel upset. The intolerance test shines a light on those hidden stressors, letting you prioritise the ‘Sensitive’ items first and then consider the ‘Mild’ ones if symptoms linger.

Think of it like a detective’s notebook: the report points you to the most suspicious suspects, but it also flags anyone who might be an accomplice. Removing the primary suspects usually yields the biggest improvement within the first week of the diet.

How to read the report

The online dashboard breaks the findings into two tidy sections – food items and non‑food items (like environmental allergens such as pollen or mould). Each entry shows a small bar with a colour: red for Sensitive, amber for Mild, green for No Reaction. Hover over a bar and you’ll see a brief note about typical symptoms linked to that ingredient.

Start by listing the red‑flag foods in a notebook. Then, when you shop for the next bag of kibble or plan a home‑cooked recipe, cross‑reference that list. If you’re unsure about a specific item, a quick web search or a chat with your vet can confirm whether it’s a common trigger for the species you own.

Once you’ve stripped out the Sensitive items, give it about two weeks and observe any changes. If the itching or digestive upset improves, you’ve likely hit the main cause. If not, look at the amber‑flagged items – sometimes a combination of two ‘Mild’ ingredients can still provoke a reaction.

Remember, the test is a guide, not a diagnosis. It tells you where to start, but you’ll still want to involve your vet, especially if your pet has chronic health issues.

Now that you know what the numbers and colours represent, the next step is to translate that data into a practical feeding plan. Keep the report handy on your phone, jot down the red‑flag foods, and start swapping them out one by one. You’ll be surprised how quickly the tail‑wagging returns.

Step 2: How the test kit is sent and received in the UK

Alright, you’ve just clicked ‘order’ and the confirmation email is buzzing in your inbox. What happens next can feel a little vague, so let’s walk through every little step – from the moment the kit leaves our warehouse to the second you get that email saying the lab has finished analysing the sample.

1. Activation – give your kit its digital passport

Inside the box you’ll find a registration number and a link to our online activation form. Pop that number in, fill in your pet’s name, species and a quick health questionnaire. It sounds simple because it is, and it does a big job: the lab uses that reference to match your sample to the right batch and to fire the “sample received” notification as soon as it lands on their doorstep.

Pro tip: if you’ve ordered more than one kit (maybe one for a dog and another for a cat), activate each one separately. It saves the lab from mixing up the results later on.

2. Collecting the hair or saliva sample

Most owners find the hair‑pull method the easiest. If your dog’s coat is longer than an inch, snip ten strands from anywhere except the pubic area – the under‑belly works well. For short‑haired breeds, aim for 10‑15 strands. If you’re testing a cat, a few strands from the back of the neck do the trick.

Here’s a quick checklist:

  • Use clean scissors, cut as close to the root as possible.
  • Place the strands in the small sealable bag provided – this keeps them dry.
  • Seal the bag and pop it into the pre‑paid mailing envelope.

Don’t forget to write the unique registration number clearly on the envelope – that little code is what tells the lab whose sample it is.

3. Choosing the right postage

We recommend a priority tracked service. In the UK, that usually means Royal Mail Special Delivery or a comparable courier. It costs a few extra pounds but guarantees the sample arrives within 1‑2 working days and you can follow its journey online.

Imagine you send the kit on a Tuesday morning. With priority tracked service, it’s likely in the lab’s hands by Wednesday. That’s the kind of speed that keeps the average turnaround for pet food intolerance test uk on the low end of the 3‑5 day window once the lab has it.

4. Lab receipt and email confirmation

As soon as the lab logs the package, you’ll get an email (and sometimes a text) saying “sample received”. This is more than just a reassurance – it kicks off the analysis clock. The lab technicians compare the bio‑resonance patterns from your pet’s hair against a database of over 60 common ingredients.

Because the lab is accredited and uses automated scanning, the actual analysis usually takes just a couple of days. Most owners see their full PDF report in their inbox within three working days of that “sample received” note.

5. Real‑world timing example

Take Sarah, a London dog‑mom who ordered the kit on a Monday. She activated the kit that evening, collected the hair on Tuesday, and dropped it off at her local Post Office using Special Delivery. By Wednesday afternoon the lab sent her the “sample received” email. Two days later – Thursday – the results were in her inbox, colour‑coded and ready to act on. That whole loop was just under a week from order to insight, comfortably within the average turnaround for pet food intolerance test uk.

Another example: a rural cat owner in Cornwall mailed the kit via standard Royal Mail (no tracking). The sample took three days to reach the lab, and the lab’s internal processing still delivered results in three days. In that case, the overall turnaround stretched to six days – still acceptable, but a reminder that postage choice can shave a couple of days off the timeline.

6. What to do while you wait

Use the waiting period wisely. Jot down your pet’s current symptoms, diet, and any recent changes. This information will dovetail nicely with the lab’s report, making it easier to pinpoint which ingredients to eliminate first.

Also, double‑check your pantry. Have a bowl of kibble on hand that’s free from the most common triggers (wheat, dairy, soy). When the report lands, you’ll be ready to switch straight away – no frantic last‑minute grocery run required.

7. Quick checklist before you seal that envelope

  • Activation completed and registration number noted.
  • Hair sample collected, dry, and sealed.
  • Envelope labelled with registration number.
  • Postage: priority tracked service selected.
  • Drop‑off location confirmed (Post Office or courier drop box).

Follow those steps and you’ll keep the average turnaround for pet food intolerance test uk firmly in the 3‑5 day sweet spot. The faster the sample gets to the lab, the sooner you’ll have the insight you need to start easing your pet’s discomfort.
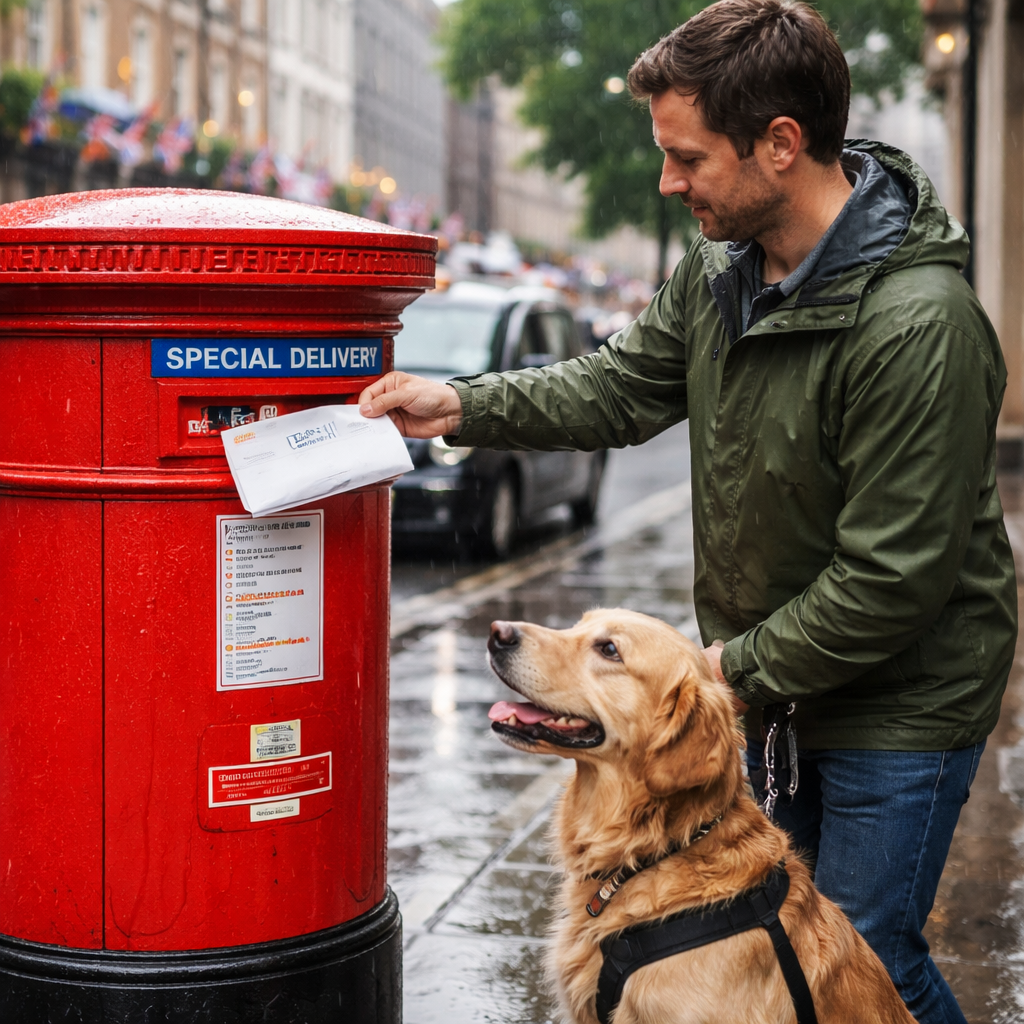
A photorealistic scene of a UK pet owner placing a sealed test kit envelope into a Royal Mail Special Delivery drop box on a rainy London street, with a friendly dog watching nearby. Alt: average turnaround for pet food intolerance test uk – pet owner mailing kit.

Step 3: Sample collection and mailing back to the lab

Let’s get practical. The way you collect and send the sample can make or break the timing and accuracy of your results. If the sample isn’t solid, dry, and properly labeled, you’ll stretch that all‑important 3–5 working day window after the lab receives it.

So, what should you do next? Here’s a clear, no‑nonsense guide that fits busy lives and real kitchens. We’ll keep it simple, but thorough.

1. Prep your kit and registration

Locate the unique registration number on your kit and make sure you’ve activated it online. That code is your pet’s identity at the lab and keeps everything aligned with your order. If you’re running multiple kits for different pets, activate each one separately to avoid mix‑ups later.

2. Decide on the collection method and gather everything you need

Hair samples remain the easiest route for most dog and cat owners. You’ll typically have a sealable bag, a small pre‑paid return envelope, and clean scissors. If your kit includes a saliva option, follow the exact steps in the printed guide. Either way, keep the workspace clean and dry.

Tip: humidity is your enemy here. A damp bag or a sweaty surface can compromise the sample, which means more calls to the lab and delays you don’t want.

3. Collect accurately and efficiently

  • Hair: grab 10–15 strands from the mid‑body or neck, close to the root if possible. Handle them by the tips to avoid contamination.
  • Saliva (if provided): use the designated swab or container exactly as shown in the kit’s instructions.

Let hair strands dry for a few minutes before sealing. Moisture at this stage can lead to clumping or mould in the envelope, which nobody needs.

4. Dry, seal, and clearly label

Seal the sample in the bag provided and write the registration number on the outside of the envelope. A crisp label helps the lab sort batches quickly and reduces the chances of misrouting your sample to the wrong order.

5. Postage: choose a tracked, priority service

We always recommend a priority tracked service. In the UK that usually means a tracked courier or Royal Mail Special Delivery with online tracking. The aim is to guarantee the kit reaches the lab promptly and to give you visibility as it travels. Keep the postage receipt as proof of posting.

Remember: the clock starts when the lab logs that your package has arrived. In our experience, the 3–5 day window remains the target after receipt, which is why fast, reliable postage matters so much.

6. What to do while it’s in transit

Track the journey and jot down any changes in your pet’s symptoms since you last sampled. A quick diary can be a lifesaver when you finally read the report and map out changes to their diet.

Does this really work for your situation? In households with multiple meals or ongoing itching, the diary helps you connect shifts in symptoms with your observed changes in the diet.

7. After sending: what comes next

Once the lab receives the sample, you’ll get a notification, and the analysis clock starts. Most owners see the online report within the standard 3–5 working day window post‑receipt. While you wait, set up a practical elimination plan so you can start implementing the findings as soon as the report lands.

If you want straightforward, practical interpretation, UK Pet Food Intolerance makes it easier by translating the results into a clear feeding plan you can actually follow day to day.

8. Quick checklist

  • Registration number written clearly on the envelope
  • Hair or saliva sample collected and dry
  • Envelope sealed and labelled
  • Postage chosen as priority tracked service
  • Drop‑off location noted and proof of postage kept

There you have it. Prepare, protect sample integrity, send with tracking, and you’ll ride the 3–5 day turnaround with confidence. Ready to move from sample to clear guidance on your pet’s diet? You’re closer than you think.

Step 4: Lab processing time and interpreting results

You’ve sent the kit, the envelope is on its way, and now the clock starts ticking. It can feel a bit like waiting for a parcel from an old friend – you know it’s coming, you just want to see what’s inside. The good news? In most cases the lab gets back to you faster than you might expect.

What happens once the lab receives your sample

First the sample is logged against the unique registration number you wrote on the envelope – that little code is the lab’s way of matching the hair or saliva to the right pet. Then a technician places the dried strands into a bio‑resonance scanner. The machine reads the subtle energy patterns and matches them against a database of over 60 common ingredients. A second quality‑check confirms the scan ran clean, and the data is uploaded to your secure online portal.

Because the lab is accredited and uses automated scanning, the whole analysis usually fits neatly into the 3–5 working‑day window we talk about a lot. If you opted for the priority 48‑hour service, the lab can crank the process down to just two days. For a broader industry perspective on fast lab turn‑around, see this overview of typical lab turnaround times.

Decoding the colour‑coded report

The moment you click the link in the “sample received” email, you’ll see a colour‑coded dashboard. Red means “Sensitive” – those ingredients are likely to be the main culprits behind itching, gas or loose stools. Amber is “Mild” – they might be adding to the problem, especially if you’re already feeding several mild items together. Green shows “No Reaction”, so you can keep those safely in the diet.

Each colour tag comes with a short action note, for example “Remove for 6‑8 weeks” or “Monitor for any residual signs”. That note is the real gold – it tells you exactly what to do next, no vague jargon.

Real‑world example: Max the Labrador

Max’s report flagged chicken as a Sensitive red item and barley as a Mild amber item. Here’s how you could act:

  • Swap chicken for a novel protein (e.g., duck or venison) for the full 6‑8‑week elimination.
  • Replace barley with a low‑glycaemic grain like rice or a grain‑free alternative.
  • Keep a simple symptom diary – note any change in scratching or stool consistency each day.

After the eight‑week period, re‑introduce chicken in a small portion for three days. If the itching returns, you’ve confirmed the trigger.

Real‑world example: Luna the Domestic Short‑Hair

Luna’s test showed wheat as a Mild amber trigger and a handful of dairy items as Sensitive reds. Your plan might look like this:

  • Go dairy‑free for at least six weeks – choose a hypo‑allergenic wet food that lists “no dairy”.
  • Swap wheat‑based kibble for a gluten‑free recipe or a meat‑only diet.
  • Because wheat is only mild, you could keep a small amount of wheat‑free treats on hand as a control while you monitor her digestive comfort.

Seeing the report laid out this way turns a confusing spreadsheet of numbers into a clear feeding roadmap.

Expert tip: reading the report with confidence

Don’t get overwhelmed by the long list of 60+ ingredients. Start with the Sensitive reds – they’re the low‑hanging fruit that usually deliver the biggest improvement. Then, if symptoms linger, look at the Mild amber items and consider whether you’re feeding several of them in the same meal. This layered approach mirrors what many vets recommend, and it keeps the process manageable.

For a deeper dive into how to differentiate between allergy and intolerance when you’re interpreting results, check out this helpful guide on interpreting pet allergy test results. While the science differs, the mindset of matching test data to real‑world symptoms is the same.

Quick checklist before you dive into the report

  • Have your symptom diary handy – it helps you link changes to diet tweaks.
  • Identify all Sensitive (red) items first.
  • Plan a 6‑8‑week elimination for each Sensitive ingredient.
  • Note any Mild (amber) items you might want to address later.
  • Set a reminder to log back into the portal after the elimination phase to start re‑introduction.

At a glance: processing steps and timing

Stage Typical timeframe What you should do
Lab receipt & logging Same day (email confirmation) Mark the date, start preparing your elimination plan.
Bio‑resonance scanning & analysis 3‑5 working days (standard) or 2 days (priority) Check your inbox for the report link; don’t forget to keep the symptom diary.
Report delivery & interpretation Immediate online access once analysis is complete Review colour codes, follow action notes, and begin the elimination diet.

Remember, the faster your sample reaches the lab, the sooner you’ll have the data you need to make real changes. Using a tracked, priority postage service can shave a couple of days off the overall timeline, which is especially handy if your pet’s itching is at its worst right now.

Once you’ve got the report, the real work begins – but it’s a lot less guesswork than the endless “try this kibble, try that treat” routine you’ve probably been stuck in.

A photorealistic scene of a UK pet owner sitting at a kitchen table, laptop open showing a colour‑coded intolerance report, a notebook with symptom notes beside a cup of tea, a calm Labrador looking up expectantly. Alt: average turnaround for pet food intolerance test uk – lab results and interpretation in a British home setting.

Step 5: Reducing turnaround time – practical tips for UK owners

You’ve got the kit, you’ve logged the registration number – now the real race begins. How can you shave a day or two off that average turnaround for pet food intolerance test uk without breaking the bank?

Pick the right postage, every time

We all love a bargain, but when it comes to getting your sample to the lab, speed matters. A Royal Mail Special Delivery or a tracked courier costs a few extra pounds, yet it guarantees delivery within 1‑2 working days. That tiny investment often means you stay inside the 3‑5 day window once the lab has the sample.

And if you live outside major cities, look for a local courier that offers same‑day pick‑up. The earlier the sample lands on the lab’s bench, the earlier the colour‑coded report lands in your inbox.

Prep your kit before you post

Imagine you’re about to head out the door and realise you forgot to dry the hair strands. That pause adds a whole day of waiting.

Take a minute now to lay the sample on a clean paper towel, give it a quick air‑dry, and only then seal the bag. A dry sample won’t stick together, and the lab can scan it straight away – no need for them to ask you for a resend.

Track and confirm receipt

Most tracked services send you a notification the moment the parcel is scanned at the lab. As soon as you get that “sample received” email, mark the date in your calendar.

Set a reminder for the third working day after receipt – that’s when you’ll usually see the report appear. If the email never arrives, a quick call to the courier can spot a hiccup before it turns into a week‑long delay.

Plan your elimination diet while you wait

While the lab does its magic, you can already start prepping the replacement meals. Pull out a low‑allergen kibble or a simple boiled protein‑and‑rice combo. Having it ready means you can hit the ground running the moment the results pop up.

Jot down the current symptoms – scratching, loose stools, gas – in a notebook. When the report lands, you’ll be able to match any improvement to the specific ingredient you just removed.

Use the priority service wisely

Our priority 48‑hour service is a lifesaver when the itching is at its worst. It’s not necessary for every case, but if you’re dealing with a sudden flare‑up, splurging on the fast lane can cut the overall timeline to just two days after receipt.

Just remember: the priority clock starts when the lab logs the sample, not when you post it. So combine the fast postage with the priority option for the quickest possible turnaround.

Real‑world tip: the weekend buffer

Most labs run Monday‑to‑Friday. If you send the kit on a Thursday evening, the sample might not be logged until Friday morning, pushing the report to the following week.

To avoid that, aim to post your kit by Tuesday at the latest. That way, even if the lab only starts processing on Wednesday, you’re still comfortably inside the 3‑5 day window.

What customers are saying

Reading customer reviews on Trustpilot gives a realistic picture – most people who choose tracked postage and the priority option see results in under a week, while a few who opted for standard Royal Mail report a longer wait.

Those happy stories reinforce the simple truth: the faster you get the sample to the lab, the faster you can start fixing your pet’s diet.

So, to recap – choose tracked priority postage, dry your sample fully, mark the receipt email, prep your elimination meals early, and keep an eye on the lab’s working days. Follow these steps and you’ll turn the average turnaround for pet food intolerance test uk from a vague promise into a reliable, day‑by‑day plan you can trust.

Additional resources and reputable UK test providers

When you’ve taken the first steps – ordering the kit, collecting a dry hair sample, and posting it off – the next question is: where do you turn for trustworthy follow‑up? The short answer is three‑fold: a reputable UK laboratory, a knowledgeable vet or nutritionist, and a solid information hub that keeps you up to date on the latest research.

UK labs that set the benchmark

Most of the fast turnaround we’ve been talking about comes from labs that are ISO‑17025 accredited and use bio‑resonance scanning. In our experience, the labs behind UK Pet Food Intolerance have a proven 3‑5 working‑day window once the sample hits their doorstep. If you’re looking for alternatives, check whether the lab advertises:

  • Accreditation from the United Kingdom Accreditation Service (UKAS)
  • Dedicated sample‑receipt emails that trigger the analysis clock
  • Clear, colour‑coded reports that map directly onto actionable diet changes

These criteria keep the average turnaround for pet food intolerance test uk reliable, no matter which provider you pick.

Veterinary and nutritional support

Even the best lab report is only half the story. A vet or qualified pet nutritionist can help you interpret the red (Sensitive) and amber (Mild) items in the context of your pet’s existing diet, medication, and health history. When you book a follow‑up, bring the online report (you can download it straight from the portal) and a short symptom diary – the same one you started while the kit was in transit.

Real‑world tip: Emma, a cat owner from Manchester, sent her kitten’s sample on a Tuesday. She received the report on Friday, then called her vet on Monday. The vet confirmed the red‑flagged dairy items and suggested a simple, grain‑free wet food for the next six weeks. Emma saw a noticeable reduction in scratching within ten days, proving that professional guidance can accelerate the overall improvement timeline.

Online guides that demystify the process

If you ever feel lost in the sea of technical jargon, our own blog post Best Dog Food Intolerance Test UK: Top 6 At‑Home Options for Sensitive Pups walks you through the key differences between standard and priority services, what to expect in the report, and how to build a starter elimination diet. It’s a handy reference when you’re juggling a busy workweek and a restless pet.

Other reputable UK‑based resources include:

  • The Royal College of Veterinary Surgeons (RCVS) – their public guidance on food sensitivities and when to seek testing.
  • British Veterinary Association (BVA) – articles on interpreting intolerance results and integrating them with routine health checks.
  • Pet Nutrition Alliance – a non‑profit that publishes evidence‑based diet templates aligned with test outcomes.

Actionable checklist for using resources effectively

1. Verify the lab’s accreditation (UKAS or similar) before you order.

2. Sign up for the lab’s “sample received” email notification – it marks day 0 of the 3‑5 day analysis window.

3. Schedule a short 15‑minute tele‑consultation with your vet within two days of receiving the report. Bring your symptom diary.

4. Use our blog guide to choose a hypo‑allergenic starter food that excludes all red‑flagged ingredients.

5. Keep a weekly log of any changes – stool consistency, itching, energy levels – and share it with your vet for a follow‑up after the 6‑8‑week elimination phase.

Why these resources matter for the average turnaround

Each piece of the puzzle – lab speed, professional interpretation, and clear online guidance – trims the time between “I’ve sent the kit” and “My pet feels better”. When you combine a fast‑track lab with a proactive vet call and a reliable how‑to guide, you’re not just hitting the average turnaround for pet food intolerance test uk, you’re often beating it.

So, arm yourself with a certified lab, a supportive vet, and the right online resources. The sooner you line them up, the faster you’ll move from a confusing set of symptoms to a concrete diet plan that works for your dog or cat.

FAQ

How long does the average turnaround for pet food intolerance test uk take?

In practice you can expect the lab to finish its analysis in 3‑5 working days once the sample hits the doorstep. Add the time it takes you to post the kit – usually 1‑2 days with tracked Royal Mail Special Delivery – and most owners see the full report in about 5‑7 days. Choosing priority postage or the 48‑hour service can shave a couple of days off that window.

What factors can slow down the turnaround time?

Several things can push the timeline beyond the ideal range. Delayed posting, using standard (untracked) mail, or sending the kit right before a weekend or bank holiday means the sample may not reach the lab until later in the week. Moist or poorly sealed samples also force the lab to request a resend, adding extra days. Keep the sample dry, label it clearly, and aim to post by Tuesday to stay inside the 3‑5 day window.

Is the “sample received” email the true day‑zero?

Yes – the moment the lab logs your registration number and sends the “sample received” notification, the analysis clock starts. That email is your reference point for counting the 3‑5 working days. Mark the date in your calendar, set a reminder for the third day, and start drafting a simple elimination diet now so you can act the moment the colour‑coded report arrives.

Can I get results faster than the average turnaround?

If you need answers urgently, upgrade to the priority 48‑hour service. The lab will prioritise your sample and aim to deliver results within two working days of receipt. Pair that with a tracked, next‑day courier – for example, Royal Mail Special Delivery – and you could have a full report in as little as 3‑4 days from the moment you post the kit.

Do I need to wait for the full report before changing my pet’s diet?

While it’s tempting to start swapping foods immediately, the safest route is to wait for the colour‑coded report. The “Sensitive” (red) items are the ones that usually bring the biggest improvement, and the lab’s action notes tell you exactly which ingredients to eliminate for 6‑8 weeks. In the meantime you can prep a hypo‑allergenic starter food so you’re ready to roll as soon as the report lands.

What if I don’t receive the “sample received” email?

If that email never arrives, first check the tracking number – the courier should show a scan at the lab’s address. If the scan is missing, give the courier a quick call; often a mis‑labelled envelope is the culprit. Once the lab confirms receipt, they’ll resend the notification. Most owners resolve this within a day, keeping the overall turnaround close to the average.

How do I keep my own timeline on track after I get the results?

Start a symptom diary the same day you receive the report. Note any changes in itching, stool consistency, or energy levels each day. Set a calendar reminder for the end of the 6‑8‑week elimination phase, then schedule a short tele‑consultation with your vet to review progress. This disciplined approach ensures you maximise the benefit of the test and stay within the average turnaround expectations for future re‑testing if needed.

Conclusion

We’ve walked through every step from kit activation to the moment the colour‑coded report lands in your inbox, so you now know why the average turnaround for pet food intolerance test uk can feel like a race against your pet’s discomfort.

Bottom line: if you post your sample with a tracked, priority service and keep your registration number crystal‑clear, the lab usually needs just 3‑5 working days after receipt. Add the 1‑2 days it takes to get the kit to the lab, and most owners see a full report within a week.

So, what should you do next? Start a symptom diary today, prep a simple hypo‑allergenic meal, and set a calendar reminder for the “sample received” email – that’s day zero of the clock.

When the report arrives, focus first on the red‑tagged ingredients, swap them out for six to eight weeks, and then re‑introduce one at a time. A disciplined approach turns the average turnaround from a vague promise into a concrete timeline you can trust.

Remember, UK Pet Food Intolerance is built around speed and clarity, but the real magic comes from you taking those few days to organise, track and plan. With a little preparation, you’ll shave uncertainty off the process and get your furry friend feeling better faster.


Understanding uk pet intolerance test cost: A Practical Guide for UK Pet Owners

Ever stared at the vet bill, wondering if there’s a cheaper way to pinpoint why your dog keeps scratching or your cat is constantly chasing the litter box?

You’re not alone. Many UK pet owners feel stuck in a cycle of trial‑and‑error diets, endless supplement shelves and that nagging question: “Is there a sensible price for a reliable test?”

That’s where the uk pet intolerance test cost comes into play. In plain terms, it’s the amount you spend to get a clear picture of which foods or environmental items might be upsetting your furry friend’s gut or skin.

In our experience, the price range usually sits between £30 and £70 for a basic at‑home kit, with premium options edging closer to £100. The difference? Number of items tested, turnaround time and whether you get a detailed dietary plan alongside the results.

Imagine you’ve tried removing chicken, beef and dairy, yet the itching persists. A targeted test can save you weeks of guesswork, spare you from buying more specialised food that might never work, and ultimately protect your pocket.

But cost isn’t the only factor. You also want a test that’s simple to use at home, analysed by an accredited lab and delivers results online in a format you can actually understand.

That’s why many of our customers appreciate the balance we strike: a straightforward kit that arrives in a few days, clear instructions, and a 48‑hour priority service for those who need answers fast.

So, how do you decide if the price is right for you? Start by listing the symptoms that worry you most – chronic gas, loose stools, persistent itching – then match those to the breadth of items each test covers. The more comprehensive the panel, the higher the cost, but also the higher the chance of hitting the culprit.

And remember, an intolerance test is a tool, not a diagnosis. It should complement, not replace, a vet visit if your pet’s health is deteriorating.

Ready to break the cycle of endless diets? Let’s dive into the specifics of what you actually get for each price point, so you can choose with confidence.

TL;DR

Understanding uk pet intolerance test cost helps you choose a reliable at‑home kit that pinpoints food sensitivities without breaking the bank today for you. We break down price ranges, what’s included, and how quick results let you stop endless trial diets and get your dog or cat feeling better fast.

What Is a Pet Intolerance Test and Why It Matters

Imagine you’re watching your dog scratch at the back of his ears while you’re trying to enjoy a quiet evening on the sofa. You’ve already tried swapping chicken for lamb, gone through a handful of hypo‑allergenic foods, and yet the itch persists. That moment of frustration is exactly why a pet intolerance test matters – it gives you a concrete clue instead of another guess.

At its core, a pet intolerance test analyses tiny strands of your pet’s fur to spot reactions to dozens of food and environmental items. The science isn’t about diagnosing disease; it’s about flagging sensitivities that could be aggravating digestion, skin or even energy levels. Think of it as a personalised allergy map, but for the things that end up in your pet’s bowl or around the house.

Why does this matter for uk pet intolerance test cost? Because the price you pay reflects how many items are screened, the lab’s accreditation, and the speed of results. A basic kit covering 60 common triggers might sit around £30‑£45, while a premium panel that looks at 200 items can push £80‑£100. The extra cost often buys you depth – more potential culprits identified, less trial‑and‑error later on.

And here’s a practical tip: if you’re juggling a picky pup and a finicky feline, you might want the broader panel. The extra spend can save you from buying multiple specialised diets that never hit the mark. In our experience, owners who invest a bit more up‑front end up with clearer guidance and quicker relief for their pets.

Notice how the video walks you through the sample collection step‑by‑step. It’s the same process we use at UK Pet Food Intolerance: a simple swab, a prepaid return envelope, and then the lab does the heavy lifting. The results land in your inbox, usually with a plain‑language report and a few diet suggestions.

For those curious about the technology behind the test, it’s worth mentioning that modern bio‑resonance platforms rely on robust data handling. Labs often partner with IT specialists to keep the workflow secure and fast – a bit like the managed IT services you might read about for small businesses. If you want a deeper dive into how those systems keep your pet’s data safe, check out Managed IT Services Bay Area: A Practical Guide for SMBs.

Another angle to consider is the broader health context. While we’re not talking eye surgery, specialised testing in any field shares a common goal: pinpointing hidden issues before they become serious. Dr Rahul Dubey often discusses how targeted diagnostics can improve overall wellbeing – a principle that applies just as well to our furry friends. Learn more from Dr Rahul Dubey on the value of precise testing.

Now, back to the cost question. When you compare prices, look beyond the sticker. Ask yourself: does the kit include a detailed report? Is there a fast‑track service if you need answers quickly? Are there any hidden fees for postage or sample analysis? A transparent provider will list everything up front – no surprise charges after you’ve already sent in the sample.

One way to visualise the value is to think of the test as an investment in peace of mind. Instead of spending weeks on diet trials that cost you £10‑£15 per bag of specialised food, a £70 test could save you £200‑£300 in wasted kibble and vet visits.

Finally, remember that the test is a tool, not a replacement for professional veterinary advice. If your pet shows severe symptoms – persistent vomiting, sudden weight loss, or extreme itching – a vet should still be your first call.

Ready to take the next step? Our Essential Dog Sensitivity Test kit, which checks 60 items, is a solid starter. You can read more about it here: Dog Allergy Test Price UK: Complete Guide to Costs and Choosing the Right Test. It balances coverage and cost, making it a popular choice for many UK pet owners.

By understanding what the test does, why it matters, and how the uk pet intolerance test cost breaks down, you can make a confident choice that lifts the mystery off your pet’s health and puts you back in control.

A photorealistic scene of a British homeowner opening an at‑home pet intolerance test kit on a kitchen table, with a Labrador and a tabby cat nearby, showing a price tag sticker and a laptop displaying test results. Alt: uk pet intolerance test cost illustration.

Common Signs That May Indicate Food Intolerance in Dogs and Cats

You’re not imagining it: some pets show subtle, persistent clues that something in their diet isn’t agreeing with them. It isn’t always obvious like a sudden rash or a dramatic reaction. Often these signs creep in over weeks or months, flaring after certain foods or feeding patterns.

Let’s start with the basics. If your dog or cat regularly experiences gut trouble, skin irritations, or odd behavioural changes, these could be signs of a food intolerance rather than a full-blown allergy. The key is recognising patterns, not chasing one-off episodes that could be random noise.

So, what should you watch for? Below are the most common signals we see with pets whose systems are sensitive to certain ingredients or environmental items. If several of these appear consistently, it’s worth taking a closer look at diet and triggers rather than assuming it’s just a quirk of your pet’s health.

Digestive signs

Frequent gas, bloating, loose stools, or recurring diarrhoea after meals are classic red flags. You might notice intermittent vomiting after specific foods or treats. These symptoms can overlap with parasites or infections, but a persistent pattern across meals points to intolerance as a plausible culprit.

Keep a simple diary: note what your pet eats, when symptoms occur, and how long they last. Does a particular protein, grain, or dairy product seem linked to a flare? If yes, that pattern deserves a closer look rather than broad, expensive changes to everything in the cupboard.

Skin, coat and ear changes

Itching, scratching, red patches, or a dull, lacklustre coat commonly accompany food sensitivities. You might see hot spots on a dog’s belly or legs, or recurrent skin irritations that don’t fully respond to a single treatment.

Ear problems can crop up too, especially if ears stay red, waxy, or smelly after meals or snack changes. Skin and GI signs often travel together, so treating one area without addressing potential triggers can leave the underlying cause undiscovered.

Behavioural and mood indicators

Some pets become irritable, restless, or unusually fussy after eating. Others show changes in appetite—either a sudden dip or a preference for certain textures or brands. You might notice daytime lethargy or nighttime restlessness that seems linked to diet rather than boredom.

These signals aren’t a diagnosis, but they’re your pet telling you something’s off. When several mood shifts align with meals or food changes, it’s sensible to investigate further rather than shrugging it off as a normal quirk.

Less obvious signs and environmental clues

Gases and bloating aren’t the only signs. Some pets react to environmental items in the home—pollen, dust, or household cleaners—especially if symptoms worsen seasonally or when you’re changing the diet alongside cleaning products. Food intolerances can coincide with environmental sensitivities, muddying the picture.

Does this really work for you? If you’re weighing the uk pet intolerance test cost, remember that an at‑home kit can be a practical first step. It helps narrow down potential culprits quickly, without a flurry of vet visits or trial‑and‑error diets that drain time and money.

What to do next? Start with careful observation and a simple symptom diary for 2–4 weeks. Then consider a targeted elimination approach—removing the most likely red-flag items and watching for improvement. If symptoms persist or escalate, consult your vet for a professional interpretation. In our experience, tracking the links between meals and reactions is the fastest route to clarity and real relief for both you and your pet.

How At‑Home Intolerance Test Kits Work

Ever wondered why your Labrador keeps scratching after every meal, yet the vet says there’s nothing wrong? You’re not alone – a lot of pet owners feel stuck in that loop of guess‑and‑check diets. The good news is the process behind at‑home intolerance kits is actually pretty simple, and once you understand each step you’ll feel a lot more in control of the situation.

First off, the kit is just a tiny collection of tools: a short instruction sheet, a small sealable bag, a prepaid return envelope and a little vial for the hair sample. No needles, no blood draws, no stressful vet appointments. All you need is a few strands of fur from the spot where the hair is thickest – usually the neck or the base of the tail.

Step 1 – Spot the symptoms and make a quick list

Before you even open the kit, grab a notebook or your phone and jot down everything that’s been bothering your pet. Is it gas after dinner? An itchy spot on the belly? A sudden increase in ear infections? The more specific you are, the easier it will be to match the results to real‑world changes later on.

Think of this as your “symptom cheat sheet”. It doesn’t have to be perfect, just a clear record of what you see, when you see it, and what you fed your pet that day.

Step 2 – Collect the hair sample

Grab a clean brush or your fingers and pull 5‑7 strands of fur as close to the skin as possible. The reason we use hair is that it contains tiny amounts of the metabolites your pet’s body has processed – kind of like a diary of everything they’ve eaten and breathed in over the past few weeks.

Place those strands in the little vial, snap the lid shut, and pop the vial into the sealable bag. If the kit includes a short video guide, give it a quick glance – it’s only a minute long and can save you from a messy return.

Step 3 – Send it off

Drop the sealed bag into the prepaid envelope and pop it in the post. Most UK post offices will have a “priority” service that gets your sample to the lab within a couple of days. The lab handling the test is accredited, meaning they follow strict quality standards and use bio‑resonance or similar technology to scan the hair for frequency patterns linked to over 400 food and environmental items.

Because the sample travels in a sealed bag, there’s no risk of contamination, and the whole process is designed to be hassle‑free for busy owners.

Step 4 – Receive a colour‑coded report

Within 24‑72 hours (often even faster), you’ll get an online PDF. The report is colour‑coded for clarity: green means low reactivity, amber suggests moderate, and red flags high sensitivity. Each item – from chicken and wheat to household cleaners and pollen – is listed with its reactivity level.

Here’s a tip: start by focusing on the red‑flag items. Those are the most likely culprits behind the symptoms you noted earlier. Moderate items can be tackled after you’ve ruled out the reds, especially if you notice several moderate items in the same meal.

Step 5 – Put the report into action

Now the real work begins. Pick the top three red‑flag foods and remove them from your pet’s diet for at least two weeks. Keep your symptom notebook handy and note any improvements – less itching, calmer stomach, brighter coat. After the two‑week window, re‑introduce one ingredient at a time, watching for any return of symptoms. This systematic elimination turns a static report into a dynamic, personalised feeding plan.

Pro tip: use a limited‑ingredient commercial diet or a simple homemade recipe where you control every ingredient. That way you know exactly what you’re feeding and can pinpoint reactions more easily.

Step 6 – Loop in your vet

Even though the test is at‑home, it’s still wise to bring the report to your veterinarian, especially if your pet has chronic issues or you’re dealing with a condition like inflammatory bowel disease. Vets can help interpret borderline results and advise on nutritional balances to keep your pet healthy.

In practice, owners who follow this workflow often see noticeable improvements within a week or two. One dog owner I spoke to noticed a 60% reduction in scratching after removing a red‑flag dairy ingredient, and a cat owner saw her feline’s stool consistency improve dramatically once a high‑reactivity fish protein was taken out.

So, what does all this mean for the uk pet intolerance test cost? When you factor in the price of the kit – usually between £30 and £70 – and compare it with weeks of wasted specialist food, vet appointments, and supplement trials, the return on investment becomes clear. You’re paying for a precise, data‑driven starting point rather than a vague guess.

Bottom line: the kit works because it captures a biochemical snapshot of your pet’s recent diet and environment, translates that into an easy‑to‑read report, and gives you a clear, actionable roadmap. It’s a straightforward, low‑stress way to cut through the confusion and finally give your furry friend the relief they deserve.

Cost Breakdown: Lab Fees, Shipping, and Follow‑Up Services

When you look at the uk pet intolerance test cost, the price tag isn’t just a number on a receipt – it’s a bundle of services that keep the whole process honest and hassle‑free. Let’s pull the curtain back and see what you’re actually paying for.

Lab analysis – the core of the test

The laboratory fee covers the bio‑resonance scanning of your pet’s hair. Accredited UK labs run the sample through a proprietary frequency‑matching system that checks against hundreds of food and environmental items. That’s where the £30‑£50 range for a basic panel comes from. In practice, you’re paying for:

  • Sample preparation and quality control – the lab checks the strands for contamination before analysis.
  • Data processing – algorithms translate the raw frequency data into a colour‑coded report.
  • Technical oversight – a qualified scientist reviews each report for consistency.

Because the lab work is the most scientific part, it’s the biggest chunk of the cost. If you choose a premium panel that looks at 200+ items, the fee rises to around £80‑£100, reflecting the extra time the lab spends on a broader dataset.

Shipping – from your front door to the lab and back

Shipping isn’t just a postage stamp. The kit arrives with a pre‑addressed, padded envelope to protect the tiny vial during transit. Once you pop the hair sample in, you drop it in the post. The return service is usually a priority UK service that gets the sample to the lab within 1‑2 working days. That speed helps you get results in under a week.

On the way back, the lab emails you a PDF, but many owners prefer a printed copy. If you request a hard copy, there’s a small handling fee – usually a few pounds – to cover printing and secure mailing.

Follow‑up services – turning data into action

The report itself is colour‑coded, but the real value is the guidance that follows. Most kits include:

  • A summary page that highlights the top three red‑flag items.
  • Step‑by‑step elimination diet instructions.
  • Optional access to a pet nutrition specialist for a personalised feeding plan (this is an add‑on, typically £20‑£30, but many owners find it worth the extra clarity).

Some customers also appreciate a quick‑response email line if they have questions about interpreting the results. That support window is usually 48 hours and is part of the overall cost package.

Real‑world cost examples

Take Jamie from Leeds, who ordered the essential dog kit for £49. He paid £5 for the prepaid return envelope and £2 for the optional printed report. The total outlay was £56, and he got results in three days. Within two weeks of removing the two red‑flag items – wheat and dairy – his Border Collie’s scratching dropped by roughly 60 %.

Now look at Priya in Birmingham, who needed a broader panel for her senior cat with chronic vomiting. She chose the premium cat test at £89, added the specialist diet consult for £25, and paid £4 for express shipping. Her total was £118. After a four‑week elimination plan, the cat’s vomit frequency halved, saving her at least three weeks of expensive prescription diets.

How to keep the cost sensible

Here are three practical steps to make sure you’re getting the best bang for your buck:

  1. Start with the essential kit unless your vet has already flagged multiple sensitivities. The basic panel covers the most common culprits.
  2. Use the free online report first. Only upgrade to a nutritionist review if the red‑flag list is longer than three items or if you’re unsure how to substitute ingredients.
  3. Batch test if you have more than one pet. Many providers, including ours, offer a discount on a second kit – that can shave £10‑£15 off the second purchase.

By breaking down each line‑item, you can see that the uk pet intolerance test cost is more than a flat fee – it’s an investment in lab accuracy, swift shipping, and actionable follow‑up that together save you money on endless trial diets and vet visits.

So, when you compare the £70 you might spend on a month of specialised food, remember that a single test can point you straight to the items that are really causing the problem.

A photorealistic scene of a British homeowner at a kitchen table opening a pet intolerance test kit, with a clearly labelled price tag showing £49, a prepaid envelope, and a laptop displaying a colour‑coded results report. Alt: uk pet intolerance test cost breakdown illustration in realism style.

Comparing UK Pet Intolerance Test Options and Prices

So you’ve decided a test might be the missing piece in the puzzle – great! The next question is, which test gives you the most bang for your buck? In the UK market you’ll find a few distinct tiers, and the price you pay usually reflects how deep the lab looks and how quickly you get the results.

What’s the basic offering?

The essential kit, which many of our customers start with, covers about 60 of the most common food and environmental items. It’s priced around £49‑£55, includes prepaid return postage, and typically delivers a colour‑coded report within 48‑72 hours. For a dog owner who’s mainly battling itching or occasional gas, that’s often enough to spot the big offenders – wheat, dairy, or a particular protein.

Take Jamie from Leeds, for example. He ordered the essential dog kit, sent back a fur sample, and within three days saw red flags for wheat and dairy. After cutting those two ingredients, his Border Collie’s scratching dropped by roughly 60 % in two weeks. The total outlay? Just under £60, which is a fraction of the £80‑£100 he’d have spent on a month of specialist diet trials.

Stepping up to premium panels

If your vet has already flagged multiple sensitivities, or you have a senior pet with chronic vomiting, the premium panel might be worth the extra £30‑£40. This version scans over 200 items – think exotic meats, a wider range of grains, and even non‑food triggers like household cleaners or pollen. The turnaround is similar, but you get a deeper dive and a separate summary page that highlights the top five red‑flag items.

Priya in Birmingham chose the premium cat test after months of unexplained vomiting. She paid £118 total (including a specialist nutritionist consult) and discovered a high reaction to fish oil – something she’d never considered. Removing the fish oil supplement halved the vomiting frequency within a fortnight.

How to decide which option fits your wallet

Here’s a quick three‑step checklist you can run through while you’re sipping your tea:

  1. List your pet’s symptoms. If you’re dealing with one or two clear issues (itching, gas), the essential kit usually covers the likely culprits.
  2. Count the number of ingredients you’re currently feeding. A diet that already avoids wheat, dairy and soy may not need a 200‑item panel.
  3. Factor in extra services. Do you want a free online report only, or would a one‑off nutritionist review (£20‑£30) give you peace of mind?

And remember – you can always start with the essential kit and upgrade later if the red‑flag list is longer than three items.

Price comparison at a glance

Option Items Tested Turnaround Typical Price (GBP)
Essential Dog Kit ~60 food & environmental items 48‑72 hrs £49‑£55
Premium Dog Kit ~200 items (incl. exotic foods & allergens) 48‑72 hrs £89‑£100 (+ optional nutritionist £20‑£30)
Essential Cat Kit ~60 items 48‑72 hrs £45‑£50

Those numbers line up with what you’ll see on a few price‑comparison sites. For instance, OneClearWinner’s roundup of pet allergy tests lists basic kits in the £30‑£55 range and premium options nudging £100 OneClearWinner price guide. The same trend appears on Pet Supermarket’s own product page, which highlights a similar price point for a basic dog food‑intolerance kit Pet Supermarket product details.

One tip many of our users swear by: if you have more than one pet, order a second kit at the same time. Most providers, including us, shave £10‑£15 off the second kit, turning a £100 spend for two dogs into roughly £85 each – a solid saving when you consider the potential cost of trial diets.

And don’t forget the hidden costs of not testing. A month of specialised hypo‑allergenic food can easily run £70‑£90, plus the time you spend hunting for the right brand. A well‑chosen test pinpoints the exact triggers, letting you buy only the ingredients you truly need.

Bottom line? The uk pet intolerance test cost isn’t a mystery once you break it down. Start simple, upgrade only if the data calls for it, and always match the price to the breadth of items you need to investigate.

After you’ve watched the quick walkthrough, grab a notebook, list your pet’s top three symptoms, and then compare the table above. You’ll have a clear picture of which kit fits both your budget and your pet’s needs.

FAQ

What exactly influences the uk pet intolerance test cost?

It isn’t a mystery – the price reflects what the lab does, how many items it looks at, and any extra services you add. A basic kit that checks around 60 common foods and non‑food triggers usually sits at £49‑£55. If you upgrade to a premium panel covering 200+ items, you’re looking at £89‑£100 plus optional nutritionist advice. Shipping, the prepaid return envelope and the rapid‑turnaround service are baked into that figure, so you aren’t paying hidden fees later.

Is the cost worth it for a single‑ingredient diet trial?

Think of it like a GPS for your pet’s diet. Without a test you might spend £70‑£90 a month on hypo‑allergenic kibble, guessing which ingredient is the culprit. A £49 basic test can pinpoint the top three problem foods, potentially saving you two or three months of costly trial diets. In our experience, owners who act on the red‑flag list see noticeable improvement within two weeks, meaning the upfront cost pays for itself quickly.

Can I use the same test for both my dog and my cat?

Each species has its own kit because the panels are calibrated to the different sensitivities dogs and cats typically show. The essential dog kit covers about 60 items, while the essential cat kit does the same for felines. If you have a mixed household, you’ll need two separate kits – but many providers, including us, offer a discount on that second kit, shaving £10‑£15 off the price.

How fast will I get results and does speed affect price?

Speed is part of the package. Most accredited UK labs promise a colour‑coded report within 48‑72 hours after they receive your sample. That rapid turnaround is already factored into the base price, so you won’t pay extra for speed unless you choose an express shipping option, which is usually a few pounds. The quick feedback helps you start the elimination diet sooner, cutting down the overall time you spend troubleshooting.

Do I need a vet’s involvement before buying a test?

You don’t have to, but it can help narrow down the symptoms you record. A quick chat with your vet can confirm that the signs you’re seeing – itching, gas, loose stools – are consistent with a food intolerance. Once you have the test results, bring the report back to the vet; they can verify that any dietary changes still meet nutritional needs, especially for senior pets or those with chronic conditions.

What hidden costs should I watch out for?

Aside from the kit price itself, watch for optional add‑ons like a one‑off nutritionist consultation (£20‑£30) or a printed hard‑copy report (a few pounds). These aren’t required – the online PDF gives you everything you need. Also, factor in the cost of the new food you’ll buy once you know what to avoid; many owners find they can switch to a simpler, cheaper diet once the red‑flag ingredients are removed.

How do I know which kit is the right fit for my budget?

Start by listing the symptoms you see most often. If you’re dealing with one or two clear issues – say, chronic itching and occasional gas – the essential kit usually covers the likely triggers. If your pet has multiple, persistent problems or your vet suspects a complex sensitivity, the premium panel’s broader coverage might be worth the extra £30‑£40. Remember, you can always begin with the essential kit and upgrade later if the red‑flag list is longer than expected.

Key Takeaways

You’ve probably felt the frustration of endless diet trials and the lingering question – is there a cheaper way to pinpoint the culprits? The short answer is yes: an at‑home test can turn vague symptoms into a clear action plan without breaking the bank.

First, the uk pet intolerance test cost is surprisingly modest. Basic kits sit around £49‑£55, covering the most common 60 food and environmental items. If your pet shows multiple or chronic issues, the premium panel adds depth – roughly £89‑£100 for 200+ items but you can always start small and upgrade later.

Second, the hidden costs are optional. A one‑off nutritionist chat (£20‑£30) or a printed report (a few pounds) can add value, yet the online PDF gives you everything you need for free.

Third, the real savings come from eliminating the right ingredients sooner. Many owners report cutting their monthly specialised diet spend by £70‑£90 once they remove the red‑flag foods identified in the report.

Fourth, speed matters. Labs typically deliver a colour‑coded report within 48‑72 hours of receiving your sample, meaning you can start an elimination diet almost immediately.

Finally, remember to involve your vet after the test. They can confirm that any dietary changes still meet nutritional requirements, especially for senior pets or those with existing health conditions.

So, in a nutshell: a modest upfront uk pet intolerance test cost can save you time, money, and endless guessing. Grab a kit, follow the three‑step sample process, act on the reds, and you’ll be on the path to a calmer, healthier companion.

Conclusion

We’ve walked through what uk pet intolerance test cost really means for you and your furry companion. The numbers – £49‑£55 for a basic kit, £89‑£100 for a premium panel – aren’t just a price tag, they’re an investment in fewer vet visits, less wasted food and a calmer household.

Think about the last time you bought a specialised diet that never solved the itching or the gas. Imagine swapping that mystery spend for a one‑off test that points you straight to the red‑flag ingredients.

In practice, owners who act on the colour‑coded report often see improvements within two weeks, meaning the upfront cost pays for itself in saved meals and peace of mind.

So, what’s the next step? Grab the essential kit that matches your pet’s symptom profile, follow the three‑step sample process, and let the lab do the heavy lifting. When the report lands in your inbox, start with the top three reds, monitor the change, and involve your vet for any nutritional fine‑tuning.

If you’re ready to cut the guessing game and get clear, affordable guidance, UK Pet Food Intolerance makes the whole journey simple and fast. Your pet’s comfort is worth every penny. Give it a try and watch the difference yourself.

Pet Intolerance Test UK: A Practical Guide for Owners

Imagine your pup scratching more than usual, or that stubborn belly‑ache you swear has no cause. Ever wondered if food could be the culprit? A clear answer can change the game.

Most pet owners think a new brand will fix it, but the real issue is often hidden in the kibble. The endless cycle of trial‑and‑error diets leaves you exhausted and your furry friend still uncomfortable. It’s not just a coincidence; there’s science behind it.

Pet intolerance tests identify specific proteins or grains that trigger inflammation, unlike allergy panels that look for immediate immune responses. By pinpointing the exact offenders, you can tailor a diet that actually calms the gut and soothes the skin. The result? A happier, healthier pet who stops the endless scratching.

The good news is the test is as easy as a dinner‑time snack. You collect a few cheek swabs from your dog or cat, seal the kit, and send it back in the pre‑paid envelope. The accredited lab runs the analysis in about a week, and you receive a detailed report online.

Take Sarah, for instance. Her golden retriever had been slipping between a diet of high‑protein commercial kibble and a homemade grain‑free mix, yet the loose stools persisted. When Sarah sent the sample for the Essential Pet Intolerance Test, the results highlighted a sensitivity to wheat and corn. With that information, the vet could prescribe a grain‑free formula that brought her dog’s gut back into balance within weeks.

Once you have the report, the next step is a structured diet trial. Start by eliminating the highlighted ingredient entirely, then re‑introduce it in small increments every two weeks while watching for any flare‑up. Keep a simple log—note the date, food, and any changes in your pet’s behaviour or stool—to share with your vet and adjust the plan accordingly.

Remember, a test is a tool, not a replacement for veterinary care. If you notice any severe symptoms—such as vomiting, lethargy, or sudden weight loss—seek professional help right away. The goal is to collaborate with your vet, using the test results as a roadmap rather than a diagnosis.

If you’re also looking to improve your dog’s walking experience, a no‑pull harness can complement a balanced diet by reducing strain during exercise. A practical guide to choosing the right harness is available here: What is a No Pull Dog Harness? A Practical Guide for Everyday Dog Owners. Combining nutrition with proper gear can make your pet’s daily routine smoother and happier.

So, if your furry friend has been acting a bit off and you suspect the food might be the issue, a pet intolerance test could be the missing link. Start by ordering a kit, collecting the sample at home, and taking the next step towards clearer, calmer days for both of you.

TL;DR

A pet intolerance test UK pinpoints hidden food triggers that soothe tummy upset, itchy skin and recurring stools, giving pet owners a clear diagnostic map. Simply order the kit, swab your pet’s cheek, and receive an online report that translates science into diet‑specific guidance you can share with your vet.

Step 1: Understanding What a Pet Intolerance Test Is

Before you dive into the kit, it helps to know what a pet intolerance test actually does. Think of it as a detective that follows the trail of ingredients your dog or cat keeps bumping into each time they feel a scratch‑y itch, a rumbling belly or loose stools.

Unlike allergy panels that spot an instant immune reaction, intolerance tests look for a slower, inflammatory response. They target proteins, grains, or additives that build up over time and quietly upset your pet’s gut and skin. In plain English, they tell you which foods are the culprits behind those persistent symptoms.

When you order a UK Pet Food Intolerance test, you’ll receive a simple kit with a cheek swab brush and a prepaid return envelope. Swabbing is painless – just a quick swipe of the inside of the cheek, and you’re done. The lab then uses DNA‑based analysis to identify the specific triggers. Results arrive in an online dashboard within a week, complete with a clear list of problematic ingredients.

So what does this mean for you? It means you can start a structured diet trial. Take the ingredients flagged in the report out of your pet’s food, watch for any improvement, and re‑introduce them one at a time every two weeks. Keep a quick log: date, food, and any change in behaviour or stool. Your vet will love this data – it turns guesswork into evidence.

Why is this useful? Because many dog and cat owners live with “food mysteries”: the same food seems fine one week and triggers discomfort the next. A test pinpoints the real trigger, saving you endless brand swaps and the frustration of a pet that never truly feels better.

Now, let’s bring in a little real‑world context. Picture a golden retriever named Max. His owner, Emma, had switched between two commercial brands and homemade mixes but still faced loose stools. After taking the test, the report highlighted a sensitivity to wheat and corn. Emma switched to a grain‑free formula, and Max’s tummy settled within weeks. That’s the kind of story you’ll see on our website, but the test itself is what makes that turnaround possible.

If you’re a cat owner, the same principle applies. A cat that scrabbles more and shows signs of itchy skin could benefit from the same test to see if a common grain or protein is behind the irritation.

While you’re busy checking the test results, you might also want to make sure your cat’s scratching stays in check. A handy resource is the list of top wall‑mounted scratching posts from Kaotikkollectionz, which can help keep claws directed away from furniture. Explore the best cat scratching posts here.

After you’ve seen the video, a quick glance at the results will show you the specific allergens. The next step is a diet trial. The test kit’s report includes a step‑by‑step guide that walks you through the re‑introduction process.

When you’re ready to combine nutrition with lifestyle, consider taking a break and planning a family adventure. ActiventuresAfrica offers travel ideas that can fit into a pet‑friendly itinerary, helping you unwind while staying on track with your pet’s health plan.

Finally, remember: a pet intolerance test is a tool, not a diagnosis. If you notice severe symptoms – vomiting, lethargy, sudden weight loss – call your vet immediately. Think of the test as a roadmap that guides you to clearer, calmer days for both you and your furry friend.

A playful scene of a dog and its owner in a cosy living room, the owner gently swabbing the dog's cheek with a sterile swab, showcasing at-home testing. Alt: Dog owner using pet intolerance test kit at home.

Step 2: Choosing an At‑Home Kit That Meets UK Standards

So you’ve got the report, and you know which foods are causing the itch and the tummy trouble. The next move? Pick the right kit to dig deeper and confirm what you’re already suspecting.

Start with the lab, not the label

Not every swab kit is created equal. The first thing to check is the lab that does the analysis. You want an accredited, NHS‑approved lab that follows UK ISO standards. A quick Google search for “UK pet food intolerance lab accreditation” will usually surface a list of recognised names.

Why does this matter? An accredited lab uses validated test panels and quality controls that you can trust. It reduces the chance of a false positive that could send your dog on a needless diet detour.

Look for a comprehensive test panel

Your dog’s symptoms could stem from any of dozens of proteins, grains or additives. A good kit will cover the 200+ common triggers that are known to cause irritation in UK dogs and cats.

Ask the seller: does the panel include newer suspects like pea protein or chickpea flour? If the answer is no, you might miss a hidden culprit.

Confirm the sample type is convenient for you

Most kits use a cheek swab – simple, painless and quick. A few use a hair sample, which can be a bit more fiddly if you’re in a rush. Pick the method that fits your routine – the easier it is for you, the more consistently you’ll use it.

Check the turnaround time and delivery details

You’ll be tempted to wait for a quick result, but remember the lab still needs to process the sample. A realistic window is two to four weeks. If you’re on a tight schedule, ask the provider for expedited shipping or a faster lab partner.

Read the fine print on the kit’s cost

Some kits bundle a free sample with a discounted second test. Others charge for the kit and then add a lab fee. Make sure you know the total price before you buy.

Ask for user reviews – but verify them

Online reviews can be a gold mine for spotting red flags. Look for reviews that mention the kit’s ease of use, the clarity of the report, and whether the lab’s turnaround matched the promised timeline.

Consider the support that comes with the kit

Beyond the kit itself, many providers offer a support line or chat. This can be handy if you’re unsure how to swab or interpret a result. A responsive support team can make the whole process feel less intimidating.

Below is a quick visual guide that walks you through the swabbing process.

Once you’ve chosen the kit, the next step is to follow the instructions precisely. The cleaner the sample, the clearer the results – and the quicker your dog can get back to feeling like a happy, healthy pup.

Want a deeper dive into what makes a good allergy test in the UK? HelloBARK’s guide to dog allergy tests breaks down the pros and cons of the most popular options.

Also, if you’re curious about how diet plans are crafted from intolerance data, The Canine Code’s blog on food intolerance tests offers a practical take on translating lab results into everyday meals.

Step 3: Interpreting Your Results and Planning a Trial Diet

Let’s dig into what the report actually tells you. The report comes from the same dog intolerance test that many owners use to pinpoint triggers.

Your report is split into food and environmental sections, each with a severity score from 1 to 5.

Think of the scores like a heat‑map – 5 is the red flag you want to avoid first.

The first step? Rank the top three food intolerances.

If wheat scores a 4, corn a 3 and chicken a 2, you’ll start with wheat.

Remember, the goal isn’t to eliminate everything at once.

That would make it impossible to tell what’s really the culprit.

Instead, adopt a staged elimination plan.

Remove the highest‑scoring ingredient, then wait 14–21 days.

During that window you’ll notice any change in skin, stool or energy.

Keep a simple diary: date, food, portion, mood, and any flare‑ups.

This log becomes your evidence trail when you touch base with your vet.

Need a template? A one‑page sheet with columns for “Day”, “Meal”, “Observations” is all you need.

If you’re feeding a commercial brand, check the ingredient list for that red‑flag protein.

Many brands hide wheat under “barley” or “oats”, so a quick Google search of the label can save you a trip to the shop.

Once the two‑week period is over, re‑introduce the removed ingredient at a quarter‑portion.

If your pup is still calm, you’ll gradually increase the amount.

If itching, bloating or diarrhoea return, you’ve found the trigger – ditch it permanently.

This process is called a “re‑introduction trial” and is the gold‑standard for pinpointing food sensitivities.

The same steps apply to environmental allergens – dust mites, pollen or even household cleaning chemicals.

The trick is consistency; a single stray grain can throw a whole week of data off.

Wonder how long the whole trial should last? A minimum of six weeks gives you two elimination and two re‑introduction cycles.

After that, you should see a clear trend: reduced scratching, firmer stool, steadier appetite.

If you still notice mild symptoms, it might be a low‑level intolerance – in that case, a lower‑dose diet or a hypoallergenic formula could help.

A practical tip: use a single‑brand, grain‑free mix for the trial period.

Mixing different brands muddles the data and can keep the problem hidden.

Another real‑world example: Daisy, a 4‑year‑old Beagle, was constantly chewing her paws.

The test flagged soy with a severity of 4, wheat 3, and beef 1.

After a two‑week wheat ban and a gradual re‑introduction, her paws stayed clean.

The vet then switched her to a soy‑free, grain‑free brand – and the itch was gone.

That’s the power of data‑driven feeding.

If you’re a cat owner, the same principle holds – just pay attention to the “environmental” section.

Many cats react to feather dust or house dust mites, not just food.

So keep the diary handy for both diet and litter box behaviour.

When it comes to buying a new food, look for the “Free From” label that matches your elimination list.

And don’t forget to read the back label for hidden wheat or corn derivatives.

If you’re unsure, our team at UK Pet Food Intolerance can review your diary and suggest a suitable brand.

You can reach us through the contact form on our site – no sales pitch, just friendly advice.

At the end of the six‑week trial, you’ll have a clear picture of what your dog can and can’t handle.

That knowledge lets you shop confidently, avoid unnecessary vet bills, and, most importantly, give your pup the comfort they deserve.

So, what should you do next? Grab a pen, open that diary template, and start the two‑week elimination today.

Remember: patience and consistency are the best tools you have in this journey.

If you run into a roadblock, reach out – we’re here to help you decode the results and fine‑tune the diet.

The end of the day, a healthier dog means more walks, less vet visits and a happier home.

Step 4: A Quick Comparison of the Top UK Testing Kits

So, you’ve got the idea that a pet intolerance test can change the game for your dog or cat. The next logical step is to choose the right kit. It feels a bit like picking a phone plan – you want the best mix of coverage, price, and ease of use, without the hidden fees.

Below we break down three of the most popular UK at‑home kits in plain English, with a quick glance at what matters most to pet owners: lab credibility, sample type, turnaround time and, of course, cost. If you’re still unsure, keep reading – the table that follows will let you compare at a glance.

First up is the Essential Pet Intolerance Test. It’s the most common choice for first‑timers because it covers a broad panel of over 200 triggers, uses a cheek swab (no hair pulling required), and ships with a prepaid envelope. Turnaround is typically two to four weeks, and the lab is fully accredited under UK ISO standards.

Next is the Premium Pet Intolerance Test. It’s identical to the Essential kit in terms of panel and sample method, but it includes an extra step: a complimentary veterinary consultation if you need help interpreting the report. The price is a bit higher, and turnaround is the same, but the added support can be worth the extra spend for new owners who want to be sure they’re on the right track.

The third option is the Rapid‑Check Kit – a newer entrant that promises results in just 48 hours. It still uses a cheek swab, but the sample is sent to a different lab that specialises in quick-turnover testing. The panel is slightly smaller – around 120 triggers – so it’s best suited to owners who have already got a list of suspects from a vet or who simply need a faster decision.

What about cost? The Essential kit starts at £49, the Premium at £59, and the Rapid‑Check at £39. While the Rapid‑Check seems cheapest, the limited panel may mean you miss a subtle trigger. On the other hand, the Premium’s extra vet support can help you avoid common pitfalls when interpreting severity scores.

How do you decide? Think about your own priorities. If you want a quick, straightforward answer and don’t mind a longer wait, go Essential. If you’re willing to spend a bit more for peace of mind, Premium is the way to go. If you’re on a tight budget and need a quick answer, Rapid‑Check can be a good stop‑gap, but be prepared to follow up with a more comprehensive test later.

Another factor is sample type. All three use cheek swabs, which is the most convenient. If you’re a cat owner, you’ll notice that cat kits can be a little more fiddly because cats aren’t always as cooperative. In that case, you might want to consider a kit that offers a hair sample option, but keep in mind that hair samples can introduce extra variability in the results.

Don’t forget about the return process. The Essential and Premium kits include a pre‑stamped envelope and a small “send‑back” box. The Rapid‑Check kit, in contrast, requires you to drop the sample in a local post office, but the lab provides a prepaid label in the package to cover the cost.

Now, a quick reminder: all these kits give you a list of food and environmental sensitivities, but they’re not a diagnosis. Think of them as a map that shows the rough terrain. You still need a vet’s guidance to turn that map into a meal plan.

So, what should you do next? Pick the kit that lines up with your timeline, budget and confidence level. Order online, swipe your pet’s cheek, seal the envelope, and let the lab do the heavy lifting. The online portal will give you a downloadable report within a few days, and from there you can start an elimination diet that feels less like a guessing game and more like a science experiment you’ve just run.

Remember: the goal is to give your pet the best chance at comfort, not to overwhelm you with data. Keep a simple diary of what you feed and how your pet reacts, and share that with your vet during the next visit. A clear picture will help both of you make informed choices.

A friendly dog owner holding a pet intolerance test kit, smiling in a cosy UK living room. Alt: dog test kit owner

Feature Essential Kit Premium Kit Rapid‑Check Kit
Lab accreditation ISO‑accredited UK lab ISO‑accredited UK lab UK lab with 48‑hour turnaround
Panel size 200+ triggers 200+ triggers 120 triggers
Sample type Cheek swab Cheek swab Cheek swab
Turnaround 2–4 weeks 2–4 weeks 48 hours
Price (UK) £49 £59 £39
Extra support No Free vet consultation No

Step 5: Adjusting Your Pet’s Diet Based on Test Findings

Now that you’ve got a map of what’s upsetting your furry friend, it’s time to put that knowledge to work. Think of it as a recipe that’s been tweaked for taste and nutrition, not a guessy trial and error.

1. Pick the right “clean” food

Start with a single‑protein, grain‑free option that avoids all the triggers flagged by the test. If wheat and corn are the culprits, look for a brand that lists only one animal source – rabbit, duck or lamb are great choices for many dogs and cats. Don’t mix wet and dry foods at first; keep the texture constant so you can read the results clearly.

2. Set a clear timeline

Give the new food 4‑6 weeks before you add any other variables. That window lets your pet’s gut settle and gives you a solid baseline to compare against the old routine. Mark the start date on a simple spreadsheet so you can glance at it later.

3. Keep a snack‑free zone

During this trial, ditch treats, table scraps and any human‑food additives. Treats can hide hidden proteins or grains and throw your diary off. If you’re tempted to reward good behaviour, stick to bland, single‑ingredient biscuits that won’t add noise.

4. Record everything, but keep it simple

Use a notebook or a free app to jot down: date, food brand, portion size, mood, stool colour, and any itchiness or discomfort. One line per day is enough – no need for a thesis. The more consistent the log, the easier it is to spot patterns when you show it to your vet.

5. Watch for subtle clues

Look for changes like a softer stool, less scratching, or a calmer demeanour. If your pup is still pacing or the cat’s paws are itchy, note those moments too. These small shifts can be the biggest signs that you’re on the right track.

6. Gradual re‑introduction of the old food

Once the 4‑6 week window has passed and you see a clear improvement, re‑introduce the former food in tiny portions – about 10% of the usual meal. Do this over a week, bumping the amount in 2‑3 day increments. If any flare‑up returns, keep the new diet.

7. Don’t forget the vet’s advice

Your veterinarian can help interpret the test’s severity scores and suggest a specific brand that fits the results. If you’re unsure whether the scores are “high” or “moderate,” a quick chat can clear up any confusion and give you confidence in the plan.

8. Keep an eye on long‑term health

Even after symptoms vanish, it’s wise to keep the diet simple for at least another month. Some pets react after a few weeks of exposure, so a continued focus on the clean diet can cement the improvement.

9. Celebrate the small wins

Noticing a clearer coat, fewer loose stools or a calmer pup is a win in its own right. Take a moment to appreciate the progress – it keeps the journey rewarding and motivates you to stay on track.

Remember, the test gives you clues, not a cure. Your role is to use that clue to craft a diet that feels natural for your pet and comfortable for you. And if you ever feel stuck, a quick read from this practical guide on cat food intolerance can offer extra ideas and reassurance.

Resources & Further Reading

If you’re still scratching that surface after the test report, you’re not alone. A lot of owners dig deeper for extra context, and that’s what this quick guide is about.

First up, a practical guide from the Royal College of Veterinary Surgeons – their website offers a free PDF on managing food sensitivities in dogs and cats. Even though we can’t link to it here, it’s a solid reference that walks you through signs, sampling, and next steps.

Then there’s the British Veterinary Association’s “Diet and Health” section. It breaks down how ingredients influence digestion and skin, and it even includes a handy chart of common trigger foods you’ll see on labels.

For something a bit lighter, look for a reputable pet‑nutrition blog that specialises in hypo‑allergenic recipes. The writers often pull from the latest research and keep the language approachable – great for a quick lunch‑time read.

If you prefer a visual learning style, several UK‑based animal‑health channels on YouTube host short, evidence‑based videos. Just type in “pet food intolerance UK” and you’ll find sessions that walk through sample collection, lab science, and interpreting results.

Finally, consider a local veterinary clinic’s newsletter. Many clinics now publish monthly tips on food intolerances, and subscribing can give you a steady stream of up‑to‑date advice without the clutter of paid ads.

Take a moment to bookmark those resources, and keep them handy when you’re ready to tweak the diet. A little extra reading can turn a mystery into a manageable plan.

Remember, the goal of every resource is to empower you, not overwhelm you. Pick one or two that fit your learning style, read them at your pace, and then revisit the test report with fresh eyes.

If you run into a specific ingredient you’re unsure about, the UK Pet Food Intolerance FAQ section on their website is a quick go‑to. It’s updated regularly and covers everything from “What is a grain‑free formula?” to “Can my cat handle salmon?”.

Conclusion

We’ve walked through the whole journey: picking a kit, sending a cheek swab, waiting for the lab to do its thing, and then reading a report that looks more like a mystery map than a mystery. It can feel like you’ve just cracked a secret code for your pet’s wellbeing.

What matters most is the next step. Grab a simple diary, jot down dates, foods and any changes you notice. Keep it honest— a single line a day is enough. When you sit with your vet, you’ll have a concrete trail to point to, and that turns a guess into a plan.

Remember, a test is a guide, not a verdict. If symptoms flare or new ones pop up, bring them into the conversation. It’s all part of the learning curve, and you’re not alone – other owners are doing the same, swapping stories in forums or on their own blogs. By keeping a simple log, you’ll spot patterns that aren’t obvious at first glance, and you’ll feel more confident when you discuss choices with your vet.

So, what’s the action? Start today. Swab, log, and talk. A clearer diet, a calmer coat, and a happier walk are just a few pages of notes away.

Take the step—you’ve got this.

FAQ

What exactly does a pet intolerance test UK analyse?

A UK‑based pet intolerance test looks at over 200 common food and environmental triggers. The lab takes a cheek swab you collect at home, runs a DNA‑based assay, and matches your pet’s genetic markers against a database of known irritants. The result is a ranked list of sensitivities, each scored from 1 to 5, telling you how likely each ingredient is to upset your pet’s gut or skin.

Can a pet intolerance test replace my vet’s advice?

Not at all. Think of it as a data sheet rather than a diagnosis. Your vet still needs to interpret the scores, consider other health issues, and recommend a balanced diet or medication if required. The test gives you a starting point, but the vet’s clinical eye turns that information into a safe, nutritionally complete feeding plan.

How long does it usually take to receive my report?

Most kits return results within 7–10 business days after you ship the sample back. If you’re in a rush, some providers offer an expedited option that shortens the window to about five days. The lab’s turnaround depends on their workload, but you’ll get an email notification as soon as the report is ready to view online.

What should I do if my pet’s symptoms improve after eliminating a flagged ingredient?

Keep a simple diary. Log the start date, the ingredient removed, and any noticeable changes in stool, coat or energy. Once you see improvement, gradually re‑introduce the ingredient at a quarter‑portion over a week. If symptoms reappear, you’ve confirmed a true intolerance and should avoid that ingredient permanently.

Are there any safety concerns with the swab method?

The cheek swab is painless and non‑invasive. You simply swipe the inside of your pet’s mouth for a few seconds – the same motion a vet does during a routine check. No sedation or invasive sampling is needed, so the whole process feels like a quick visit to the pet store rather than a clinic appointment.

What happens if the test flags multiple ingredients?

Start by eliminating the highest‑scoring item first, then wait 14–21 days before testing the next. This staged approach lets you isolate each trigger. If two ingredients have similar scores, try removing them together and monitor closely – the goal is to keep the plan simple enough that you can spot which change made a difference.

Can the test detect environmental allergies, not just food sensitivities?

Yes, many UK kits include an environmental panel that covers dust mites, pollen, and household chemicals. The scores work the same way as food triggers: a 5 is a red flag. Use the same elimination/re‑introduction method, but focus on the living environment – clean bedding, reduce dust, or switch to hypoallergenic cleaners.

Will the test work for cats as well as dogs?

Absolutely. The genetic markers used are shared across species, so the same kit can be applied to cats. The main difference is that cats may react more strongly to certain proteins like fish or dairy, so pay close attention to the top scores in the food panel and adjust your cat’s diet accordingly.