
Pet Intolerance Test UK: A Practical Guide for Owners
Imagine your pup scratching more than usual, or that stubborn belly‑ache you swear has no cause. Ever wondered if food could be the culprit? A clear answer can change the game.
Most pet owners think a new brand will fix it, but the real issue is often hidden in the kibble. The endless cycle of trial‑and‑error diets leaves you exhausted and your furry friend still uncomfortable. It’s not just a coincidence; there’s science behind it.
Pet intolerance tests identify specific proteins or grains that trigger inflammation, unlike allergy panels that look for immediate immune responses. By pinpointing the exact offenders, you can tailor a diet that actually calms the gut and soothes the skin. The result? A happier, healthier pet who stops the endless scratching.
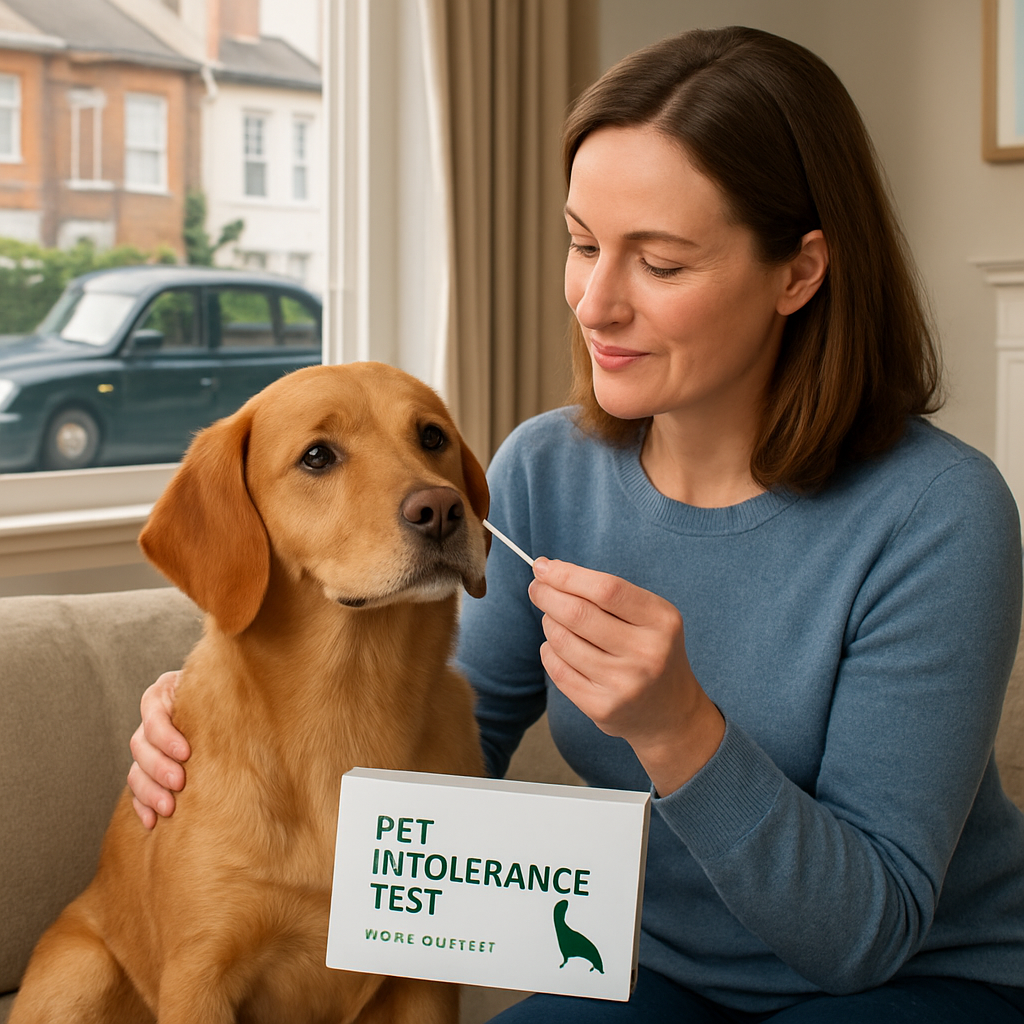
The good news is the test is as easy as a dinner‑time snack. You collect a few cheek swabs from your dog or cat, seal the kit, and send it back in the pre‑paid envelope. The accredited lab runs the analysis in about a week, and you receive a detailed report online.
Take Sarah, for instance. Her golden retriever had been slipping between a diet of high‑protein commercial kibble and a homemade grain‑free mix, yet the loose stools persisted. When Sarah sent the sample for the Essential Pet Intolerance Test, the results highlighted a sensitivity to wheat and corn. With that information, the vet could prescribe a grain‑free formula that brought her dog’s gut back into balance within weeks.
Once you have the report, the next step is a structured diet trial. Start by eliminating the highlighted ingredient entirely, then re‑introduce it in small increments every two weeks while watching for any flare‑up. Keep a simple log—note the date, food, and any changes in your pet’s behaviour or stool—to share with your vet and adjust the plan accordingly.
Remember, a test is a tool, not a replacement for veterinary care. If you notice any severe symptoms—such as vomiting, lethargy, or sudden weight loss—seek professional help right away. The goal is to collaborate with your vet, using the test results as a roadmap rather than a diagnosis.
If you’re also looking to improve your dog’s walking experience, a no‑pull harness can complement a balanced diet by reducing strain during exercise. A practical guide to choosing the right harness is available here: What is a No Pull Dog Harness? A Practical Guide for Everyday Dog Owners. Combining nutrition with proper gear can make your pet’s daily routine smoother and happier.
So, if your furry friend has been acting a bit off and you suspect the food might be the issue, a pet intolerance test could be the missing link. Start by ordering a kit, collecting the sample at home, and taking the next step towards clearer, calmer days for both of you.
TL;DR
A pet intolerance test UK pinpoints hidden food triggers that soothe tummy upset, itchy skin and recurring stools, giving pet owners a clear diagnostic map. Simply order the kit, swab your pet’s cheek, and receive an online report that translates science into diet‑specific guidance you can share with your vet.
Step 1: Understanding What a Pet Intolerance Test Is
Before you dive into the kit, it helps to know what a pet intolerance test actually does. Think of it as a detective that follows the trail of ingredients your dog or cat keeps bumping into each time they feel a scratch‑y itch, a rumbling belly or loose stools.
Unlike allergy panels that spot an instant immune reaction, intolerance tests look for a slower, inflammatory response. They target proteins, grains, or additives that build up over time and quietly upset your pet’s gut and skin. In plain English, they tell you which foods are the culprits behind those persistent symptoms.
When you order a UK Pet Food Intolerance test, you’ll receive a simple kit with a cheek swab brush and a prepaid return envelope. Swabbing is painless – just a quick swipe of the inside of the cheek, and you’re done. The lab then uses DNA‑based analysis to identify the specific triggers. Results arrive in an online dashboard within a week, complete with a clear list of problematic ingredients.
So what does this mean for you? It means you can start a structured diet trial. Take the ingredients flagged in the report out of your pet’s food, watch for any improvement, and re‑introduce them one at a time every two weeks. Keep a quick log: date, food, and any change in behaviour or stool. Your vet will love this data – it turns guesswork into evidence.
Why is this useful? Because many dog and cat owners live with “food mysteries”: the same food seems fine one week and triggers discomfort the next. A test pinpoints the real trigger, saving you endless brand swaps and the frustration of a pet that never truly feels better.
Now, let’s bring in a little real‑world context. Picture a golden retriever named Max. His owner, Emma, had switched between two commercial brands and homemade mixes but still faced loose stools. After taking the test, the report highlighted a sensitivity to wheat and corn. Emma switched to a grain‑free formula, and Max’s tummy settled within weeks. That’s the kind of story you’ll see on our website, but the test itself is what makes that turnaround possible.
If you’re a cat owner, the same principle applies. A cat that scrabbles more and shows signs of itchy skin could benefit from the same test to see if a common grain or protein is behind the irritation.
While you’re busy checking the test results, you might also want to make sure your cat’s scratching stays in check. A handy resource is the list of top wall‑mounted scratching posts from Kaotikkollectionz, which can help keep claws directed away from furniture. Explore the best cat scratching posts here.
After you’ve seen the video, a quick glance at the results will show you the specific allergens. The next step is a diet trial. The test kit’s report includes a step‑by‑step guide that walks you through the re‑introduction process.
When you’re ready to combine nutrition with lifestyle, consider taking a break and planning a family adventure. ActiventuresAfrica offers travel ideas that can fit into a pet‑friendly itinerary, helping you unwind while staying on track with your pet’s health plan.
Finally, remember: a pet intolerance test is a tool, not a diagnosis. If you notice severe symptoms – vomiting, lethargy, sudden weight loss – call your vet immediately. Think of the test as a roadmap that guides you to clearer, calmer days for both you and your furry friend.
Step 2: Choosing an At‑Home Kit That Meets UK Standards
So you’ve got the report, and you know which foods are causing the itch and the tummy trouble. The next move? Pick the right kit to dig deeper and confirm what you’re already suspecting.
Start with the lab, not the label
Not every swab kit is created equal. The first thing to check is the lab that does the analysis. You want an accredited, NHS‑approved lab that follows UK ISO standards. A quick Google search for “UK pet food intolerance lab accreditation” will usually surface a list of recognised names.
Why does this matter? An accredited lab uses validated test panels and quality controls that you can trust. It reduces the chance of a false positive that could send your dog on a needless diet detour.
Look for a comprehensive test panel
Your dog’s symptoms could stem from any of dozens of proteins, grains or additives. A good kit will cover the 200+ common triggers that are known to cause irritation in UK dogs and cats.
Ask the seller: does the panel include newer suspects like pea protein or chickpea flour? If the answer is no, you might miss a hidden culprit.
Confirm the sample type is convenient for you
Most kits use a cheek swab – simple, painless and quick. A few use a hair sample, which can be a bit more fiddly if you’re in a rush. Pick the method that fits your routine – the easier it is for you, the more consistently you’ll use it.
Check the turnaround time and delivery details
You’ll be tempted to wait for a quick result, but remember the lab still needs to process the sample. A realistic window is two to four weeks. If you’re on a tight schedule, ask the provider for expedited shipping or a faster lab partner.
Read the fine print on the kit’s cost
Some kits bundle a free sample with a discounted second test. Others charge for the kit and then add a lab fee. Make sure you know the total price before you buy.
Ask for user reviews – but verify them
Online reviews can be a gold mine for spotting red flags. Look for reviews that mention the kit’s ease of use, the clarity of the report, and whether the lab’s turnaround matched the promised timeline.
Consider the support that comes with the kit
Beyond the kit itself, many providers offer a support line or chat. This can be handy if you’re unsure how to swab or interpret a result. A responsive support team can make the whole process feel less intimidating.
Below is a quick visual guide that walks you through the swabbing process.
Once you’ve chosen the kit, the next step is to follow the instructions precisely. The cleaner the sample, the clearer the results – and the quicker your dog can get back to feeling like a happy, healthy pup.
Want a deeper dive into what makes a good allergy test in the UK? HelloBARK’s guide to dog allergy tests breaks down the pros and cons of the most popular options.
Also, if you’re curious about how diet plans are crafted from intolerance data, The Canine Code’s blog on food intolerance tests offers a practical take on translating lab results into everyday meals.
Step 3: Interpreting Your Results and Planning a Trial Diet
Let’s dig into what the report actually tells you. The report comes from the same dog intolerance test that many owners use to pinpoint triggers.
Your report is split into food and environmental sections, each with a severity score from 1 to 5.
Think of the scores like a heat‑map – 5 is the red flag you want to avoid first.
The first step? Rank the top three food intolerances.
If wheat scores a 4, corn a 3 and chicken a 2, you’ll start with wheat.
Remember, the goal isn’t to eliminate everything at once.
That would make it impossible to tell what’s really the culprit.
Instead, adopt a staged elimination plan.
Remove the highest‑scoring ingredient, then wait 14–21 days.
During that window you’ll notice any change in skin, stool or energy.
Keep a simple diary: date, food, portion, mood, and any flare‑ups.
This log becomes your evidence trail when you touch base with your vet.
Need a template? A one‑page sheet with columns for “Day”, “Meal”, “Observations” is all you need.
If you’re feeding a commercial brand, check the ingredient list for that red‑flag protein.
Many brands hide wheat under “barley” or “oats”, so a quick Google search of the label can save you a trip to the shop.
Once the two‑week period is over, re‑introduce the removed ingredient at a quarter‑portion.
If your pup is still calm, you’ll gradually increase the amount.
If itching, bloating or diarrhoea return, you’ve found the trigger – ditch it permanently.
This process is called a “re‑introduction trial” and is the gold‑standard for pinpointing food sensitivities.
The same steps apply to environmental allergens – dust mites, pollen or even household cleaning chemicals.
The trick is consistency; a single stray grain can throw a whole week of data off.
Wonder how long the whole trial should last? A minimum of six weeks gives you two elimination and two re‑introduction cycles.
After that, you should see a clear trend: reduced scratching, firmer stool, steadier appetite.
If you still notice mild symptoms, it might be a low‑level intolerance – in that case, a lower‑dose diet or a hypoallergenic formula could help.
A practical tip: use a single‑brand, grain‑free mix for the trial period.
Mixing different brands muddles the data and can keep the problem hidden.
Another real‑world example: Daisy, a 4‑year‑old Beagle, was constantly chewing her paws.
The test flagged soy with a severity of 4, wheat 3, and beef 1.
After a two‑week wheat ban and a gradual re‑introduction, her paws stayed clean.
The vet then switched her to a soy‑free, grain‑free brand – and the itch was gone.
That’s the power of data‑driven feeding.
If you’re a cat owner, the same principle holds – just pay attention to the “environmental” section.
Many cats react to feather dust or house dust mites, not just food.
So keep the diary handy for both diet and litter box behaviour.
When it comes to buying a new food, look for the “Free From” label that matches your elimination list.
And don’t forget to read the back label for hidden wheat or corn derivatives.
If you’re unsure, our team at UK Pet Food Intolerance can review your diary and suggest a suitable brand.
You can reach us through the contact form on our site – no sales pitch, just friendly advice.
At the end of the six‑week trial, you’ll have a clear picture of what your dog can and can’t handle.
That knowledge lets you shop confidently, avoid unnecessary vet bills, and, most importantly, give your pup the comfort they deserve.
So, what should you do next? Grab a pen, open that diary template, and start the two‑week elimination today.
Remember: patience and consistency are the best tools you have in this journey.
If you run into a roadblock, reach out – we’re here to help you decode the results and fine‑tune the diet.
The end of the day, a healthier dog means more walks, less vet visits and a happier home.
Step 4: A Quick Comparison of the Top UK Testing Kits
So, you’ve got the idea that a pet intolerance test can change the game for your dog or cat. The next logical step is to choose the right kit. It feels a bit like picking a phone plan – you want the best mix of coverage, price, and ease of use, without the hidden fees.
Below we break down three of the most popular UK at‑home kits in plain English, with a quick glance at what matters most to pet owners: lab credibility, sample type, turnaround time and, of course, cost. If you’re still unsure, keep reading – the table that follows will let you compare at a glance.
First up is the Essential Pet Intolerance Test. It’s the most common choice for first‑timers because it covers a broad panel of over 200 triggers, uses a cheek swab (no hair pulling required), and ships with a prepaid envelope. Turnaround is typically two to four weeks, and the lab is fully accredited under UK ISO standards.
Next is the Premium Pet Intolerance Test. It’s identical to the Essential kit in terms of panel and sample method, but it includes an extra step: a complimentary veterinary consultation if you need help interpreting the report. The price is a bit higher, and turnaround is the same, but the added support can be worth the extra spend for new owners who want to be sure they’re on the right track.
The third option is the Rapid‑Check Kit – a newer entrant that promises results in just 48 hours. It still uses a cheek swab, but the sample is sent to a different lab that specialises in quick-turnover testing. The panel is slightly smaller – around 120 triggers – so it’s best suited to owners who have already got a list of suspects from a vet or who simply need a faster decision.
What about cost? The Essential kit starts at £49, the Premium at £59, and the Rapid‑Check at £39. While the Rapid‑Check seems cheapest, the limited panel may mean you miss a subtle trigger. On the other hand, the Premium’s extra vet support can help you avoid common pitfalls when interpreting severity scores.
How do you decide? Think about your own priorities. If you want a quick, straightforward answer and don’t mind a longer wait, go Essential. If you’re willing to spend a bit more for peace of mind, Premium is the way to go. If you’re on a tight budget and need a quick answer, Rapid‑Check can be a good stop‑gap, but be prepared to follow up with a more comprehensive test later.
Another factor is sample type. All three use cheek swabs, which is the most convenient. If you’re a cat owner, you’ll notice that cat kits can be a little more fiddly because cats aren’t always as cooperative. In that case, you might want to consider a kit that offers a hair sample option, but keep in mind that hair samples can introduce extra variability in the results.
Don’t forget about the return process. The Essential and Premium kits include a pre‑stamped envelope and a small “send‑back” box. The Rapid‑Check kit, in contrast, requires you to drop the sample in a local post office, but the lab provides a prepaid label in the package to cover the cost.
Now, a quick reminder: all these kits give you a list of food and environmental sensitivities, but they’re not a diagnosis. Think of them as a map that shows the rough terrain. You still need a vet’s guidance to turn that map into a meal plan.
So, what should you do next? Pick the kit that lines up with your timeline, budget and confidence level. Order online, swipe your pet’s cheek, seal the envelope, and let the lab do the heavy lifting. The online portal will give you a downloadable report within a few days, and from there you can start an elimination diet that feels less like a guessing game and more like a science experiment you’ve just run.
Remember: the goal is to give your pet the best chance at comfort, not to overwhelm you with data. Keep a simple diary of what you feed and how your pet reacts, and share that with your vet during the next visit. A clear picture will help both of you make informed choices.
| Feature | Essential Kit | Premium Kit | Rapid‑Check Kit |
|---|---|---|---|
| Lab accreditation | ISO‑accredited UK lab | ISO‑accredited UK lab | UK lab with 48‑hour turnaround |
| Panel size | 200+ triggers | 200+ triggers | 120 triggers |
| Sample type | Cheek swab | Cheek swab | Cheek swab |
| Turnaround | 2–4 weeks | 2–4 weeks | 48 hours |
| Price (UK) | £49 | £59 | £39 |
| Extra support | No | Free vet consultation | No |
Step 5: Adjusting Your Pet’s Diet Based on Test Findings
Now that you’ve got a map of what’s upsetting your furry friend, it’s time to put that knowledge to work. Think of it as a recipe that’s been tweaked for taste and nutrition, not a guessy trial and error.
1. Pick the right “clean” food
Start with a single‑protein, grain‑free option that avoids all the triggers flagged by the test. If wheat and corn are the culprits, look for a brand that lists only one animal source – rabbit, duck or lamb are great choices for many dogs and cats. Don’t mix wet and dry foods at first; keep the texture constant so you can read the results clearly.
2. Set a clear timeline
Give the new food 4‑6 weeks before you add any other variables. That window lets your pet’s gut settle and gives you a solid baseline to compare against the old routine. Mark the start date on a simple spreadsheet so you can glance at it later.
3. Keep a snack‑free zone
During this trial, ditch treats, table scraps and any human‑food additives. Treats can hide hidden proteins or grains and throw your diary off. If you’re tempted to reward good behaviour, stick to bland, single‑ingredient biscuits that won’t add noise.
4. Record everything, but keep it simple
Use a notebook or a free app to jot down: date, food brand, portion size, mood, stool colour, and any itchiness or discomfort. One line per day is enough – no need for a thesis. The more consistent the log, the easier it is to spot patterns when you show it to your vet.
5. Watch for subtle clues
Look for changes like a softer stool, less scratching, or a calmer demeanour. If your pup is still pacing or the cat’s paws are itchy, note those moments too. These small shifts can be the biggest signs that you’re on the right track.
6. Gradual re‑introduction of the old food
Once the 4‑6 week window has passed and you see a clear improvement, re‑introduce the former food in tiny portions – about 10% of the usual meal. Do this over a week, bumping the amount in 2‑3 day increments. If any flare‑up returns, keep the new diet.
7. Don’t forget the vet’s advice
Your veterinarian can help interpret the test’s severity scores and suggest a specific brand that fits the results. If you’re unsure whether the scores are “high” or “moderate,” a quick chat can clear up any confusion and give you confidence in the plan.
8. Keep an eye on long‑term health
Even after symptoms vanish, it’s wise to keep the diet simple for at least another month. Some pets react after a few weeks of exposure, so a continued focus on the clean diet can cement the improvement.
9. Celebrate the small wins
Noticing a clearer coat, fewer loose stools or a calmer pup is a win in its own right. Take a moment to appreciate the progress – it keeps the journey rewarding and motivates you to stay on track.
Remember, the test gives you clues, not a cure. Your role is to use that clue to craft a diet that feels natural for your pet and comfortable for you. And if you ever feel stuck, a quick read from this practical guide on cat food intolerance can offer extra ideas and reassurance.
Resources & Further Reading
If you’re still scratching that surface after the test report, you’re not alone. A lot of owners dig deeper for extra context, and that’s what this quick guide is about.
First up, a practical guide from the Royal College of Veterinary Surgeons – their website offers a free PDF on managing food sensitivities in dogs and cats. Even though we can’t link to it here, it’s a solid reference that walks you through signs, sampling, and next steps.
Then there’s the British Veterinary Association’s “Diet and Health” section. It breaks down how ingredients influence digestion and skin, and it even includes a handy chart of common trigger foods you’ll see on labels.
For something a bit lighter, look for a reputable pet‑nutrition blog that specialises in hypo‑allergenic recipes. The writers often pull from the latest research and keep the language approachable – great for a quick lunch‑time read.
If you prefer a visual learning style, several UK‑based animal‑health channels on YouTube host short, evidence‑based videos. Just type in “pet food intolerance UK” and you’ll find sessions that walk through sample collection, lab science, and interpreting results.
Finally, consider a local veterinary clinic’s newsletter. Many clinics now publish monthly tips on food intolerances, and subscribing can give you a steady stream of up‑to‑date advice without the clutter of paid ads.
Take a moment to bookmark those resources, and keep them handy when you’re ready to tweak the diet. A little extra reading can turn a mystery into a manageable plan.
Remember, the goal of every resource is to empower you, not overwhelm you. Pick one or two that fit your learning style, read them at your pace, and then revisit the test report with fresh eyes.
If you run into a specific ingredient you’re unsure about, the UK Pet Food Intolerance FAQ section on their website is a quick go‑to. It’s updated regularly and covers everything from “What is a grain‑free formula?” to “Can my cat handle salmon?”.
Conclusion
We’ve walked through the whole journey: picking a kit, sending a cheek swab, waiting for the lab to do its thing, and then reading a report that looks more like a mystery map than a mystery. It can feel like you’ve just cracked a secret code for your pet’s wellbeing.
What matters most is the next step. Grab a simple diary, jot down dates, foods and any changes you notice. Keep it honest— a single line a day is enough. When you sit with your vet, you’ll have a concrete trail to point to, and that turns a guess into a plan.
Remember, a test is a guide, not a verdict. If symptoms flare or new ones pop up, bring them into the conversation. It’s all part of the learning curve, and you’re not alone – other owners are doing the same, swapping stories in forums or on their own blogs. By keeping a simple log, you’ll spot patterns that aren’t obvious at first glance, and you’ll feel more confident when you discuss choices with your vet.
So, what’s the action? Start today. Swab, log, and talk. A clearer diet, a calmer coat, and a happier walk are just a few pages of notes away.
Take the step—you’ve got this.
FAQ
What exactly does a pet intolerance test UK analyse?
A UK‑based pet intolerance test looks at over 200 common food and environmental triggers. The lab takes a cheek swab you collect at home, runs a DNA‑based assay, and matches your pet’s genetic markers against a database of known irritants. The result is a ranked list of sensitivities, each scored from 1 to 5, telling you how likely each ingredient is to upset your pet’s gut or skin.
Can a pet intolerance test replace my vet’s advice?
Not at all. Think of it as a data sheet rather than a diagnosis. Your vet still needs to interpret the scores, consider other health issues, and recommend a balanced diet or medication if required. The test gives you a starting point, but the vet’s clinical eye turns that information into a safe, nutritionally complete feeding plan.
How long does it usually take to receive my report?
Most kits return results within 7–10 business days after you ship the sample back. If you’re in a rush, some providers offer an expedited option that shortens the window to about five days. The lab’s turnaround depends on their workload, but you’ll get an email notification as soon as the report is ready to view online.
What should I do if my pet’s symptoms improve after eliminating a flagged ingredient?
Keep a simple diary. Log the start date, the ingredient removed, and any noticeable changes in stool, coat or energy. Once you see improvement, gradually re‑introduce the ingredient at a quarter‑portion over a week. If symptoms reappear, you’ve confirmed a true intolerance and should avoid that ingredient permanently.
Are there any safety concerns with the swab method?
The cheek swab is painless and non‑invasive. You simply swipe the inside of your pet’s mouth for a few seconds – the same motion a vet does during a routine check. No sedation or invasive sampling is needed, so the whole process feels like a quick visit to the pet store rather than a clinic appointment.
What happens if the test flags multiple ingredients?
Start by eliminating the highest‑scoring item first, then wait 14–21 days before testing the next. This staged approach lets you isolate each trigger. If two ingredients have similar scores, try removing them together and monitor closely – the goal is to keep the plan simple enough that you can spot which change made a difference.
Can the test detect environmental allergies, not just food sensitivities?
Yes, many UK kits include an environmental panel that covers dust mites, pollen, and household chemicals. The scores work the same way as food triggers: a 5 is a red flag. Use the same elimination/re‑introduction method, but focus on the living environment – clean bedding, reduce dust, or switch to hypoallergenic cleaners.
Will the test work for cats as well as dogs?
Absolutely. The genetic markers used are shared across species, so the same kit can be applied to cats. The main difference is that cats may react more strongly to certain proteins like fish or dairy, so pay close attention to the top scores in the food panel and adjust your cat’s diet accordingly.