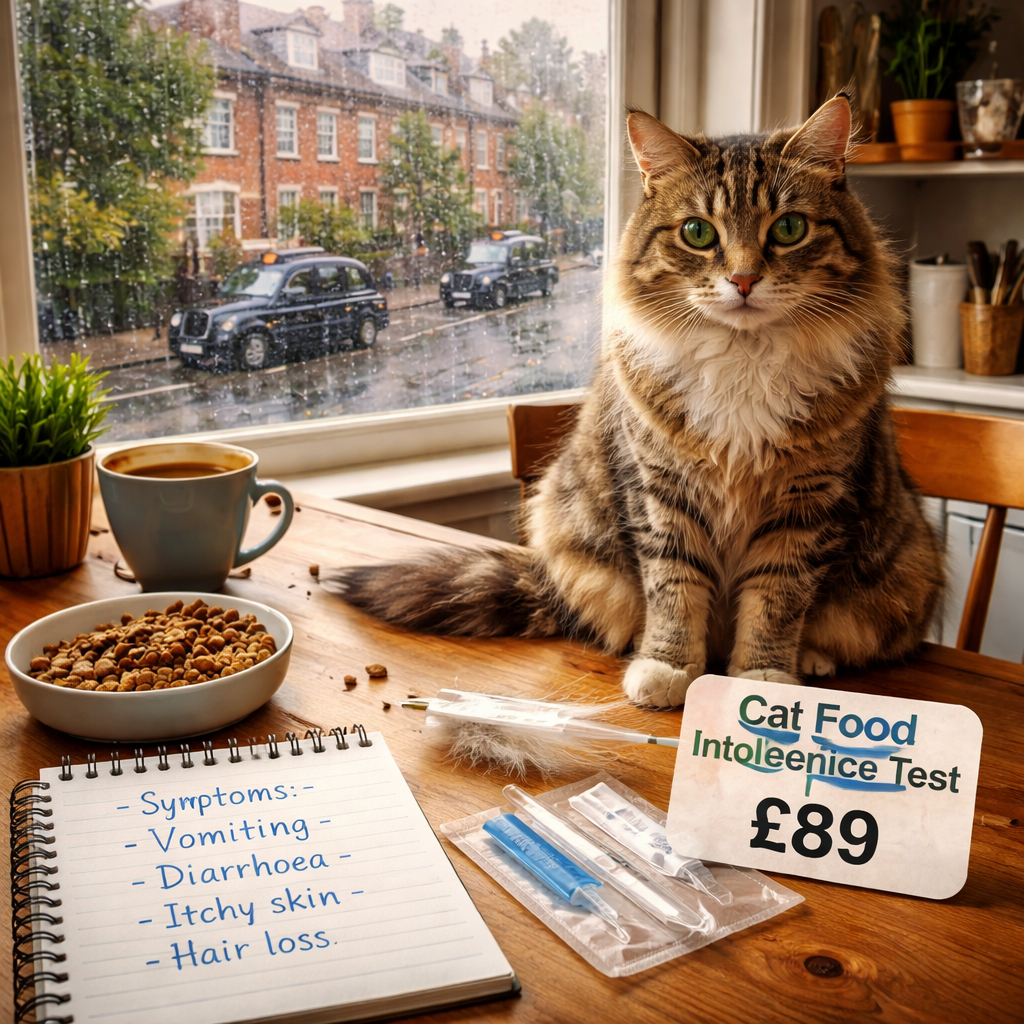
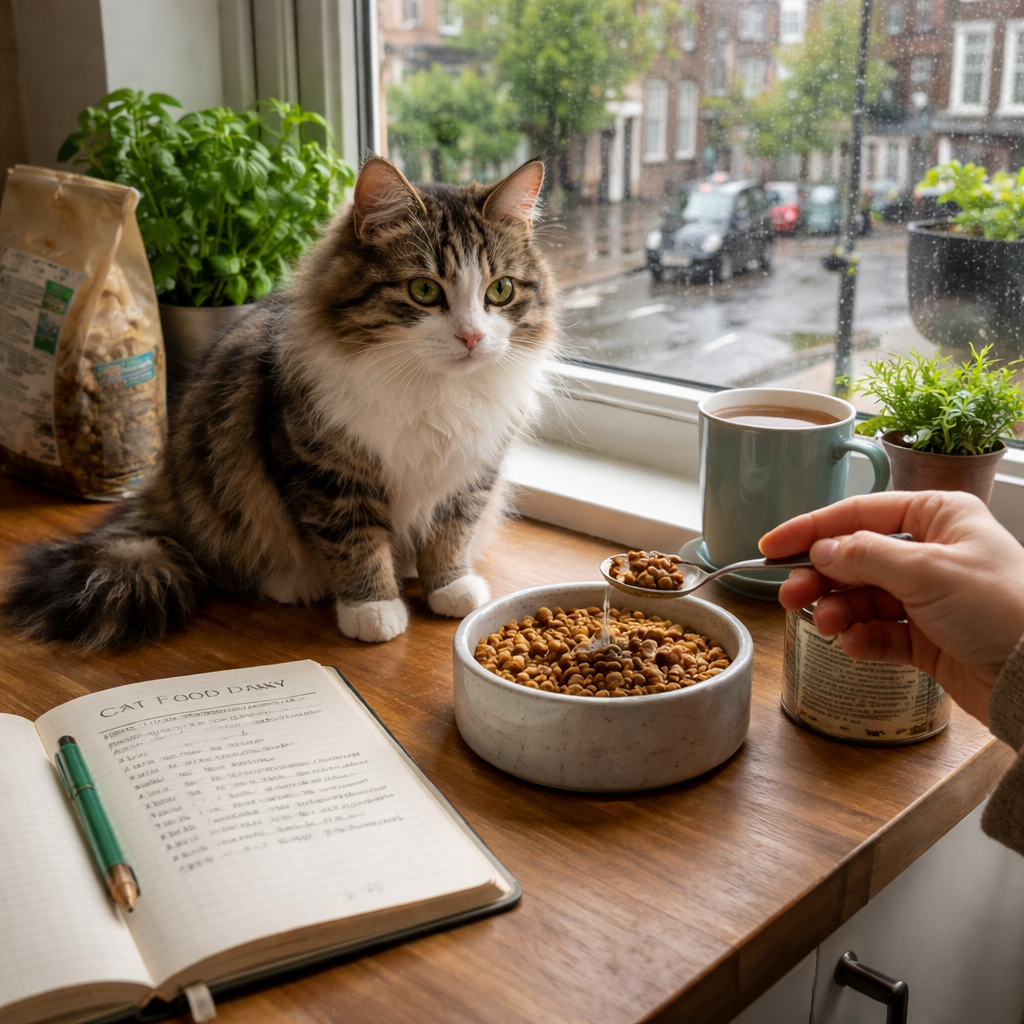
Cat itchy skin after eating UK: A practical guide for pet owners

If your cat starts scratching its skin right after a meal, you’re probably wondering if the food is to blame.

It isn’t rare, many UK owners notice red patches, a greasy coat, or a sudden bout of itching within minutes of dinner.

The skin reaction often ties back to a food intolerance, not a true allergy. Intolerances can spark digestive upset, excess gas, and then the skin flare‑up you see.

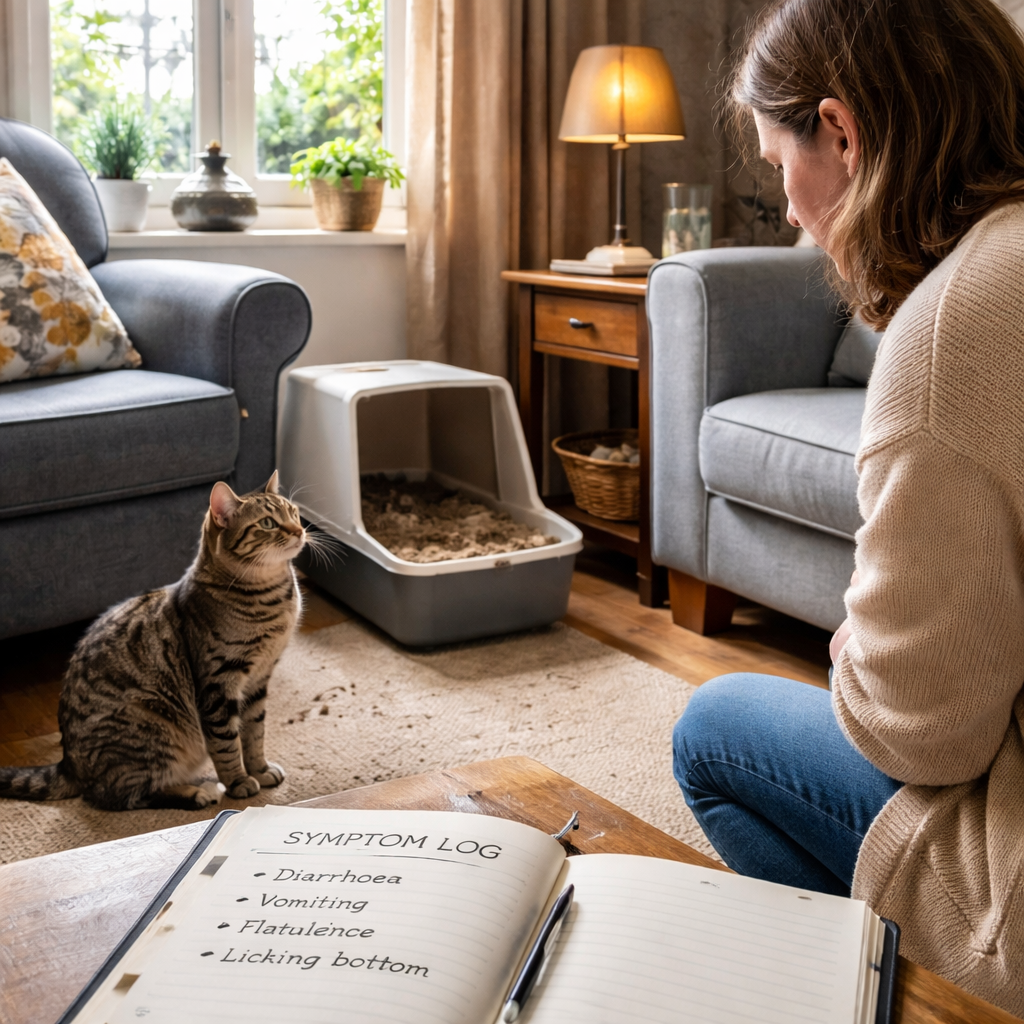
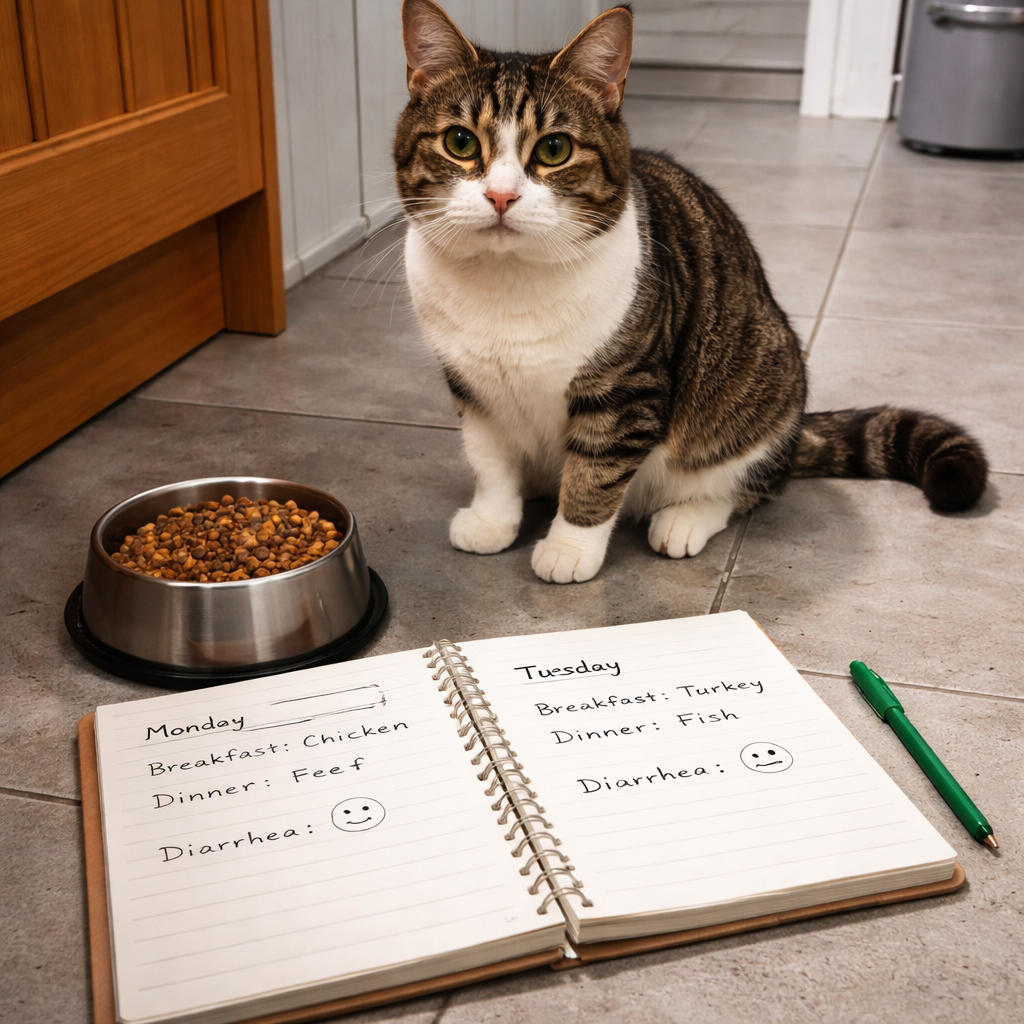
A quick way to spot the pattern is to keep a simple log. Write down the brand, flavour, and any new ingredient each time you feed, then note any itch, redness or hair loss that follows.

If the diary shows a clear link, say a chicken‑based kibble that always triggers a rash, you’ve found a suspect. The next step is to test that suspicion.

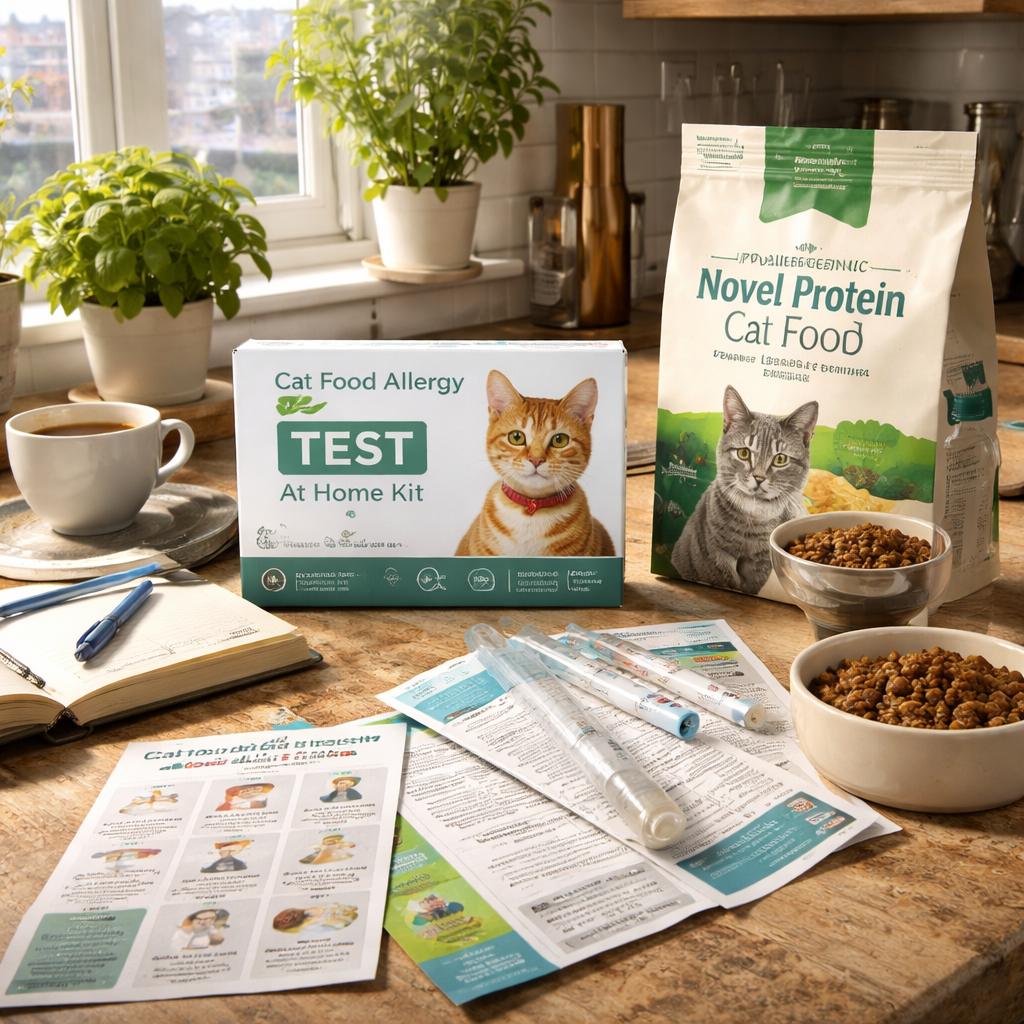
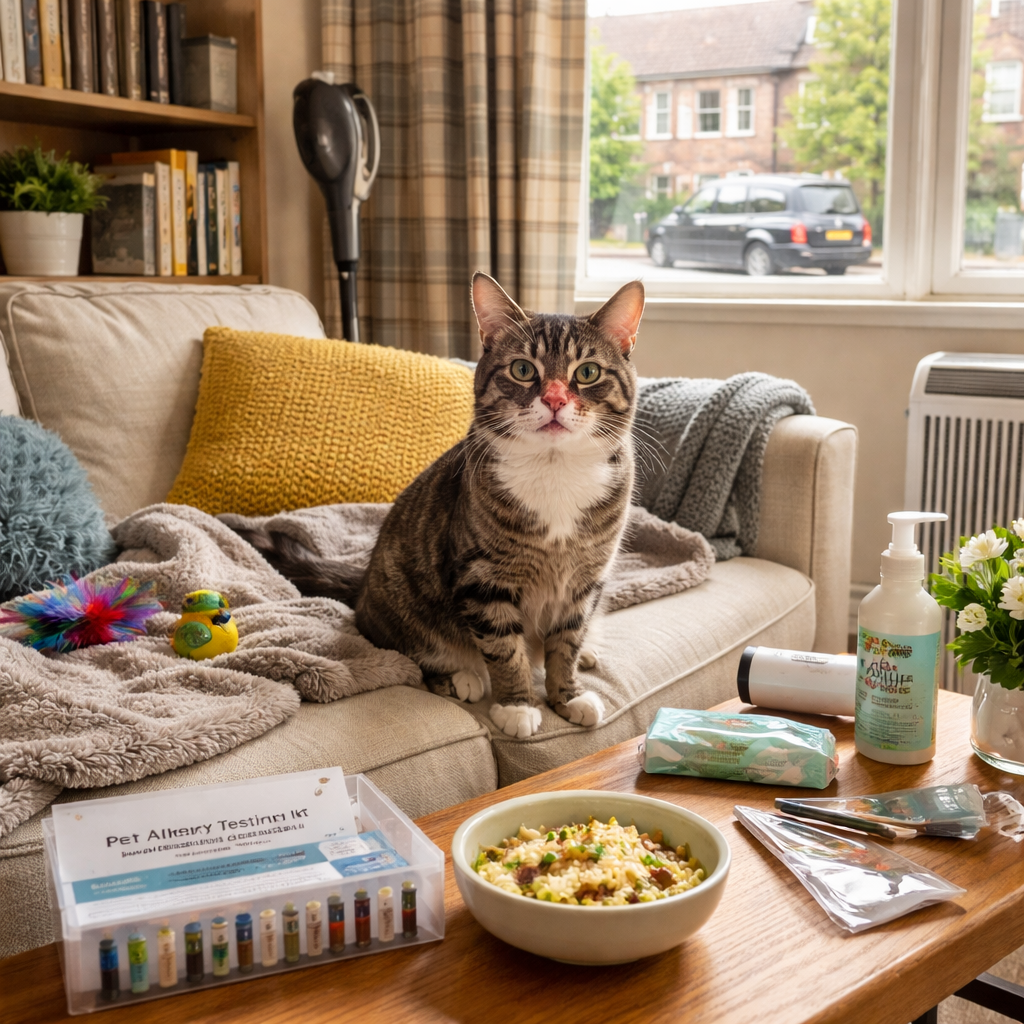
One practical way to confirm is an at‑home food intolerance test. You collect a small stool sample, send it to an accredited lab, and get a clear report that points out which proteins or additives are causing the trouble.

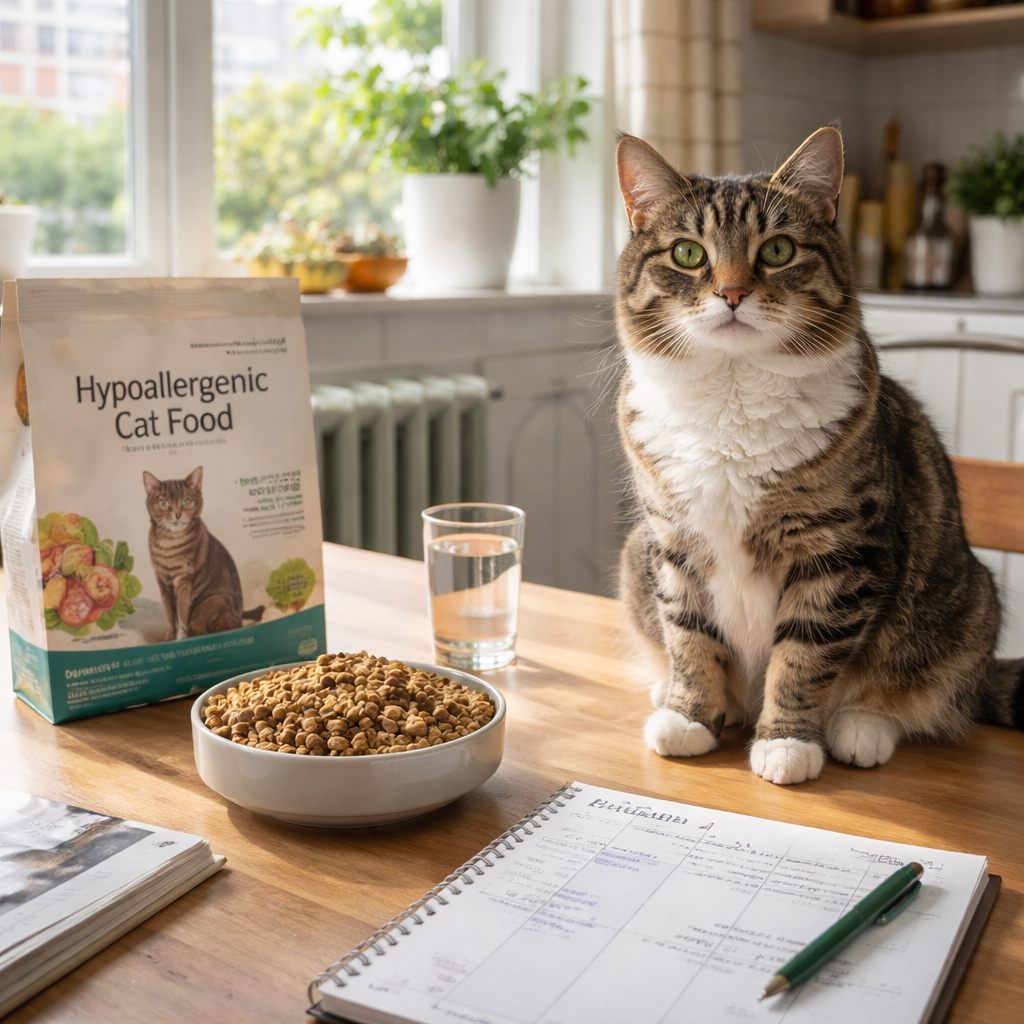
Armed with those results you can switch to a hypo‑allergenic recipe or a limited‑ingredient brand, watching the skin calm down over the next few weeks.

If you need a quick reference on what signs to watch, check out our guide on Understanding cat food intolerance symptoms, it breaks down the common skin clues and how they link to diet.

Remember, any persistent itch deserves a vet check, the test helps you narrow down food triggers, but it isn’t a substitute for professional advice.

Common Food Triggers That Can Cause Itchy Skin

If your cat starts scratching right after a bowl, chances are something in the food is the culprit.

Most cats react to certain proteins. Chicken, fish and beef are common offenders. When a cat is sensitive, even a small bite can set off an itchy rash.

Dairy can be a hidden trigger. Many wet foods use cheese or milk powder as flavour boosters. A splash of dairy can cause redness that looks like a rash.

Grains such as wheat, corn or rice may seem harmless, but some felines develop a gut upset that shows up as skin irritation. Switching to a grain‑free recipe often helps.

Additives and preservatives are another sneaky cause. Colourings, flavour enhancers and artificial sweeteners can irritate a cat’s skin from the inside out.

Eggs and soy are often used as binders in kibble. Some cats find them hard to digest, which can surface as itchy patches on the chin or ears.

To spot the pattern, print a simple food‑log and mark any itch after each meal. A quick print job from Jiffy Print Online gives you a handy sheet you can stick on the fridge.

If you suspect a food trigger, an at‑home intolerance test can give you a clear picture. Services like UK Pet Food Intolerance let you send a small stool sample to a lab, then get results online that point out the specific proteins to avoid.

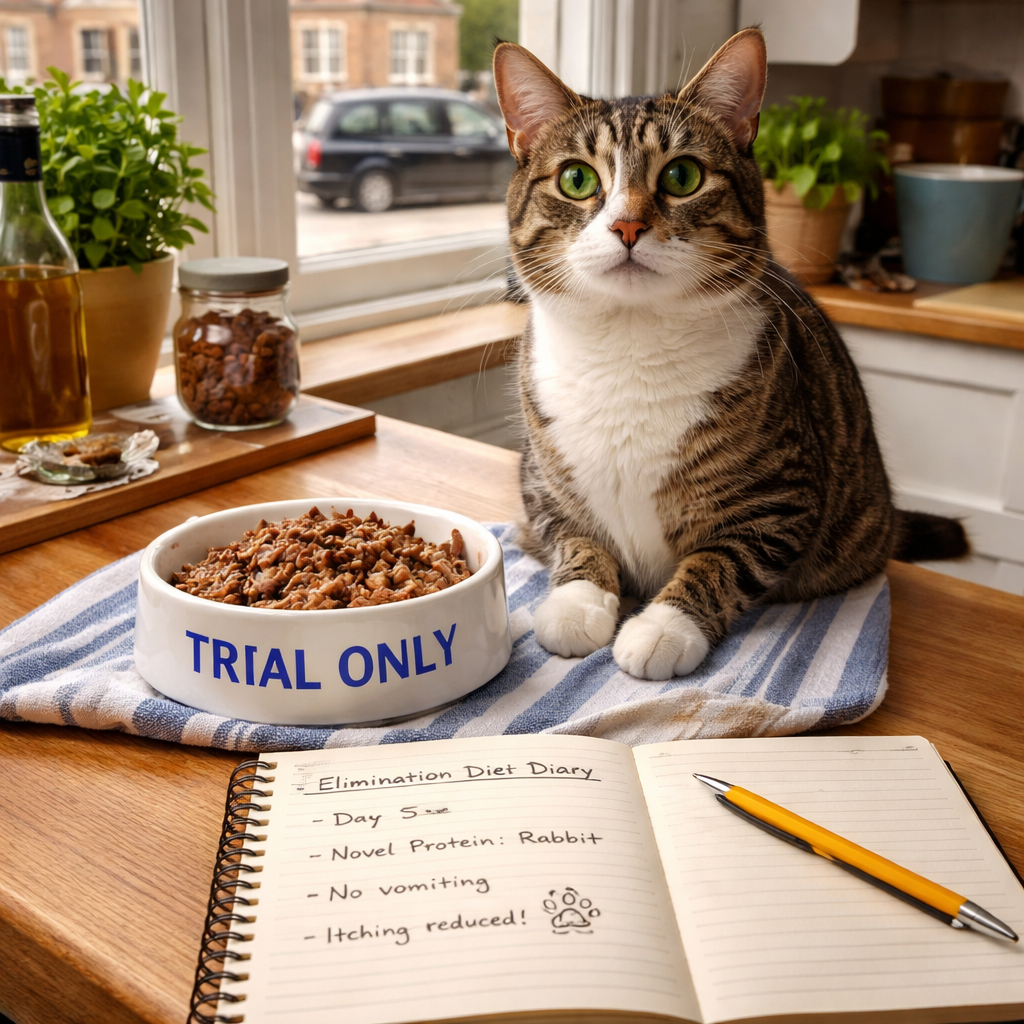
Keep your cat’s diet simple while you test. A single protein source, like turkey, mixed with water lets you see if the skin calms down. If it does, you’ve narrowed the list.

Look for repeat offenders and cut them out for a couple of weeks. If the itching eases, you’ve likely found a trigger. For more detailed guidance, you might read the advice on Lyndsey Crawford about pet nutrition, or explore the French resource from CV Adapt that lists common allergens.

How to Observe and Record Your Cat’s Symptoms

When your cat starts scratching after dinner, the first thing to do is to watch and write down what happens.

Step 1: Pick a place to log. Grab a small notebook, a spreadsheet, or a note‑taking app on your phone. Keep it near the feeding area so you can add details straight away.

Step 2: Record the meal. Write the date, the exact time you served the food, the brand name, the flavour and any new ingredient you notice. A short line like “10 am – Tuna pâté, new pea fibre” is enough.

Step 3: Note the cat’s reaction. Within the next hour, jot down any itching, redness, hair loss, ear rubbing or sudden grooming. Use simple words: “itching behind ears”, “red patch on belly”, “excessive licking”. If you see the behaviour later in the day, add a second entry with the time.

Step 4: Keep track for at least a week. Do this for every meal, even the ones that seem fine. After seven days you’ll start to see if certain foods line up with flare‑ups.

Tip: Snap a photo. A quick phone picture of any rash or hair loss gives you a visual record you can compare day by day. Store the image in the same folder as your notes.

Here’s a tiny table you can copy:

  • Date / Time
  • Food (brand + flavour)
  • New ingredient?
  • Symptom observed
  • Time of symptom

When the pattern becomes clear, you’ll have solid evidence to show a vet or to try a limited‑ingredient trial. And if you need a more scientific read‑out, a home food intolerance test from UK Pet Food Intolerance can turn those notes into a lab‑backed report.

By sticking to this simple log, you’ll spot triggers faster and give your cat a calmer, happier life.

Comparison of Hypoallergenic Cat Foods

If your cat shows itchy skin after eating, a hypoallergenic diet can be a game changer. Below are three solid options you can find in most UK pet shops.

Option 1: Hydrolysed protein formula

This type breaks the protein into tiny pieces your cat can’t recognise as an allergen. It’s often recommended when other diets have failed. Look for a label that says “hydrolysed chicken” or “hydrolysed fish”.

Option 2: Single‑source novel protein

Choose a recipe that uses only one new protein, like rabbit or venison, and no other animal meals. The idea is to give your cat a clean slate and see if the itch fades.

Option 3: Grain‑free limited‑ingredient

These kibbles keep fillers to a minimum and swap wheat or corn for peas or sweet potato. They’re useful if you suspect a grain is part of the problem.

What should you check on the bag? First, the protein source. Second, any added colourings or flavour enhancers – they can still irritate skin. Third, the guaranteed analysis: look for low ash and low filler levels.

And remember, a diet change is only one piece of the puzzle. If you’ve logged meals for a week and the itch still shows up, a test from UK Pet Food Intolerance can point out the exact protein or additive that’s the culprit.

Here’s a quick side‑by‑side view to help you compare:

Food type Main protein Key hypoallergenic feature
Hydrolysed protein formula Hydrolysed chicken or fish Protein broken into tiny fragments
Single‑source novel protein Rabbit or venison Only one new animal protein
Grain‑free limited‑ingredient Pea or sweet potato based Minimal fillers, no wheat/corn

Pick the one that matches your cat’s taste and your budget. Keep tracking symptoms for a week after the switch. If the rash eases, you’ve likely found the trigger. If not, consider a professional test to get clearer answers.

Managing Itchy Skin at Home

First, give your cat a calm space. A quiet room with a soft blanket lets them settle when the itch hits.

Next, check the skin. Look for red patches, flakes, or hair loss. If you spot more than a few spots or your cat is scratching more than four times a day, note it – the PDSA says excessive scratching can signal a deeper issue.

Then, try a gentle bath. Use a mild, hypo‑allergenic cat shampoo that rinses clean. Warm water, a few short strokes, and a towel‑dry will calm the surface. Avoid human soaps or strong fragrances.

After the bath, apply a soothing wipe. A wipe with aloe or oatmeal can reduce irritation without needing a prescription. Many owners find these wipes helpful for quick relief.

Give your cat a short diet trial. Switch to a limited‑ingredient formula for seven days, watching the skin each evening. Keep a simple log: date, food, any new ingredient, and what you see on the coat. If the rash fades, you may have found the trigger.

Consider an at‑home intolerance test if the itch persists despite the bath and diet trial. A test from UK Pet Food Intolerance can turn your notes into a lab‑backed report, pointing out the exact protein or additive that’s bothering your cat.

A cool compress can bring instant relief. Wrap a clean, damp cloth in a thin towel, chill it in the fridge for a few minutes, then gently press it on the itchy area for 5‑10 minutes. This simple trick can calm inflammation without any chemicals.
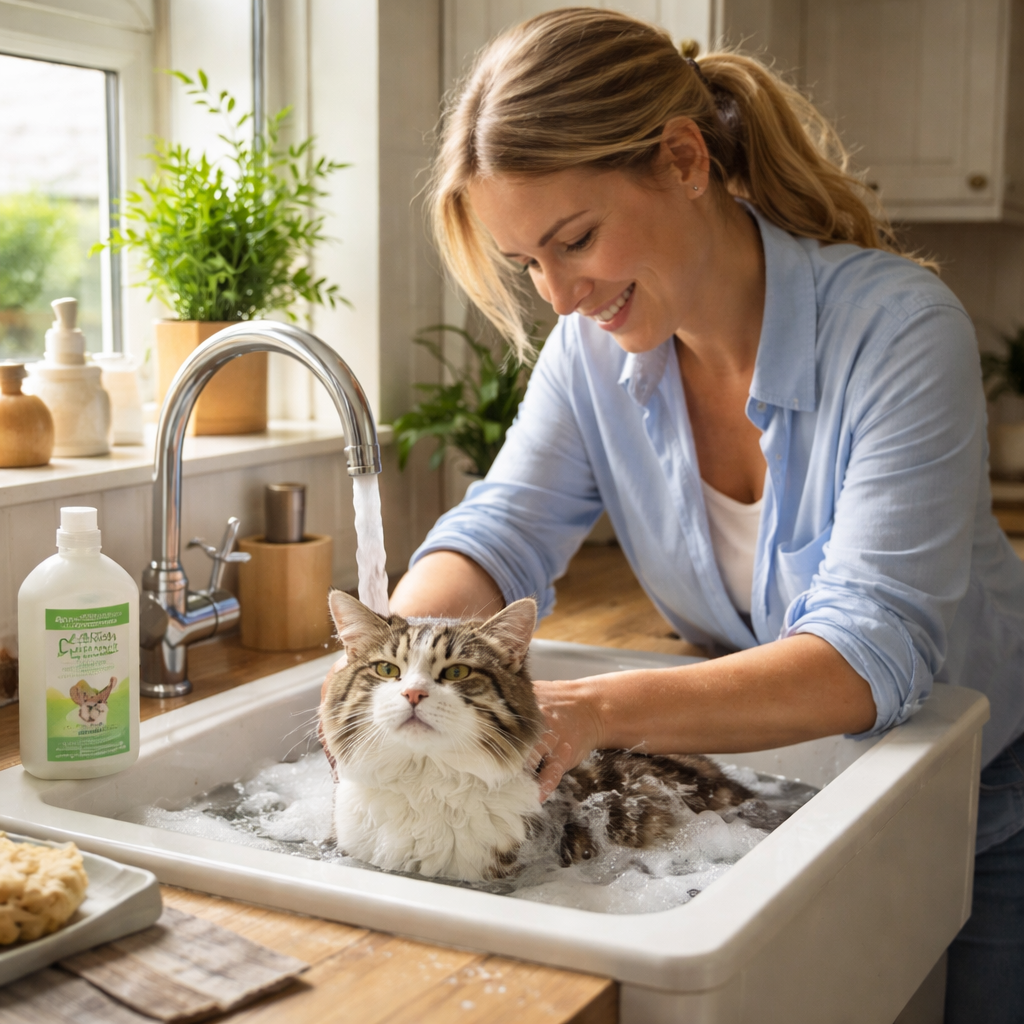
A photorealistic scene of a British homeowner gently bathing a cat in a kitchen sink, soft natural light, the cat looking relaxed, a bottle of hypoallergenic cat shampoo visible on the counter. Alt: cat itchy skin after eating uk home care.

Finally, keep the environment tidy. Regularly wash bedding, vacuum carpets, and wipe down feeding bowls. Reducing dust and residue helps stop secondary irritation.

If the skin still looks sore after two weeks, book a vet appointment. Home steps can ease mild flare‑ups, but a professional check is essential for chronic problems.

When to Seek Veterinary Advice

If your cat keeps scratching right after a meal, you might wonder whether it’s time to call the vet.

A few red spots that fade in a day or two are usually okay, but anything that lasts longer needs professional eyes.

Here’s a quick checklist: if you see any of these, book an appointment today.

Persistent redness or swelling: the skin stays pink or puffy for more than 48 hours.

Excessive grooming: your cat spends more than a few minutes each session licking or biting a spot.

Open sores or oozing: you can see crusts, blood, or a foul smell.

Changes in appetite or litter habits: the cat eats less, vomits, or has soft stools alongside the itch.

Fever, lethargy or weight loss: the cat feels weak, sleeps a lot, or seems to be dropping pounds.

Veterinarians will first rule out common culprits like fleas, mites or bacterial infections. The PDSA notes that these are the usual first steps before looking at food sensitivities PDSA explains. If the vet finds no parasite or infection, they may suggest a food trial or an at‑home intolerance test to pinpoint the trigger.

If the vet prescribes medication, follow the dosage exactly and keep a log of any side‑effects. Note when the itch eases or flares again, that record helps the vet decide if diet, medication or a mix is best.

A quick phone call can also give you advice on whether the cat needs an urgent visit or can wait a day or two. Vets often ask for the same log you’ve been keeping, so having it ready speeds up the process.
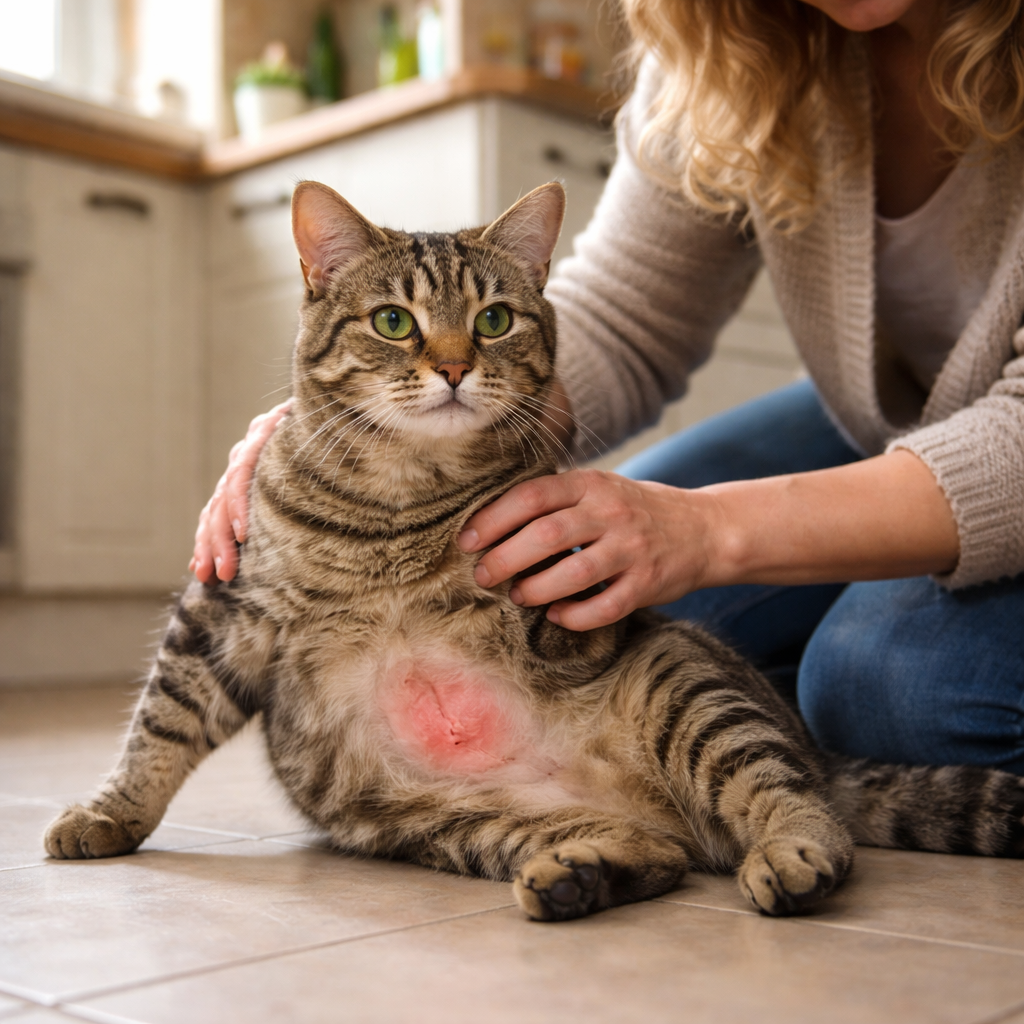
A photorealistic scene of a British cat sitting on a kitchen floor, its skin showing mild redness on the belly, a concerned owner gently patting it, soft natural light from a window. Alt: cat itchy skin after eating uk, owner checking skin.

Bottom line: don’t wait for weeks. If any of the warning signs above appear, get a vet in within a couple of days. Early help stops the problem from getting worse and gets your cat back to a calm, happy life.

Conclusion

Dealing with cat itchy skin after eating uk can feel like a mystery you never solve. But you’ve now got the basics: watch, log, test, and act.

Keep a simple diary for a week. If the rash eases when you switch to a limited‑ingredient diet, you’ve likely found the trigger.

When the itch stubbornly returns, a home food intolerance test from UK Pet Food Intolerance can turn those notes into clear, lab‑backed guidance.

Remember, a vet’s eye is still the gold standard for any persistent problem. Use the vet’s advice together with your own observations for the best outcome.

So, what’s the next step? Grab a notebook, note the next meal, and watch the skin. A few small actions today can spare weeks of scratching tomorrow.

FAQ

What causes my cat’s itchy skin right after a meal?

Most of the time the itch is a food intolerance. When a cat eats a protein or additive it can’t break down, the gut makes gas and the skin reacts. Common triggers in the UK are cheap chicken kibble, fish meals, dairy treats and grain fillers like wheat or corn. The reaction can show up within minutes or a few hours, so watching the timing helps you spot the link.

How long should I keep a food diary to see if the diet is the problem?

Keep a simple diary for at least seven days. Write down the date, time, brand, flavour and any new ingredient, then note any itch, red patch or extra grooming you see in the next hour. A week gives enough repeats to spot patterns, especially if you rotate between a few foods. If the same meal shows up every time the skin flares, you’ve likely found the trigger.

What should I do if the itch continues even after switching to a limited-ingredient diet?

When the rash stays after a diet change, it may be a hidden additive or a secondary issue like parasites. First, check the new food label for any colourings, flavour enhancers or small amounts of grain. If nothing obvious shows, a home food intolerance test from UK Pet Food Intolerance can give lab-backed results that point out the exact protein or additive causing trouble.

Can stress or environment cause itchy skin, or is it always food?

Stress can make a cat scratch more, but it usually won’t cause a red rash right after a meal. Environmental irritants like dusty bedding or harsh cleaning sprays can add to the problem, especially if the skin is already sensitive. Look at the whole picture: if the itching appears only after eating, food is the likely cause; otherwise, check the litter, grooming tools and any recent changes at home.

Is an at-home test reliable, and do I need a vet’s go-ahead?

An at-home test is reliable for spotting which proteins or additives the cat reacts to, because a lab analyses the stool sample with proven methods. It isn’t a medical diagnosis, so you still need a vet to rule out infections, mites or other skin diseases. Use the test results as a guide for the next diet trial, then bring the log and report to the vet for a full check-up.

How often should I re-test if my cat’s diet changes?

If you switch to a new food, wait at least four weeks before re-testing. That gives the gut time to settle and any lingering skin signs to fade. After the trial, collect a fresh stool sample and send it in. Regular re-testing every few months can help you catch new sensitivities, especially if you add treats or change the protein source often.

Understanding cat food intolerance test results: A practical guide for UK cat owners

You can finally stop guessing why your cat’s tummy is upset.

Most owners try new foods, watch for changes, and still end up with loose stools or endless scratching. The missing piece is clear data, and the cat food intolerance test results.

When the lab finishes the analysis, you get a simple report. It lists the ingredients that sparked a reaction and grades them as low, medium or high risk. No jargon, just colour‑coded boxes and short notes that tell you what to avoid.

With that list in hand, you can build an elimination diet that targets the flagged foods. Cut them out for a few weeks, then re‑introduce one by one. The difference shows up fast, and fewer trips to the vet, calmer evenings, and a happier feline.

If you’ve watched your cat gag after a wet meal or seen patches of dry skin after a dry kibble, you know how frustrating the cycle can be. It feels like you’re chasing a moving target, and every new brand feels like a gamble.

That’s why many UK pet owners choose an at‑home test from UK Pet Food Intolerance. The kit arrives in the post, you collect a tiny stool sample, and the accredited lab does the heavy lifting.

In the next part of this guide we’ll walk through how to read the numbers, what each risk level means, and the next steps to tweak your cat’s diet without a lot of guesswork.

Step 1: Collect a sample of your cat’s stool

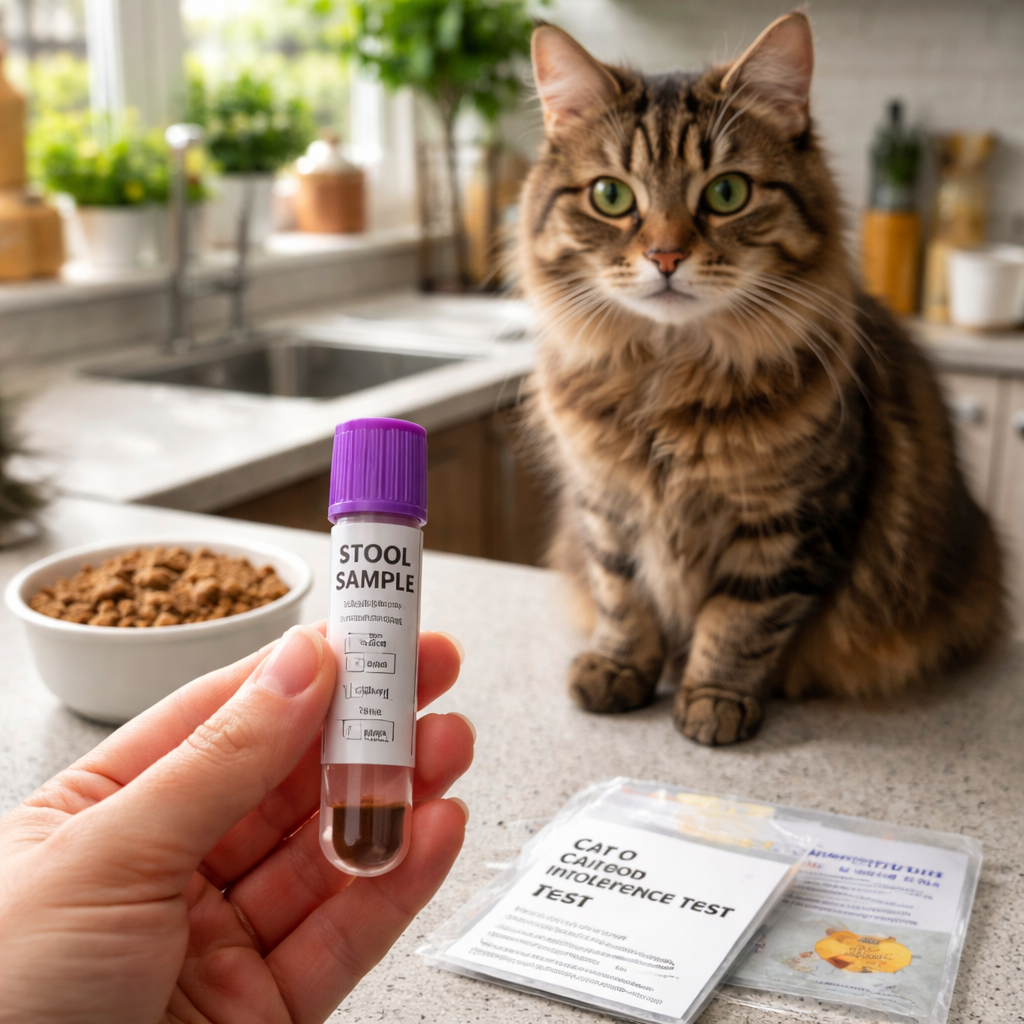
First thing you need is a tiny bit of stool. It sounds odd, but the lab only needs a pea‑size amount to spot any food reactions.

Grab a clean disposable glove or a piece of fresh parchment paper. Gently lift the fresh drop from the back of the litter tray, you’ll see it as a moist, brown clump. If the stool looks dry, wait a few minutes after your cat uses the box; fresh is best.

Tip: Keep the sample in a small sealable bag or the tube that comes in the kit. Label it with the date so you don’t mix it up later.

When you’ve sealed the sample, store it in the fridge for up to 24 hours. The cold slows any bacteria that might change the result.

Now you’re ready to send it off. The UK Pet Food Intolerance kit includes a pre‑paid envelope, just drop it in the post.

Make sure the sample isn’t contaminated by cat litter. Use a clean spoon or the little spatula that comes with the kit. Avoid touching the stool with bare hands, gloves keep you safe and keep the sample pure.

If you miss the fresh window, you can still collect a sample but the lab may note a slight delay. It’s better to wait for the next bathroom break than to guess.

When you drop the envelope in the post, keep the receipt. Most services track the parcel so you know when it’s on its way.

While you wait for the results, keep a simple food diary. Note what your cat eats each day and any signs like itching or loose stools. This will make the colour‑coded report easier to act on.

If you’re wondering how this kind of home test stacks up against other health checks, you might find this practical comparison guide useful.

practical comparison guide shows how different tests can be weighed for cost, comfort and accuracy.

Once the lab finishes, you’ll get clear cat food intolerance test results. The report will colour‑code each ingredient and tell you whether it’s low, medium or high risk.

A photorealistic image of a hand holding a small cat stool sample tube on a kitchen counter, with a cat nearby. Alt: cat food intolerance test results sample collection.

Step 2: Choose a reliable at‑home test kit

Now that you’ve got a fresh sample, the next move is picking the kit that will actually give you trustworthy cat food intolerance test results. Not every kit is created equal, and the difference shows up in the lab’s report quality and how easy the process feels for you.

First, look for a kit that says the sample will be analysed by an accredited lab. That badge means the lab follows strict quality standards, so the numbers you get back aren’t just guesswork. A common sign is a reference to ISO‑17025 or a UKAS‑accredited facility.

Second, check what the kit includes. You’ll want a pre‑labelled tube, a clear instruction sheet, and a prepaid box for mailing. Some kits also throw in a short video guide – that can be a lifesaver if you’re nervous about handling stool.

Third, compare the list of ingredients the lab tests for. A good kit covers the usual suspects – chicken, fish, dairy, wheat, and novel proteins – plus a few less‑common items like legumes or additives. If the list feels short, you might miss a hidden trigger.

Here’s a quick three‑step checklist you can print and stick on the fridge:

  • Accredited lab badge visible on the product page.
  • All‑in‑one packaging (tube, label, prepaid box).
  • At least 20‑30 common food items tested.

For UK pet owners, the Home Test for Cat Food Intolerance UK: A Step‑by‑Step Guide walks through exactly what to expect when you order, how the kit arrives, and what to do once you’ve packed it up.

Tip from a lab tech: store the tube upright in the fridge until you ship it. That keeps the sample from drying out and gives the lab the best chance to spot subtle sensitivities.

If you’re still unsure, imagine a scenario where you pick a cheap kit that only tests five ingredients. You might get a clean report, but the real culprit stays hidden – you’ll end up back at square one, chasing symptoms.

On the flip side, a well‑rounded kit may cost a bit more, but it saves you time, vet visits, and the stress of guessing. Think of it as an investment in peace of mind.

Need help deciding which kit fits your budget? Tools like Velio can show you data trends on popular pet‑care products, letting you see what other UK owners are choosing.

And if you ever switch hobbies, you might enjoy reading about buying a pontoon boat – Blackbeard Marine has a tidy guide that’s easy to skim.

Step 3: Send the sample and interpret the results

Seal the tube, pop it in the prepaid box, and drop it in the post. The lab asks for a quick turnaround, so ship it the same day if you can.

Make sure the box stays upright in the mailbox, the tube will stay upright inside and won’t leak. If you use a drop‑off point, hand the parcel to the clerk and ask them to keep it upright.

The lab extracts DNA and runs a panel of about thirty common ingredients. Most owners hear back in 7‑10 days with a colour‑coded PDF you can open on any device.

What the report looks like

The page is split into three columns: ingredient, risk level, and a short note. Green means low risk, amber medium, red high. A quick glance tells you which foods to avoid.

For a deeper dive, the guide on interpreting test results explains how the lab scores each ingredient and why they use those thresholds.

Reading the risk levels

Red indicates a strong antibody response, that ingredient is likely behind the tummy upset or itchy skin. Amber suggests a moderate response; you may want to try an elimination trial. Green means the ingredient is probably safe, but keep an eye on any new reactions.

Practical tips

Write the red and amber foods on a sticky note and stick it on the fridge. When you shop, scan the label and cross‑check, it saves you from buying the wrong kibble.

Start an elimination diet with one red ingredient at a time. Keep a simple diary: day, food, any change in stool or skin. After two weeks you’ll see if the symptom eases.

Beware of cross‑reactivity, proteins that look alike can trigger a similar response. The report flags potential cross‑reactivity, so treat those amber items with extra caution.

Next steps

Once you’ve removed the red foods and tested the ambers, you’ll have a clearer picture of what your cat can tolerate. Build a balanced, low‑risk diet that keeps the tummy calm and the coat shiny.

If you hit a roadblock, a quick call to your vet with the report in hand can help decide whether a follow‑up test or a specialist referral is needed.

Step 4: Adjust your cat’s diet safely

Now that you know which ingredients light up red or amber, it’s time to build a new bowl that keeps the tummy calm and the coat shiny.

Pick a safe baseline

Choose a limited-ingredient wet or dry food that contains none of the red items. Look for a label that lists only one protein source and a short grain list. If the list still showed a red ingredient, swap it for a plain turkey or rabbit recipe that the test marked green.

Give the same amount each day so you can spot changes. Too much or too little can mask a reaction, so use the feeding guide on the bag.

Swap out the red foods

Remove every red ingredient from every meal. That means no treats, no supplements, no occasional table scraps that hide chicken or dairy. Keep the diet simple, one brand, one flavour, no extra bits.

Trial amber foods one at a time

After two weeks on the baseline, pick one amber ingredient to test. Add a tiny amount, a spoonful of a new kibble or a few bits of a novel protein, for three to five days. If your cat’s stool stays firm and the skin looks calm, keep that food for a week before moving to the next amber.

Treats, dental chews, and even wet food gravy can hide a red protein. Read the full ingredient list before you add anything new.

Track what you see

Write down the date, the food you added, and any change in poop, gas, or itchiness. A one-line diary works fine, “Day 8: added salmon, no change”. After each trial, look for a pattern. If a symptom spikes, pull that food out and stay with the baseline.

It can take a week or more for a gut to settle after a change. If you see a flare up, go back to the baseline and wait a few days before trying the next test food.

Phase Action Tip
Baseline Feed only green-rated food Use the same brand for two weeks
Amber test Add one amber ingredient at a time Wait 3‑5 days, then observe
Review Check diary for symptoms Remove any food that triggers a reaction

When to call the vet

If after a full cycle you still see loose stools or itchy patches, it’s time to show the cat food intolerance test results to your vet. They can suggest a specialist diet or run further blood work.

Stick to the plan, keep the diary honest, and you’ll soon see a calmer cat and a cleaner litter box.

Step 5: Monitor improvements and know when to seek veterinary advice

Now the test results are in, it’s time to watch how your cat reacts. The goal is simple – see if the gut calms down and the skin stops itching.

Watch the diary for trends

Keep the one‑line diary you started earlier. Write the date, the food you gave, and any change in stool or skin. A line like “Day 12: new salmon treat, no change” is perfect.

After a few days, look for a pattern. If the stool stays firm for three days straight, you’re probably on the right track. If you spot a spike – loose poo or a new rash – note it and pull that food back.

Know what a true food intolerance looks like

Food intolerance can show up on the first bite, unlike an immune‑driven allergy that may need several exposures. That difference matters when you decide if a reaction is real or just a coincidence. VCA Hospitals explains that intolerance often causes digestive upset, while allergies tend to cause recurring skin signs.

Use that knowledge to decide if you need a vet. If the diary shows only mild, occasional changes, you can keep tweaking at home.

When to pick up the phone

Call the vet if any of these happen:

  • Loose stools that last more than a week.
  • Itchy patches that don’t improve after two weeks on the new diet.
  • Vomiting, weight loss, or severe lethargy.

Bring the cat food intolerance test results and your diary to the appointment. The vet can rule out an allergy, run blood work, or suggest a specialised diet.

Set a realistic timeline

Give each change at least five days. The gut needs time to settle, especially after a protein switch. If you rush, you’ll miss the real signal.

And remember – you don’t have to do it all alone. Many UK pet owners find it helpful to share their diary with a trusted friend or a local cat‑care forum for extra eyes.

When you see steady stools and a calm coat, you’ll know the plan works. If not, the vet’s advice will point you to the next step.

A photorealistic scene of a British homeowner sitting at a kitchen table, writing in a simple diary while a relaxed cat watches from a nearby chair. The diary shows dates, foods, and notes on stool consistency. Alt: cat food intolerance test results monitoring diary in a UK home setting.

Conclusion

You’ve seen how a clear cat food intolerance test results report can cut through the guesswork. By swapping out red‑flagged ingredients and watching a simple diary, most owners spot calmer tummies and softer coats within weeks.

So, what’s the next step? Grab your test kit, send the sample, and let the lab do the heavy lifting. Then use the colour‑coded guide to build a baseline diet that only contains green‑rated foods.

If a symptom pops up again, the diary will point you straight to the culprit – no more endless trial and error. And remember, a quick call to the vet is never a bad idea if things don’t improve.

Ready to take the uncertainty out of feeding time? A reliable at‑home test from UK Pet Food Intolerance makes it easy to start the process today.

Keep the diary short – a line like “Day 10: new kibble, no change” is enough. Over time you’ll see a clear pattern without getting lost in details.

Frequently Asked Questions

What do cat food intolerance test results actually show?

The report lists each ingredient the lab tested and gives it a risk colour – green, amber or red. Green means the cat is unlikely to react, amber signals a possible mild reaction, and red points to a strong immune response that could be causing tummy upset or itchy skin. You’ll also see a short note on why the lab flagged the item.

How quickly should I act on red‑flagged ingredients?

When you see a red label, start removing that ingredient from every meal right away. Swap the kibble or wet food for a brand that doesn’t list the protein or additive. Keep the diet simple for at least two weeks so you can see if the symptoms settle. If they do, you’ve likely found the main trigger. You can also note the change in your diary to confirm the improvement.

What does an amber rating mean for my cat’s diet?

Amber tells you the cat may have a mild sensitivity. It’s worth testing the ingredient one at a time. Add a tiny spoonful of the food for three to five days while you keep the rest of the diet unchanged. Watch the stool and skin; if you notice any flare‑up, pull that food back and keep it off the regular menu.

Can I trust the colour‑coded guide from the test?

The colour‑coded guide is based on lab analysis that follows ISO‑17025 standards, so it’s as reliable as most accredited tests. It gives you a clear visual cue, which helps you spot problem foods fast. Just remember it’s a guide – you may still need a vet’s opinion if symptoms linger after you’ve removed the red and amber items for your cat today.

Do I need to repeat the test after changing the diet?

You don’t have to retest unless new symptoms appear or you add a fresh protein source. Most owners find that a single set of results is enough to guide the first elimination plan. If you later introduce a novel ingredient and see a reaction, you can send another sample to confirm whether that new food is also a trigger.

What should I do if symptoms persist despite following the test advice?

If the diary still shows loose stools or itchy patches after you’ve removed all red foods and tried the amber ones, call your vet. Bring the test report and your notes so the vet can decide whether further blood work or a specialised diet is needed. Sometimes an underlying health issue unrelated to food can be the cause for your cat.

Understanding Cat Food Intolerance Test Price: A Practical Guide

Finding out how much a cat food intolerance test costs can feel like hunting for a hidden clue in a maze of pet‑care ads. The truth is simpler: you pay for a kit, send a small fur sample, and get a clear list of foods to avoid.

First, set a budget. Most at‑home kits sit between £40 and £80, depending on how many ingredients they check. A cheaper kit might test 100 items, while a premium one covers 200‑plus. Knowing your limit helps you avoid surprise spend.

Second, compare what you get for the price. Look for labs that are accredited, a quick turnaround (often under two weeks), and online results that explain each ingredient’s risk level. Some kits also include a handy diet‑plan sheet – that’s extra value you don’t want to miss.

Third, factor in any hidden costs. Shipping is usually free in the UK, but if you need a replacement sample or extra testing, those fees can add up. Make a quick checklist: kit price, shipping, possible retest fees, and any optional add‑ons.

Fourth, read real‑world feedback. Owners often share whether the test helped spot hidden triggers for itching or loose stools. A practical example: a cat owner tried a £55 kit, spotted dairy as a culprit, and swapped to a dairy‑free diet, seeing calmer skin in a week.

Finally, use a trusted guide to walk through the whole process. Our cat food intolerance test cost guide breaks down each step, from buying the kit to interpreting the results, so you can feel confident you’re getting the best bang for your buck.

Step 1: Identify Common Symptoms of Food Intolerance

First, watch your cat for signs that something in their diet might be off. Look for loose stools, frequent vomiting, or a sudden rise in gas. Those clues often show up before a rash or itch.

Next, note any skin changes – a patch of dry fur, an itchy chin, or a red belly. Even a subtle scratch can hint at an underlying food trigger.

Pay attention to behaviour too. If your cat seems less playful or starts hiding more, it could be gut discomfort. A quick log of meals and symptoms helps you spot patterns.

Try a simple checklist:
• Stool consistency
• Frequency of vomiting
• Skin irritation
• Energy levels
Keep the list short and update it daily.

Seeing a pattern? You’re ready to consider a cat food intolerance test. Knowing the cat food intolerance test price helps you plan the next step without surprise costs.

When you’ve gathered enough clues, compare a few test kits. Look for labs that are accredited, give results within two weeks, and break down each ingredient’s risk level.

Step 2: How At‑Home Tests Work and What They Measure

First, you collect a few strands of your cat’s hair – no need to pull from the root. Slip the strands into the prepaid bag, seal it, and pop it in the post. The kit’s lab then analyses the sample against a list of common ingredients.

What the lab looks for is a reaction‑level score for each ingredient. A strong score means the cat’s gut reacts badly, a mild score suggests it can tolerate the food in small amounts, and no score means the ingredient is likely safe.

So, how does this help you with the cat food intolerance test price? Knowing exactly which items trigger a reaction lets you pick a diet that avoids costly trial‑and‑error purchases. You’ll spend less on food you end up tossing.

Here’s a quick step‑by‑step you can follow once the kit arrives:

  1. Register the kit online using the unique code inside the box.
  2. Gather 10‑15 hair strands from any part of your cat’s coat.
  3. Place the hair in the supplied bag, seal, and attach the prepaid label.
  4. Drop the parcel in the post. Results usually land in your inbox within 4‑5 business days.

What you get back is a simple PDF report. It groups ingredients into three levels – avoid, limit, and safe. That layout makes it easy to match the results with the labels on commercial cat foods.

One practical example (hypothetical): the report flags dairy powder as a strong trigger. You can then switch to a dairy‑free kibble, which often costs a similar amount but saves you the expense of ongoing skin creams and vet visits.

Want to know whether home tests are trustworthy? The BBC notes that many at‑home kits claim to work on hair samples, but scientific backing varies. It’s a reminder to choose a kit that’s accredited and transparent about its method.BBC on home intolerance testing

Quick comparison of what’s measured

Test component What it measures Typical turnaround
Hair sample Energetic response to each ingredient 3‑5 days
Ingredient list Severity level (avoid, limit, safe) Included in report
Result format PDF plus online dashboard view Immediate after analysis

Now you know exactly what the test does, how fast you’ll see the results, and why it can save you money in the long run. Ready to take the next step?

Step 3: Comparing Prices and What’s Included

Now that you know how the test works, it’s time to look at the cost side.

Most UK kits sit between £40 and £80, so write the base price down before you get distracted.

A good kit bundles the sample bag, prepaid post label and an online dashboard where you can view the PDF report.

Watch out for hidden fees for re‑tests or for buying a longer ingredient list later.

Quick checklist:

  • Kit price
  • Shipping cost (free is common)
  • Number of ingredients tested
  • Result format – PDF and online view

Some kits also throw in a diet‑plan sheet that helps you map out safe meals, a nice bonus if you’re new to feeding trials.

When you line up two kits, a £55 option that checks 150 items and gives an online dashboard usually beats a £45 kit that only lists 80 items in a plain PDF.

For example, a US‑based service lists a cat test at $69 that covers 143 foods and 49 non‑food items.AffinityDNA cat test details

Another provider shows prices from $96 to $146, with the top tier adding a “digital upgrade” that lets you unlock extra panels later.5Strands price tiers

UK Pet Food Intolerance packages the sample kit, free UK shipping, accredited lab analysis and a clear PDF plus online dashboard for around £60. That mix of price and what’s included often out‑values cheaper kits that charge extra for each extra ingredient.

Always verify that the lab is ISO‑17025 accredited, because that flag tells you the results meet recognised quality standards.

What’s the next step? Write the numbers in a table, match them against the checklist, and pick the kit that gives you the most insight for the money you’re ready to spend.

Remember, the cheapest price now can cost more later if you need extra tests or keep changing food.

Step 4: Interpreting Results and Next Steps

When the PDF lands in your inbox, the first thing to do is glance at the three colour bands – avoid, limit, safe.

Red means the cat reacted strongly. That ingredient probably sparks itching or gut upset. Green means you can keep it in the diet. Yellow says a little bit is OK, but watch for any flare-ups.

Got a long list of reds? Pick the top two and try a short elimination phase. Swap out those foods for a week and note any change in symptoms.

But what if the report shows only a few yellows and most greens? That usually means the current diet is already close to ideal. You can fine‑tune by rotating the yellow items and seeing which one still triggers a reaction.

Quick checklist

  • Write each ingredient and its colour on a sticky note.
  • Match the notes to the foods you buy – label the bags.
  • Plan a 7‑day trial for any red or yellow foods you want to test.
  • Log daily observations in the same diary you used for symptoms.

Remember, the test isn’t a medical diagnosis. If symptoms persist, a vet can run an IgE blood test or an oral food challenge – the gold standard explained by Oak Brook Allergists.how allergy test scores work

For a step‑by‑step guide on running the trial at home, the Nextmune lab PDF walks you through sample handling and feeding plans.official feline food trial guide

Once you’ve logged the results, compare them against your original symptom diary. If the red foods line up with the worst itching days, you’ve found a clear target.

Finally, decide how much you’re willing to spend on future kits. A basic kit may cost around £55, but a version that checks more ingredients can save you money in the long run by avoiding repeated trials.

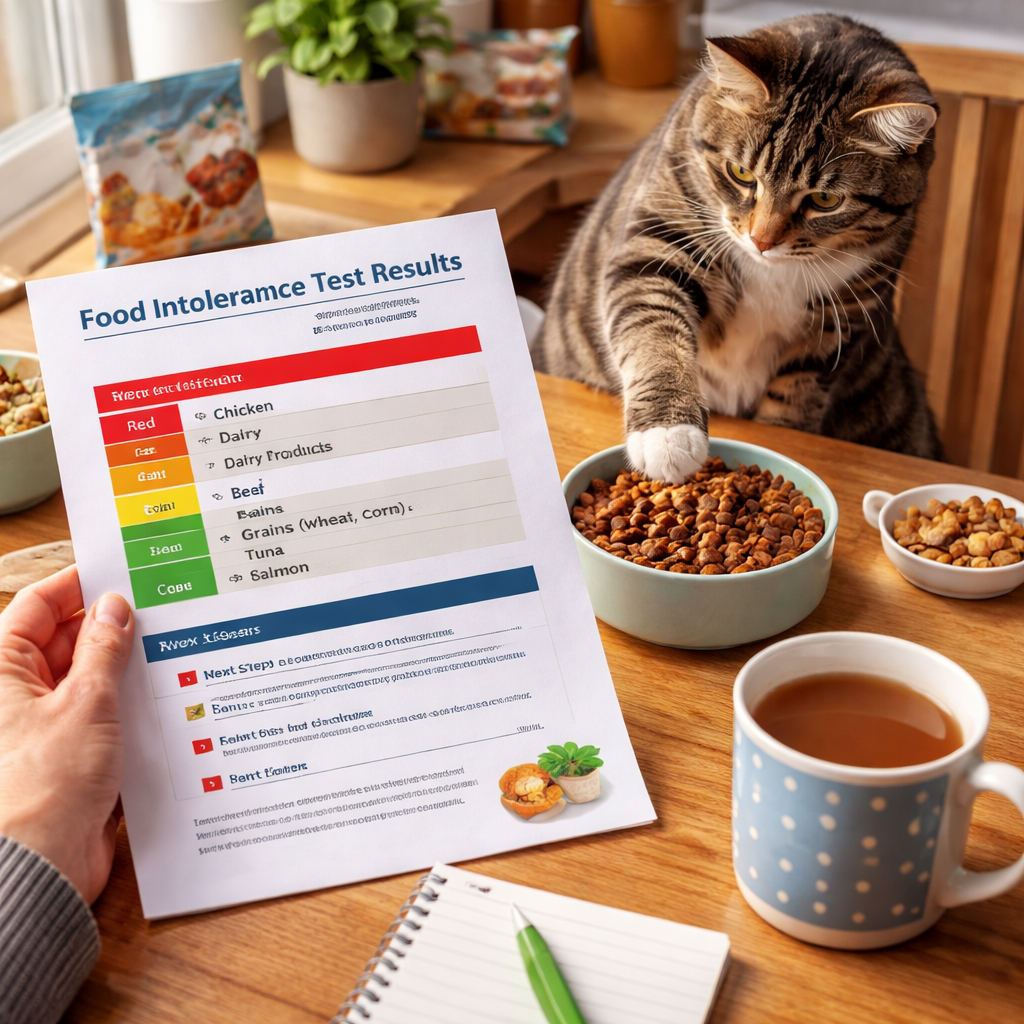
A photorealistic scene of a British kitchen table with a cat owner holding a printed test report, colourful stickers marking red, yellow, green ingredients, a mug of tea, and a curious cat pawing at a bowl of food. Alt: cat food intolerance test results and next steps visual guide.

Frequently Asked Questions

What does the cat food intolerance test price include?

The cat food intolerance test price covers the sample bag, a prepaid return label, lab analysis of your cat’s hair, and a PDF report that grades each ingredient as avoid, limit or safe. You also get an online dashboard where you can view the scores and a simple guide on how to set up an elimination diet. No extra lab fees are hidden.

How long does it take to get results after I send the sample?

The results usually arrive in your inbox within four to six business days after the lab receives the hair sample. Some kits promise a faster online view once the analysis is done, but the PDF is the same final document. You’ll get a clear colour-coded list so you can start adjusting meals without waiting weeks for a vet appointment.

Is the test worth the cost for a cat with mild itching?

If your cat shows occasional itching or a few soft stools, the cat food intolerance test price can be a sensible first step. The test pinpoints likely triggers, letting you swap out one ingredient at a time instead of overhauling the whole diet. Many owners find that a £55-£70 kit saves money on vet visits and trial-and-error food purchases.

Can I use the test results to change my cat’s diet immediately?

Once you have the colour-coded report, start by removing any red-listed foods for a week and watch the diary you kept earlier. If symptoms ease, re‑introduce the same food in small amounts to confirm the link. The guide that comes with the kit shows how to plan these short trials, so you don’t guess and you’ll feel more confident about the diet.

Are there hidden fees beyond the test price?

There are no surprise charges hidden in the cat food intolerance test price, but you should check a few things before you buy. Make sure the kit includes free UK postage and that any optional add-ons, such as extra ingredient panels, are clearly priced. If you need to send a replacement sample, some providers may charge a small fee, so read the fine print.

How often should I repeat the test?

The test isn’t a one-time licence; you may want to repeat it if your cat’s diet changes or new symptoms appear. A good rule of thumb is to run another test after six months of a stable diet, or sooner if you introduce a novel protein. Re-testing helps keep the colour-coded list up to date and avoids hidden allergens.

Conclusion

By now you see that the cat food intolerance test price is just one piece of the puzzle. A clear, colour‑coded report lets you cut out the foods that spark itching or loose stools without guessing.

Pick a kit that covers enough ingredients without hidden fees. The £40‑£80 range fits most UK homes, and free postage keeps the total tidy.

When the results land, start a short elimination phase. Remove the red‑flag foods for a week, watch the diary you’ve kept, then re‑introduce them in tiny bites. If the symptoms settle, you’ve found a win.

Remember, the test isn’t a medical diagnosis – it’s a guide that helps you and your vet focus on the right diet changes. With a bit of patience, you’ll save on vet visits, food waste, and the stress of endless trial‑and‑error.

Ready to take the next step? A quick look at the UK Pet Food Intolerance site helps you match price, coverage and convenience.

Understanding Cat Food Intolerance Test Cost UK: A Practical Guide

You’ve probably stared at the price tag of a cat food intolerance test and wondered if it’s worth it. The truth is, the cost can feel high, but it’s a clear step toward ending endless bouts of upset tummy, itchy skin, or puzzling gas.

First, list the symptoms you see – loose stools, scratching, vomiting – and note how long they’ve lasted. Next, set a budget. Tests range from basic kits that cover around 60 items to premium versions that check up to 200 triggers. A basic kit usually sits under £70, while the premium option can run close to £130. Both include postage, lab work, and a report delivered to your inbox.

Then, compare what you get for the price. Look for a kit that offers a quick turnaround (most deliver results in 2‑5 days) and clear guidance on how to adjust your cat’s diet. If you’re unsure which level you need, a good rule of thumb is to start simple – many cats react to just a few common ingredients.

Want a deeper dive into what each cost covers? Check out Understanding uk pet intolerance test cost: A Practical Guide for UK Pet Owners for a breakdown of fees, lab work, and result timelines.

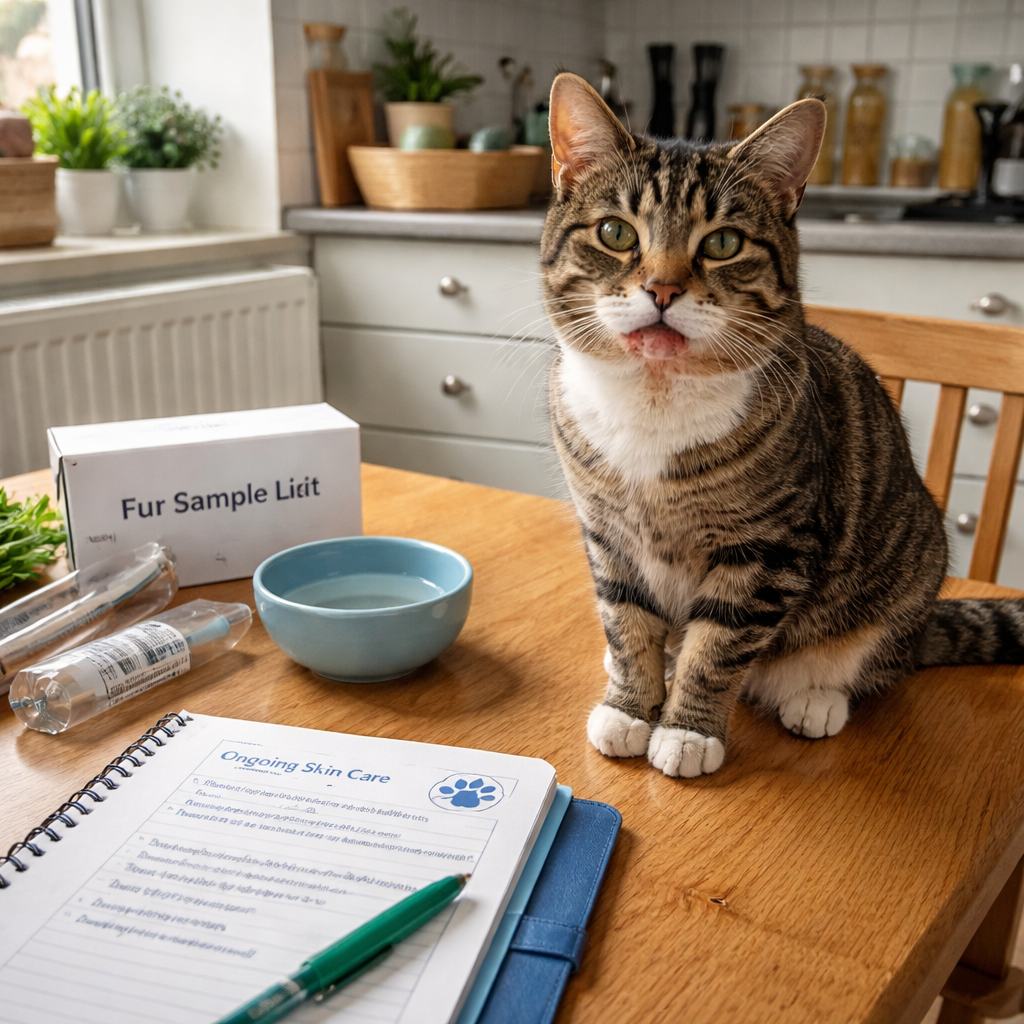
Once you’ve chosen a kit, follow the simple at‑home steps: collect a few strands of fur, seal the sample, and send it off. Within days you’ll have a clear list of foods to avoid, letting you start a targeted diet that can calm your cat’s discomfort.

Step 1: Recognise the Signs of Food Intolerance in Your Cat

First thing you’ll notice is a pattern. Your cat might be scratching more than usual, or you may spot a few loose stools after meals. It can be easy to blame a stray hairball, but when the same signs repeat over several days, it’s worth pausing.

Look for these tell‑tale clues:

  • Vomiting that isn’t linked to a sudden diet change
  • Itchy skin, especially around the ears or belly
  • Frequent gas or a sour smell in the litter box
  • Weight loss despite a normal appetite

If any of these pop up, write them down. A simple notebook or phone note works. Note when each symptom started and what you fed your cat that day. This little log becomes the backbone of any test you decide to try.

Now, a quick reality check: not every upset tummy means intolerance. Parasites, infections, or stress can cause similar signs. That’s why a vet visit is still the first step if the problem is severe or lasting more than a week.

Assuming you’ve ruled out urgent medical issues, the next move is to watch the diet. Many cats react to common ingredients like dairy, wheat, or certain fish proteins. Spotting a link between a new treat and a flare‑up can save you time and money.

Here’s a handy habit: after each meal, glance at the litter box and give a quick pat to your cat’s belly. If you see a change, jot it. Over a week you’ll start to see a pattern emerge.

Does this feel like a lot? It isn’t. You’re just being a detective for your pet’s comfort.

Below is a short video that walks you through the basics of spotting intolerance signs and what to note before you order a test.

When you’ve gathered enough clues, you’ll be ready to choose the right cat food intolerance test cost uk option that fits your budget and needs. The clearer your notes, the clearer the test results will be.

Step 2: Compare Test Options and Their Costs

Now that you’ve logged the symptoms, it’s time to look at the kits on the market and see what you actually pay for. The price tag can feel steep, but breaking it down helps you decide what you need and what you can skip.

Most cat food intolerance tests fall into three buckets. The first is a basic kit that checks around 60 common triggers – things like chicken, dairy and wheat. It usually sits under £70 and includes postage, lab work and a PDF report.

The middle tier expands the panel to roughly 200 items, covering exotic proteins, grain‑free additives and a few environmental allergens. Expect to spend close to £130. You still get a quick turnaround (2‑5 days) and clear guidance on how to tweak the diet.

At the high end some providers offer a premium service that looks at up to 300‑plus ingredients, plus a detailed elimination guide. Those can climb toward £180, but they also promise the most comprehensive picture if your cat reacts to multiple foods.

Here’s a quick way to compare:

Option Items Tested Typical Cost Result Time
Essential Kit ~60 common foods £70 – £80 2‑5 days
Standard Kit ~200 ingredients £120 – £140 2‑5 days
Premium Kit 300+ items + elimination guide £170 – £190 48 hours – 5 days

Tip: If you’ve only seen a handful of symptoms, start with the essential kit. Many cats only react to one or two proteins, so a larger panel may just add cost without extra value.

What about hidden fees? Some kits charge extra for express shipping or for a printed hard‑copy report. Always read the fine print before you click ‘Buy’. A good rule of thumb is to ask yourself whether the added speed or paper copy will actually change how you act on the results.

For a real‑world price snapshot, Which? notes that home food intolerance kits typically range from £70 to £200, with cheaper hair‑sample kits often lacking clinical validation.Which? price guide

So, what’s your next move? Grab a notebook, pick the kit that matches the symptom severity you’ve logged, and place the order. Once the sample is in the lab, you’ll have a clear list of foods to avoid – and a budget you actually understand.

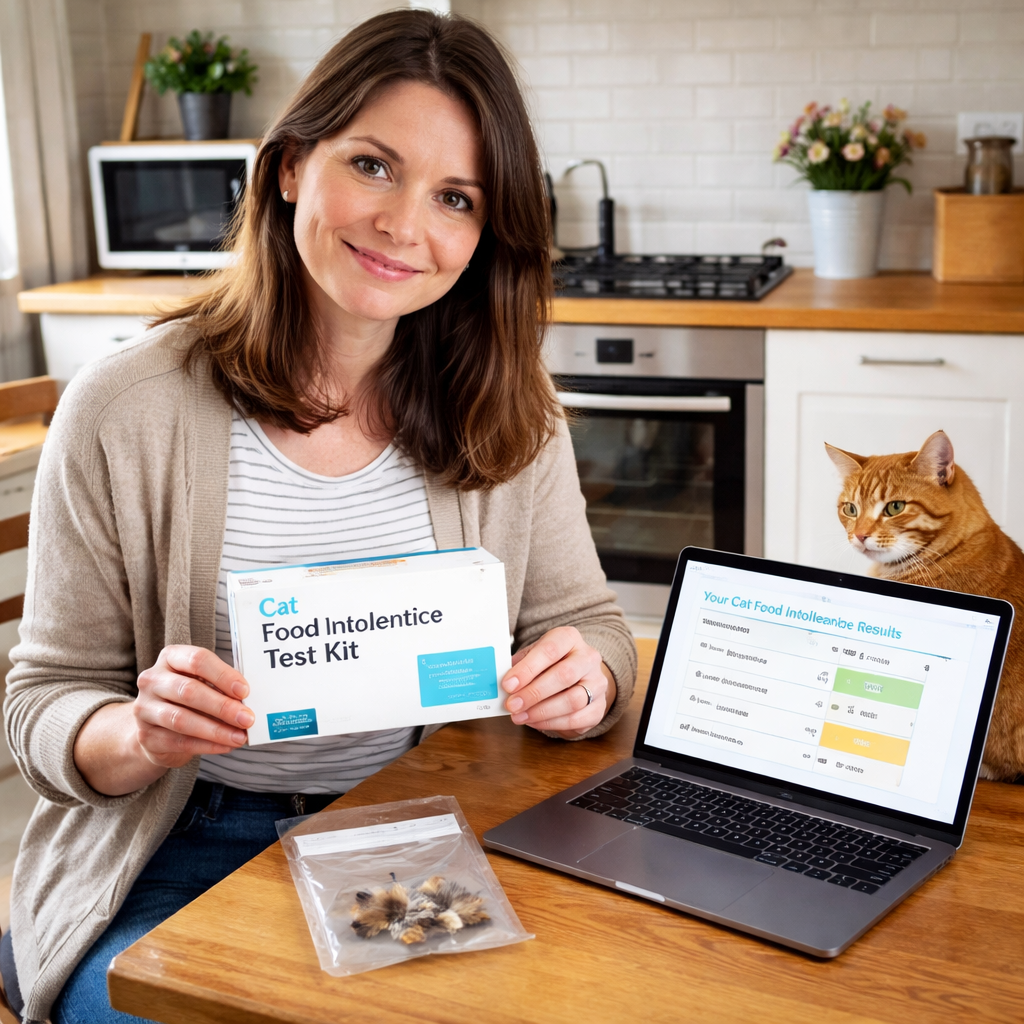
A photorealistic scene of a UK homeowner sitting at a kitchen table, holding a small cat food intolerance test kit box and a notebook of symptom notes, soft natural light through a window, British kitchen details visible. Alt: cat food intolerance test cost uk visual guide

Step 3: How to Use an At‑Home Cat Food Intolerance Test

Now that you’ve got the box, let’s walk through what you actually do. No fancy lab gear, just a few simple steps you can do at the kitchen table.

Gather your kit

Open the package and lay out the tube, the sealable bag, the instruction sheet and a pen. Make sure you have a clean surface and a pair of tweezers if the kit includes them. A quick glance at the official sample guide helps you know where each part goes.

Collect the fur sample

Pick a spot where your cat likes to groom – the chin, cheek or back works well. Use the tweezers to pull out 4-5 fine strands of fur. Try to get hair that still has a bit of skin attached; that gives the lab the best chance to detect any reaction.

Seal and send

Drop the strands into the small tube, snap the lid shut and place the tube into the pre-paid envelope. Seal the envelope tightly and tape it if you feel it needs extra security. Most providers ship the sample to a UK-based accredited lab within two business days.

Track the shipment

Write the tracking number on your notebook – the same place you logged your symptoms. Knowing when the sample is on its way lets you plan the diet change ahead of the result.

Read the results

Within 2-5 days you’ll get an email with a clear list of foods your cat reacts to. The report usually groups items into “high”, “moderate” and “low” sensitivity. Use the list to swap out the problematic ingredients first – you don’t need to overhaul the whole diet at once.

Tip: Keep a simple food diary for the next two weeks. Note each new ingredient you try and any change in your cat’s behaviour. This makes it easy to confirm that the test findings line up with real‑world improvement.

Avoid common pitfalls

Don’t wash the fur before you cut it, soap can hide the proteins the lab is looking for. Also, try not to collect hair that’s been sitting in a litter box; it may be contaminated with dust or food particles. Finally, send the sample as soon as possible; a delay of more than a week can reduce accuracy.

Step 4: Interpreting Results and Planning the Next Diet Change

When the email lands, you’ll see three colour‑coded groups – high, moderate and low. That’s your map. The higher the rating, the sooner you should drop that ingredient.

Match the list to what you feed

Grab your food diary. Does the high‑sensitivity list include chicken? If you’re still feeding a chicken‑based kibble, swap it for a novel protein like rabbit. If the list flags wheat but you use a grain‑free wet food, you’re already safe there.

Plan a short‑term elimination trial

Pick one “high” item and replace it with a bland, single‑protein diet for 7‑10 days. Keep water plain – no milk or broth. Track any change in stool, itching or energy.

FirstVet explains that a strict elimination diet helps confirm the trigger and avoids accidental re‑exposure food‑trial guide. Stick to the new food, no treats, no table scraps.

Watch for setbacks

If symptoms improve, you’ve likely hit the right spot. If they stay the same, move to the next high‑sensitivity ingredient. Keep the diary tight – note the day you made the switch and any tiny flare‑up.

Don’t rush to change everything at once. A step‑by‑step approach lets you see which change actually helped, saving you from unnecessary diet overhauls and extra cat food intolerance test cost uk later on.

Plan the next diet change

Once you’ve confirmed a culprit, look for a commercial hypoallergenic diet that omits it. Many UK brands label “limited ingredient” or “hydrolysed protein” on the bag. If you prefer homemade meals, work with a vet to keep the nutrition balanced.

Tip: Keep a spare bag of the new diet on hand. Running out forces a slip‑up and can reset the trial.

Remember, the goal isn’t to make life harder for your cat. It’s to give you a clear, affordable path forward – one that fits your budget and your cat’s palate.

When you’ve settled on a safe diet, you can stop worrying about the next cat food intolerance test cost uk and focus on enjoying calmer evenings with a happier pet.

A photorealistic kitchen table in a cosy British home, a notebook with a food diary, a cat sitting beside a bowl of novel protein kibble, natural daylight streaming through a window, realistic style.

Conclusion

You’ve walked through spotting signs, picking a kit, sending a sample, and tweaking the diet. The process keeps the focus on one thing: getting your cat feeling better without blowing your budget.

Remember, the cat food intolerance test cost uk can range from about £70 for a basic kit to around £130 for a fuller panel. It’s a small spend compared with ongoing vet visits or endless trial‑and‑error meals.

If you’ve logged the symptoms and sent the fur, the next step is simple, swap the high‑risk ingredients one at a time and watch the improvement. Keep a spare bag of the new food and note any tiny flare‑ups.

So, what’s the bottom line? A modest test can give you clear direction, save you money and peace of mind. Ready to take the next step? Grab a kit that fits your budget and start the journey to a calmer, happier cat.

FAQ

What is the cat food intolerance test cost uk?

The cat food intolerance test cost uk varies by kit. A basic essential kit that checks about 60 common foods usually sits between £70 and £80. A standard kit covering around 200 items costs roughly £120 to £140. The premium option, which looks at 300‑plus triggers, can be £170 to £190. All prices include postage, lab work and an online report, so you know exactly what you’re paying for.

How long does it take to get results from a cat food intolerance test?

Once you send the fur sample, most UK labs return results within two to five working days. If you chose a rapid‑service option, you might see an email in 48 hours. The report comes as a simple list that groups foods into high, moderate and low sensitivities. You can then plan the next diet change without waiting weeks for a vet appointment.

Can I use the test if my cat is on medication?

Yes, you can still send a sample while your cat is on medication, but keep a note of any drugs you’re using. Some medicines, especially steroids, can mask or alter the immune response that the lab looks for. Write the drug name in your diary and mention it when you fill the online form. The lab may flag results as tentative, so you might need a follow‑up test after the meds finish.

Do I need a vet’s referral to order a cat food intolerance test?

You don’t need a vet’s referral to buy a kit from UK Pet Food Intolerance. The test is designed for home use, so you can order it straight from the website. However, many owners find it helpful to discuss the results with their vet, especially if the cat has ongoing health issues. The vet can confirm that any diet changes are balanced and safe.

What items are included in the essential cat food intolerance test?

The essential kit looks at roughly 60 of the most common food triggers for cats. You’ll get results for proteins like chicken, beef and fish, plus dairy, wheat, soy and a few additives such as carrageenan. The list also covers common allergens found in treats and wet food sauces. While it doesn’t test exotic proteins, it catches the majority of everyday ingredients that cause problems.

How can I keep the test affordable?

To keep the cat food intolerance test cost uk low, start with the essential kit and only upgrade if you need more detail. Look for promo codes on the UK Pet Food Intolerance site or sign up for their newsletter – they sometimes share discounts. Buying a single kit instead of a bundle also avoids extra fees. Track your cat’s symptoms carefully so you know exactly which kit level you need.

How to Conduct a Cat Food Intolerance Test at Home: A Practical Guide for UK Pet Owners

If your cat keeps vomiting after meals, the cause is often hidden in the food.

Most owners try new brands, switch bowls or add treats, but symptoms linger. That shows a food sensitivity may be involved, and the only reliable way to know is a cat food intolerance test at home.

Here’s how you get answers without a vet visit. First, gather a small sample of your cat’s fur, a few strands from the back or tail. Then send the sample to a lab that analyses 200 ingredients. Results return in a few days, showing which foods trigger reactions.

Once you have the list, start an elimination diet: feed a simple, single‑protein food for two weeks, then re‑introduce items one by one while watching for loose stools, itching or tummy pain. A quick tip, keep a diary of meals and symptoms; it makes spotting patterns easier.

For a detailed walk‑through, see our step‑by‑step home test guide with pictures and what to expect.

If you also manage pet health records digitally, you might find this healthcare IT support services guide useful for keeping data safe and compliant.

Step 1: Observe and Record Your Cat’s Symptoms

First thing you need to do is watch your cat like a detective. Notice every time they vomit, have loose stools, scratch a lot, or seem gassy. Those little clues are the map to a hidden food trigger.

Write it down as soon as it happens. Grab a notebook or a phone note and jot the time, what they ate, and the symptom. Even a quick “12 pm – chicken pâté – mild diarrhoea” helps you see patterns later.

Make the habit easy by setting a short timer. Some owners use a Pomodoro timer for coding practice to stay focused while logging meals. A 5‑minute burst is enough to capture the detail without losing momentum.

A simple colour‑coded chart works well. Use green for meals that pass without trouble, yellow for mild signs, and red for clear reactions. Seeing the colours line up makes the trigger pop out fast.

When the day is done, skim your notes. Look for foods that appear before the upset. If chicken shows up three times in a row, it’s a strong suspect.

Keeping those notes safe matters. A good digital health record service can store your diary securely, so you don’t lose it when you move house or change devices. Check out the healthcare IT support services guide for tips on protecting pet data.

If you need guidance on what a balanced cat diet looks like, Dr Dubey offers a clear rundown of nutrients and safe ingredients. See the Dr Dubey pet nutrition page for extra ideas before you start the elimination diet.

A photorealistic scene of a British homeowner sitting at a kitchen table, writing notes in a notebook about their cat's meals and symptoms, with a calm tabby cat nearby, soft natural light from a window, realistic style.

Step 2: Choose a Reliable At‑Home Cat Food Intolerance Test Kit

Now that you have a symptom diary, the next move is picking a test kit you can trust.

Check who analyses the sample

Look for labs that are accredited and use proven methods. A reputable lab will tell you how many ingredients they test for and whether they follow UK standards.

Read real user feedback

Customer reviews give clues about how easy the kit is and how clear the report feels. Sites that compile many reviews, like product comparison site topchoice.co.uk, can help you spot kits with high satisfaction scores.

Mind the price and what’s included

A kit should list the cost of the sample tube, shipping and the online result portal. Avoid hidden fees that pop up later.

Make sure the kit comes with clear instructions for taking a fur sample, so you don’t face vague steps that leave you guessing.

Think about support. A good provider will have a FAQ page or an email line you can tap if something goes wrong.

Finally, match the kit to your cat’s needs. If your feline is prone to skin itching, pick a test that covers common allergens like fish, dairy and wheat.

When you’ve crossed off these boxes, you’ll feel confident that the cat food intolerance test at home you choose will give you reliable data to guide the next diet trial.

Also check the kit’s expiry date and how long the lab promises to return results. Most providers aim for a turnaround of a week or two, which lets you start the elimination diet without long waits.

Store the fur sample in the sealed tube, keep it dry, and ship it as soon as possible, a fresh sample gives the most accurate picture.

Step 3: Collect and Submit Your Cat’s Sample Correctly

First, make sure the kit you bought is still within its expiry date. An old tube can give fuzzy results.

Gather a few strands from the back of your cat’s neck or the tip of the tail. A soft brush or a clean comb works well to pull out just enough hair without pulling the skin.

Place the hair in the sealed tube that came with the kit. Do not use any metal foil or a tin container. The lab says metal can interfere with the DNA analysis.

Write your cat’s name and the collection date on the label. If you like, add a tiny note about where you took the sample, for example, “living‑room carpet”, to help you spot environmental triggers later.

Seal the tube tightly and place it in the padded envelope provided. Keep the envelope dry and away from direct sunlight. Heat can damage the sample.

Mail the package as soon as possible, ideally within 24 hours of collection. Use the prepaid label that came with the kit and drop it in a regular post box. No special courier is needed.

When the lab receives the sample, they usually return results in 3 to 5 business days. The test analyses 143 food items and 49 non‑food substances, giving you a clear picture of what might be causing your cat’s tummy or skin issues.

Tip: if the hair feels damp, let it air‑dry on a clean paper towel before sealing. A dry sample keeps the DNA intact and avoids false‑negative results.

Once you have the results, you can start the elimination diet with confidence.

Step 4: Interpreting the Results – What the Numbers Mean

When the lab sends you the report, the first thing you’ll see is a list of ingredients with a score next to each one.

Those scores are simple: a higher number means your cat’s immune system reacted more strongly to that protein or additive. A lower number means the ingredient is likely safe.

Most reports split the scores into three colour bands, red, amber and green. Red tells you “avoid”, amber says “watch”, and green means “ok to keep”. Think of it like a traffic light for your cat’s diet.

So, what should you do with a red flag on chicken? Stop feeding any food that lists chicken as the first ingredient. If the same ingredient shows up in a treat, swap it for a plain biscuit.

A amber result on dairy isn’t a free pass. Try a short trial where you remove dairy for a week and see if the symptoms improve. If they do, keep dairy out for good.

Green scores are your green light. You can keep those foods and even use them as the base for a simple elimination diet.

Tip: write the three groups on a sticky note and stick it on the fridge. A quick glance each morning will remind you what to buy.

Quick reference table

Result What it means Next step
High (red) Strong reaction likely Avoid completely
Medium (amber) Possible reaction Trial remove for 7 to 10 days
Low (green) Little or no reaction Safe to include

By turning the numbers into clear actions, you’ll know exactly which foods to cut, which to test, and which to keep. That’s the power of a cat food intolerance test at home, it turns guesswork into a plan you can follow.

Step 5: Implement a Safe Elimination Diet Based on Test Findings

Now that the test has given you a traffic‑light list, turn those colours into meals.

Start with the green foods – they’re safe. Use them as the base of every bowl.

Pick one green protein, like plain turkey or rabbit, and mix with a simple carb such as rice or pumpkin puree. No extra treats.

Feed this mix for five to seven days. Watch the litter box, skin and tummy. If nothing changes, the base is safe.

Add an amber ingredient one at a time. Give it three to five days, then return to the green base for a wash‑out. If symptoms return, drop it.

Red items stay out completely. Toss any food that lists them first and replace treats with plain biscuits.

Tip: write the three lists on a sticky note and tape it to the fridge. A quick glance each morning saves trips to the shop.

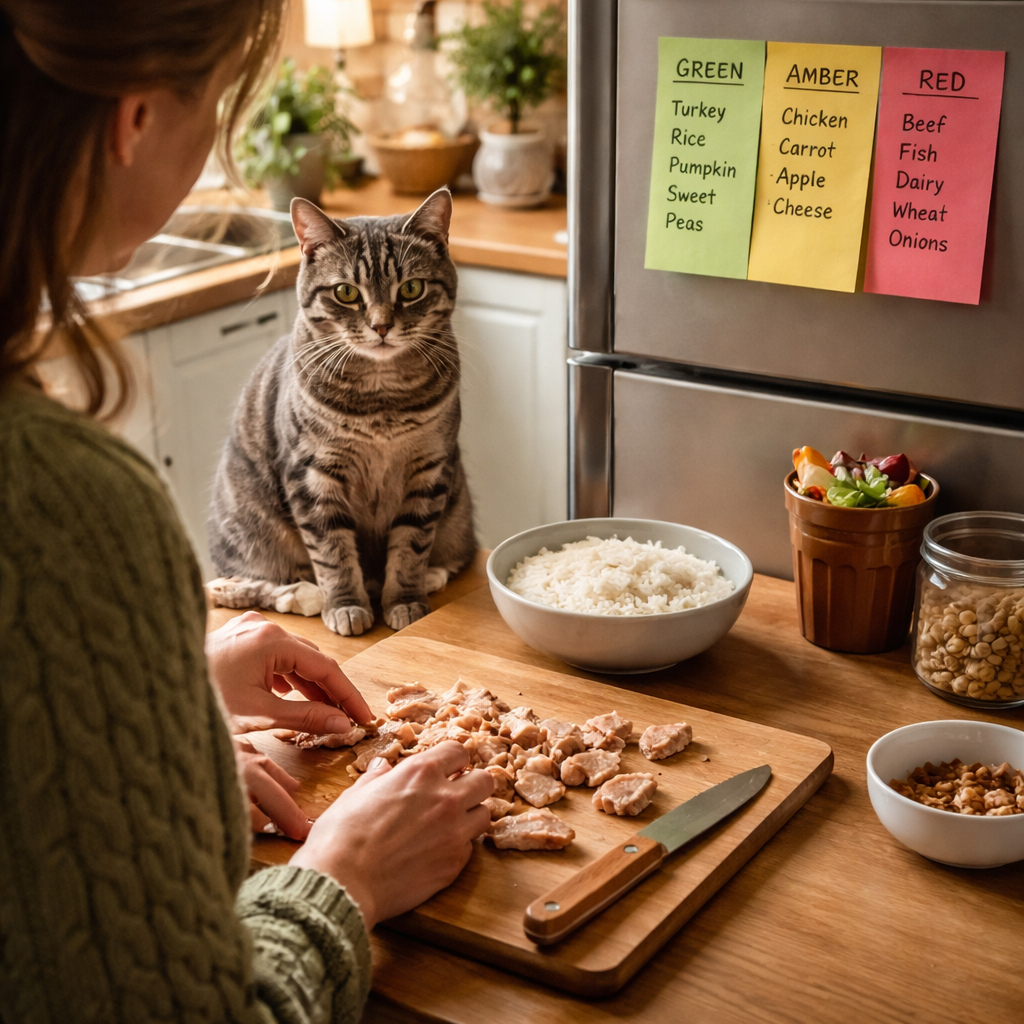
A photorealistic kitchen scene in a cosy British home, showing a cat owner preparing a simple bowl of plain turkey and rice on a wooden board, with a sticky note on the fridge listing green, amber and red foods. Alt: cat food intolerance test at home elimination diet preparation.

Keep a short diary – a phone note works. Note the date, the food and any itching, vomiting or loose stools. Patterns will appear quickly.

If you prefer cooking, the Cats.com guide to homemade cat food recipes gives simple starter meals that fit your green list.

Store leftovers in sealed containers for two days and warm gently before serving.

Ready to start? Grab the green foods tomorrow, set up the sticky note and begin the first bowl. You’ll soon see if the test helped you cut the mystery meals.

Frequently Asked Questions

How does a cat food intolerance test at home actually work?

First you get a small kit. It comes with a tube, a label and a prepaid envelope. You collect a few strands of fur from the back of your cat’s neck or tail, pop them in the tube, and mail it back. The lab looks at the DNA in the hair to spot which proteins your cat reacts to. Results come back as a simple colour‑coded list.

What kind of sample do I need to give for the test?

You only need a tiny amount of hair – about a teaspoon‑size clump. Use a soft brush or comb to pull a few strands from the base of the neck or the tip of the tail. The hair should be dry; if it’s damp, let it air‑dry on a clean paper towel before sealing the tube. No blood or stool samples are required.

How long will I wait before I see the results?

Most accredited labs in the UK aim to finish the analysis within 5 to 7 business days after they receive the sample. Once the report is ready, you’ll get an email with a link to view it online. In practice, you can expect to have the full list of red, amber and green ingredients within a week.

Can I rely on the test without a vet’s input?

The test gives you a clear picture of which foods may be causing trouble, but it isn’t a medical diagnosis. It’s a handy tool to guide your next diet trial. Most vets will use the same information to fine‑tune a feeding plan, so think of it as a first step that you can discuss with your vet later.

What should I do if the report flags a red‑alert ingredient?

Red means your cat’s immune system reacts strongly to that protein. The safest move is to stop feeding anything that lists that ingredient as the first component. Check every treat, wet food and even some dry foods. Replace it with a green‑listed protein, like plain turkey or rabbit, and watch for improvement over a week.

Is the at‑home test safe for kittens and senior cats?

Yes. The sample collection is gentle – you’re only pulling a few hairs, which most cats tolerate well. The process works the same whether your cat is a playful kitten or a calm senior. Just make sure the kitten’s coat is clean and avoid using any metal containers, as the lab advises.

Conclusion

You’ve walked through each step of a cat food intolerance test at home, from spotting symptoms to decoding the colour‑coded report.

Now you know that a red flag means stop that ingredient, amber means test it for a week, and green means it’s safe to keep.

What’s the next move? Grab a trusted kit, collect a few hairs, and send them off. The lab does the hard work, you get clear guidance.

Remember, the test isn’t a vet diagnosis, but it gives you a solid starting point for a diet trial you can discuss with your vet later.

Most cat owners find swapping out the red foods and building meals around green proteins brings calm in a few weeks.

If you want a UK‑based option, UK Pet Food Intolerance provides kits that meet those standards and deliver results online.

Understanding cat food intolerance symptoms UK: A practical guide

Most UK cat owners notice something off with their pet, but they can’t pin down why. A sudden bout of loose stools, an itchy rash, or a picky eater can be more than a quirk – it might be a food intolerance. In this guide, you’ll learn the tell‑tale signs that point to a problem, how to watch for patterns, and what steps you can take at home before calling the vet.

First, keep a simple log. Write down what your cat eats each day, any treats, and the exact time you feed them. Next to that, note any odd behaviours: vomiting, greasy‑looking poo, extra scratching, or a dull coat. Over a week, patterns emerge. For example, a cat that only reacts after a new wet food appears likely has a sensitivity to that ingredient.

If the symptoms line up, a practical next move is to try an elimination diet – swap out the suspect food for a hypo‑allergenic option for 10‑14 days. Watch for improvement. Many owners find that a steady diet with a single protein source reduces digestive upset and skin irritation.

When you need a clearer picture, an at‑home test can help. UK Pet Food Intolerance offers kits that let you collect a small fur sample, send it to an accredited lab, and receive easy‑to‑read results. This approach saves trips to the clinic and gives you concrete data to guide diet changes.

Remember, a food intolerance isn’t a disease, but it can cause real discomfort. Spotting the signs early means a happier, healthier cat. For more detail on spotting each symptom, understand cat food intolerance symptoms and start tracking today.

Need help organising your pet’s health records online? A quick read of this cloud IT services for small business guide shows how simple digital tools can keep vet notes, diet logs, and test results all in one safe place.

Step 1: Recognise common cat food intolerance symptoms

Spotting a food intolerance starts with watching your cat’s day‑to‑day signs. A sudden rise in loose stools, a greasy‑looking poo, or a bout of vomiting that pops up after a new kibble could be a red flag.

Itchy skin is another big clue. If your feline spends more time scratching the belly, ears or the back of the neck, think about what they ate in the last 24‑48 hours. Even a subtle dry patch can hint at a reaction.

Behaviour changes matter too. A normally playful cat that becomes withdrawn, or one that starts hiding the litter box, may be feeling uncomfortable inside. Pay attention to any gas, bloating or a foul‑smelling breath – those are often tied to a gut upset.

So, how do you turn these hints into a clear picture? Keep a simple log. Write down every meal, treat and supplement, then add a quick note of any symptom you see that day. Over a week the pattern will start to show itself.

Does your cat only react after a specific wet food? Does a particular protein seem to trigger a rash? Jot those links down. The more detail you capture, the easier it is to spot the culprit later.

Here’s a quick checklist you can paste into your phone notes:

  • Meal type (wet, dry, treat) and brand
  • Protein source (chicken, fish, rabbit, etc.)
  • Symptoms observed (vomit, stool change, itching, lethargy)
  • Time of day symptoms appeared

Once you have a few days of data, compare the dates of new foods with the onset of symptoms. If a clear link emerges, you’ve got a strong lead.

Need a deeper dive? A home test kit can give you lab‑backed evidence without a vet visit. The kit lets you collect a small fur sample, send it off, and get a result sheet that tells you which ingredients are likely to cause trouble.

And if you want to see how AI tools can help streamline your content creation, check out this guide on an AI SEO content generator.

Remember, spotting the signs early means you can act fast and keep your cat comfortable.

For a professional perspective on gut health, you might find Dr. Dubey’s insights useful.

A photorealistic scene of a British homeowner sitting at a kitchen table, reviewing a cat food intolerance symptom log on a tablet while a fluffy grey cat looks on, soft natural light from a nearby window, Realism style.

Step 2: Monitor and record your cat’s reactions

Now that you’ve spotted the clues, it’s time to watch what happens day by day.

Set up a simple log

Grab a notebook or a phone note. Write the date, the food you gave, and the exact time. Then add a column for any reaction you see.

Typical reactions to note are:

  • Scratching or licking spots
  • Rough coat or bald patches
  • Vomiting
  • Loose, greasy stools
  • Gas or tummy rumble

Keep the language short. A “1” means mild, “2” moderate, “3” severe. This makes trends easy to spot.

Watch for patterns

Check the log after a few days. Do the symptoms pop up after the same brand? After a new treat? If you see a clear link, you’ve got a strong hint.

Sometimes the reaction shows up several hours later. That’s why you should keep notes for at least seven days, even if the cat seems fine on day three.

Note the time gap between feeding and any reaction. Most intolerances show up within two to six hours.

Use a reminder

Set a phone alarm for feeding times. When you ring, add the entry right then – you’ll not forget later.

You can also make a simple spreadsheet on your computer. Columns for date, food, time, symptom, severity let you sort and see trends at a glance.

If you have multiple cats, give each one a different colour pen or tag. That way you don’t mix up who did what.

When to involve the vet

If the log shows persistent vomiting, blood in stool, or the cat stops eating, call the vet straight away. Even if the signs are mild, sharing the log helps the vet spot the trigger faster.

Purina explains that food allergies are rare, but keeping a detailed record is the best way to tell a true allergy from a simple intolerance.

Optional: try an at‑home test

For peace of mind, you could send a small fur sample to a lab. UK Pet Food Intolerance offers kits that give clear results online, so you can match the findings with what you saw in your log.

In the end, the goal is simple: spot the link, show it to your vet, and move toward a calmer, happier cat.

Step 3: Test and adjust the diet safely

Now that you have a log and maybe a test result, it’s time to put a plan into action.

Pick a starting point

Choose a single hypoallergenic cat food options that matches the test hint or your vet’s advice. A limited-ingredient formula reduces the chance of hidden triggers.

Track the first two weeks

Feed only the new food for 14 days. Keep the same feeding times and portions you used before. Write down any change – less itching, calmer tummy, or new upset.

Look for improvement within the first few days. If you still see loose stools or skin flare-ups after a week, note the severity.

Adjust when needed

If symptoms drop, stay with the food for another two weeks to be sure the change sticks.

If problems persist, try a different novel protein – for example swap duck for salmon. Keep the log and compare the two weeks side by side.

Remember to keep water fresh and offer a small treat only if it’s part of the new diet.

A photorealistic kitchen scene in a British home, a cat sitting beside a bowl of hypoallergenic cat food, a notebook with a diet log open on the table, soft natural light through a window. Alt: cat food intolerance symptoms uk testing and diet adjustment.

When to call the vet

Call the vet straight away if your cat stops eating, vomits repeatedly, or blood appears in the stool. Even mild signs can mean the new food isn’t a good fit.

Bring your log and any test results. This helps the vet see the pattern fast.

Step What to do What to watch for
Day 1‑14 Feed only the chosen hypoallergenic food Changes in itch, stool, appetite
Day 15‑28 Continue if improvement, or switch protein New reactions or lingering issues
Any time Contact vet if severe signs appear Vomiting, blood, loss of appetite

One practical tip is to use a simple spreadsheet to colour-code each day’s notes. That way you can see trends at a glance.

Many owners find that a clear log plus a short trial of hypoallergenic cat food helps them settle on a diet that eases the symptoms. Platforms like UK Pet Food Intolerance make the test kit easy to order, so you can start the trial without a trip to the clinic.

Conclusion

Dealing with cat food intolerance symptoms uk can feel endless, but the right plan puts you back in control.

You’ve learned to spot itchy spots, greasy stools, and sudden vomiting, then record each reaction in a simple log.

A short elimination trial lets you see whether a single protein food calms the skin and settles the tummy.

If you want clear, lab-backed results without a vet visit, the at-home kit from UK Pet Food Intolerance gives you exactly that, a fur sample, a safe send-off, and online guidance to help you choose the next diet step.

Keep the log, watch the trends, and call the vet if any severe sign appears. With patience and the right data, you’ll soon know the foods that keep your cat happy and healthy.

Remember, the goal isn’t just to stop itching, it’s to give your cat a life where meals are a joy, not a mystery.

FAQ

What are the most common cat food intolerance symptoms in the UK?

You’ll often see itchy patches on the head or neck, extra licking, and small bald spots. On the gut side, look for loose or greasy stools, occasional vomiting, and frequent gas. These signs tend to flare after a new brand or treat, so a simple log can help you spot the pattern.

How can I tell if my cat’s itchy skin is from food or fleas?

Flea bites usually appear in clusters on the lower back and tail base, and you may spot tiny black specks. Food‑related itch tends to be more widespread, especially on the face, ears, and paws, and often comes with a tummy upset. A short flea treatment trial can rule out parasites, while a food log helps isolate diet triggers.

Do I need a vet to confirm food intolerance, or can I test at home?

A vet can rule out infections or allergies, but an at‑home fur sample gives you a clear picture of which proteins may be causing trouble. The kit is simple: collect a tiny fur clump, mail it, and get lab‑backed results online. It’s a convenient step before any costly vet visits.

How long should an elimination diet last to see results?

Give the new hypoallergenic food at least 10‑14 days without any other treats. Most cats show a drop in itching or stool issues within the first week. If you still see symptoms after two weeks, consider switching to a different novel protein and keep tracking.

What should I do if my cat’s symptoms get worse during the trial?

Stop the new food immediately and return to the previous diet that was stable. Record what changed and note any new reactions. If vomiting, blood, or loss of appetite persists, call a vet right away – it could be a sign of a deeper issue.

Can an at‑home fur test help pinpoint the exact ingredient causing issues?

Yes. The test analyses proteins present in the fur, which reflects what the cat has been eating. Results point to likely culprits, so you can pick a single‑protein diet that avoids those ingredients. It saves guesswork and speeds up the path to a calmer, happier cat.

Cat Food Intolerance Signs UK: A Practical Guide for Pet Owners

If your cat keeps whining after meals, you’re probably wondering why.

Most owners chalk it up to a picky palate, but often it’s a hidden food intolerance.

In the UK, the mix of grain‑based kibble and occasional treats can trigger gut upset that looks like anything else.

Watch for loose stools, frequent gas, or a sudden rash that won’t settle. Those are classic cat food intolerance signs uk pet lovers spot early.

Another red flag is a sudden drop in energy – a once‑playful kitten now prefers a quiet corner.

It’s easy to blame stress or a recent move, yet the diet may be the real culprit.

One practical step is to keep a simple log: note each meal, any reaction, and the time it appears.

After a week or two, patterns start to emerge, and you’ll see which ingredients cause trouble.

At UK Pet Food Intolerance we help owners cut through the guesswork with an at‑home test that pinpoints the exact proteins or grains that don’t agree with your cat.

That way you can swap out the bad stuff without a full diet overhaul, keeping meals tasty and tummy‑friendly.

In this guide we’ll walk through the most common signs, show how to track them, and explain what to do next – from simple diet tweaks to a quick home test.

Ready to stop the mystery and give your cat the relief it deserves?

Step 1: Recognise Digestive Symptoms

Cat food intolerance signs uk often hide behind everyday quirks. One minute your feline is fine, the next they’re sprinting to the litter box with loose stools. That sudden change is a red flag.

First, watch the bathroom routine. If the poop is runny, has a strange smell, or shows mucus, jot it down. A simple log – date, meal, and any reaction – helps you spot patterns without fancy tools.

Next, listen for gas. A cat that burps or lets out a rumbling tummy more often than usual may be struggling with a protein or grain they can’t handle.

Skin can speak too. Persistent itching, tiny bald patches, or a rash that won’t quit often links back to what’s on the plate. When the fur looks rough or the cat scratches at night, think food.

Energy levels matter. A playful kitten that suddenly prefers the sofa is sending a signal. Fatigue, especially after meals, is another clue.

Combine these observations into a one‑page chart. After a week or two you’ll see which ingredients line up with the bad days.

Once you have a picture, UK Pet Food Intolerance offers an at‑home test that pinpoints the exact proteins or grains causing trouble. The kit is easy to use, and results arrive online, giving you clear guidance on what to cut out.

Feeling overwhelmed? Try the Pomodoro method to stay focused while you log meals. A quick 25‑minute timer can turn a boring tracking task into a bite‑sized habit.

Take a moment to breathe. Remember, you’re not alone – many cat owners in the UK face the same puzzle.

A photorealistic scene of a British living room with a tabby cat sitting beside a litter box, a notebook open with a simple symptom log, soft natural light through a window, emphasizing a calm, attentive pet owner noticing digestive signs. Alt: cat food intolerance signs uk visual guide.

Step 2: Spot Skin and Itching Clues

You’ve got the food log down, now look at the coat. Itching and skin changes are often the first shout that something in the bowl doesn’t agree with your cat.

Typical skin clues

Keep an eye out for these signs:

  • Red, inflamed patches on the chin, ears or belly
  • Scratching that seems endless, even after a quick groom
  • Flaky skin or dandruff‑like scales
  • Hair loss in small, round spots
  • Excessive licking of paws or the rear end

These clues can appear on their own or alongside tummy woes. For example, imagine Bella, a four‑year‑old tabby, who suddenly starts rubbing her chin on the sofa after each dinner. A quick glance shows a faint pink rash that fades after a few hours, but it keeps coming back when she eats the same chicken‑based kibble.

Here’s how to turn that observation into useful data:

  1. Pick a consistent time each day – right after she finishes her meal – and give her a quick once‑over. Note any new redness, flakes or hair loss.
  2. Write the skin note in the same log you use for digestive signs. Include the exact food brand, flavour and the time you saw the symptom.
  3. If the symptom shows up within a few hours, flag it as a possible food‑related clue. If it appears days later, still record it – some reactions take time to surface.
  4. Take a photo on your phone. A picture helps you compare day‑to‑day and makes it easier to show the vet if you need professional advice.

Purina points out that true food allergies are rare, but they often masquerade as skin irritation before gut trouble shows up. Read more about how allergies can look on the skin.

The PDSA reminds owners that itching can also be caused by fleas or infections, so a vet check is still a good idea. Learn how vets rule out other causes.

Once you have at least a week of combined tummy and skin notes, patterns will start to pop up. If a certain brand shows up every time a rash appears, that ingredient is a prime suspect.

Tip: keep your cat indoors during an elimination trial – even a stray mouse can re‑introduce a hidden protein and muddle the results.

Finally, set a reminder to review your log every two days. A short, regular check keeps the detective work manageable and gets you closer to a calm, itch‑free cat.

A photorealistic scene of a British living‑room window with soft natural light, showing a ginger cat sitting on a cosy rug while its owner gently examines the cat’s chin for redness, a phone on the side displaying a simple symptom log. Alt: cat food intolerance signs uk – owner checking skin irritation.

Step 3: Simple At‑Home Food Trial (Video)

Now you’ve logged gut and skin clues, it’s time to film a short trial. A quick video helps you spot the exact moment a reaction starts and gives the vet a clear record.

What you need

Grab a phone, a small bowl, and the new test food. Pick a quiet spot where your cat feels safe. Keep the camera on a stable surface or use a phone holder.

Step-by-step

1. Show the label of the food you’re testing. Say the brand and flavour out loud. This makes the video useful for later reference.

2. Pour a measured portion into the bowl. Record the exact amount – a half-cup works for most adult cats.

3. Place the bowl on the floor and let your cat eat. Keep the camera rolling for the first five minutes. Note any hesitation, gagging, or immediate scratching.

4. After the meal, film a quick check of the chin, ears and belly. A few seconds is enough – just enough to capture any redness or flaking.

5. Repeat the same routine each day for the trial period. Save each clip in a folder labelled with the date and food name.

Why a video? Seeing the reaction in real time removes the guesswork that a written note can miss. If you notice a flare up within minutes, you can stop the food and switch back to a bland diet.

Tip: keep the lighting soft but bright enough to show colour changes. Natural daylight from a window works well.

If you want a proven template, the Nextmune cat diet trial guide walks you through a similar process (see the official cat food trial guide). It also lists the ideal length of each trial and how to interpret subtle signs.

When the trial ends, compare the clips side-by-side. Look for patterns – does the rash appear after the same food each time? Does the stool stay normal with one brand and change with another? Those visual clues are powerful evidence when you discuss results with a vet or when you order an at-home intolerance test from UK Pet Food Intolerance.

Step 4: Compare Foods & Choose Safe Options

Now the videos are saved, it’s time to line them up and look for a pattern. Grab a laptop, open the folder, and play each clip back‑to‑back. Do you see a flare‑up after the same brand every time? That’s a red flag.

Make a quick note for each food you tested. Write down the brand, the flavour, and what you saw – rash, loose stool, or no change. Keep the note short; a single line per food keeps it easy to scan.

Side‑by‑side checklist

Turn the notes into a tiny table. Seeing everything at once helps you pick the safe choice fast.

Food tested Reaction seen Safe?
Teepee Turkey & Rice Red chin after 10 min No
Easterbrooks Duck & Sweet Potato No visible change Yes
Generic Chicken Kibble Soft stool next day No

Notice how the duck‑based formula shows no reaction? That’s a good sign it’s gentle on your cat’s gut and skin.

But what if a food gives a mixed result – a tiny rash but normal stool? You might still keep it if the rash fades quickly, but watch the next round closely.

Pick the safe option

Choose the food that consistently shows “no reaction”. If you have a few that pass, pick the one your cat likes most. A happy cat is more likely to stick with the diet.

If none of the foods are clean, look for a hypoallergenic cat food option. Brands that use novel proteins like duck or salmon often avoid the common allergens that cause the signs you’re seeing.

Finally, write a short plan: feed the safe food for a week, watch for any new signs, then confirm with your vet or a UK Pet Food Intolerance test if you’re still unsure. Simple, steady steps will get you to a calm, comfortable cat.

Conclusion

You’ve seen how gut upset, itchy skin and a drop in play can all point to cat food intolerance signs uk. The key is to watch, record and act.

Start by keeping a simple log for a week – note the brand, flavour and any reaction. If a food shows no change, mark it safe and stick with it. If you spot a pattern, try a short elimination trial or use a cat food sensitivity test to confirm the trigger.

Once you have a clear winner, feed that diet for a month and watch for any new signs. If symptoms persist, book a vet visit and consider a professional at‑home test.

Remember, small steps lead to big relief for you and your cat. And for peace of mind with all your pet records, check out this quick guide on cloud backup for small business.

FAQ

What are the most common cat food intolerance signs in the UK?

The first things you’ll notice are tummy troubles and skin changes. Loose or watery stools, frequent trips to the litter, and sudden gas are clear flags. You might also see vomiting soon after a meal or a dull coat that looks dry. Itching, red patches on the chin or ears, and a quick loss of playfulness are other typical signs. Spotting a mix of these clues usually points to a food intolerance.

How long does it usually take for symptoms to appear after a new food?

Most cats show a reaction within a day or two, but some signs take up to a week to surface. Digestive upset like loose stool often appears fast, while skin irritation can be slower, sometimes showing up three to five days after the meal. Keep an eye on your cat for at least ten days after any diet change to catch delayed reactions.

Can I tell the difference between an allergy and an intolerance?

Allergies usually cause a strong immune response, so you’ll see intense itching, swelling, or even breathing problems, which are rare in cats. Intolerances mainly affect the gut and skin with milder, recurring signs like soft stools or a faint rash. If the reaction is quick and severe, think allergy; if it builds slowly and stays moderate, it’s likely an intolerance.

What should I record in a food symptom log?

Write down the date, the exact brand and flavour you fed, and the time of the meal. Note any change you see in the next few hours – loose stool, vomiting, scratching, or a red patch. Also add the cat’s mood, like if she seems tired or less playful. A simple table with these columns makes patterns pop up fast.

When should I consider an at-home food intolerance test?

If you’ve tried a few diet swaps and the symptoms keep coming back, it’s time for a test. Also consider testing when you see both gut and skin signs together, or when a vet can’t find another cause. An at-home kit gives you clear results without multiple vet visits, letting you pinpoint the problem quickly. You’ll usually get results within a week, and the report tells you which proteins or grains are likely to cause trouble.

How to Perform a Cat Food Allergy Test at Home: A Step‑by‑Step Guide

Most cat owners think a quick diet change will fix upset tummies, but that rarely works.

What you’re really seeing is a hidden food intolerance. It can show up as loose stools, gas, or itchy skin. Those signs tell you the gut is fighting something it can’t digest.

A cat food allergy test at home lets you pinpoint the culprit without weeks of trial‑and‑error. You collect a small fur or saliva sample, ship it to an accredited lab, and get a clear report online. The whole process takes a few days and costs less than a vet’s extensive work‑up.

Here’s a quick three‑step plan: 1️⃣ Spot the symptoms and note when they flare. 2️⃣ Order an at‑home test kit. 3️⃣ Follow the lab’s ingredient guide to swap out problem foods and watch the improvement.

If you’re hunting for a gut‑calming food, see our Best Cat Food for Sensitive Stomach UK guide for safe options.

Start with the test, then adjust the diet. Within a week most owners notice calmer tummies and softer coats. You’ll finally know what’s making your cat uncomfortable and can act with confidence.

Step 1: Observe and Record Symptoms

First thing you need to do is watch your cat like a detective. Notice when the litter box looks different – more than a few loose stools or a sudden smell. Jot down the day, time, and what you fed them. A quick note in your phone works just fine.

Next, pay attention to the skin. Scratchy spots, hair loss, or a greasy coat often show up after a meal. Write down the exact spot and whether it flares after a particular brand of food.

Don’t forget the bathroom trips. Count how many times your cat uses the box each day. If the number spikes after a new treat, that’s a clue. A simple table with columns for date, food fed, symptom, and severity makes patterns pop out.

It’s easy to miss subtle changes, so set a reminder on your calendar. Five minutes each evening is enough to update the log. Over a week you’ll have a clear picture of what triggers the upset.

Here’s a quick checklist:

  • Record every meal and treat.
  • Note stool consistency and frequency.
  • Mark any itching, redness, or coat changes.
  • Track when symptoms appear – within hours or the next day.

Seeing the data side by side often reveals the hidden intolerance before you even open a test kit.

Watch this short video for a visual guide on setting up your symptom log:

Once you have a week’s worth of notes, you’re ready for the next step: ordering a cat food allergy test at home and sending in a sample.

Step 2: Eliminate Common Triggers

Most flare‑ups come from just a few ingredients that your cat can’t tolerate. If you strip those out, the skin and tummy calm down quickly.

First, list the usual suspects: chicken, beef, fish, dairy, and any treats that contain fillers. Write each one on a separate line in your diary.

A photorealistic scene of a UK kitchen counter with a cat food allergy test at home kit, a notebook, and a bag of novel protein cat food. Alt: cat food allergy test at home visual guide.

Next, swap every listed item for a novel protein or limited‑ingredient diet. FirstVet recommends a strict 6‑8 week trial with only the new food and plain water (source). During this time, no extra treats, no table scraps, no flavored meds.

Tip: keep a second bowl labelled “trial only” and store the regular food out of sight. This stops accidental nibbling.

Watch for hidden sources. Some dental treats hide chicken broth, and some wet foods add milk powder. Check the ingredient list for each product before you add it to the bowl.

If you have more than one cat, feed the trial cat in a separate room or use a timed feeder. This prevents the others from stealing a bite.

When the 6‑8 weeks are up, re‑introduce the old foods one at a time. Offer a tiny spoonful of the previous protein and note any itch or stool change for the next two days.

If a reaction shows up, mark that ingredient as a trigger and avoid it forever. If nothing returns, you’ve likely found a safe baseline.

Finally, jot down the safe foods and share the list with your vet. They can help you choose a complete, balanced diet that fits your cat’s needs.

Step 3: Conduct an At‑Home Elimination Trial

Now that you’ve swapped to a novel protein, it’s time to start the actual trial.

Pick a quiet spot, fill a clean bowl with the new food and plain water, and label it “trial only”. Keep the old kibble locked away – even a tiny bite can spoil the test.

Stick to the plan for 6-8 weeks. No treats, no table scraps, no flavored meds. If you spot a stray treat, toss it. Consistency is the magic that lets you see a real change.

Every day, jot down what your cat ate, any poop changes, and any scratchy spots. A quick tick‑box notebook works fine – you don’t need fancy apps.

What if you have more than one cat? Feed the trial cat in a separate room or use a timed feeder. This stops the others from stealing a bite and confusing the results.

Watch for hidden ingredients. Some dental treats hide chicken broth; some wet foods add milk powder. Double‑check every label before you add anything to the bowl.

At the end of the trial, re‑introduce the old foods one at a time. Offer a tiny spoonful, wait two days, and note any itch or stool shift. This tells you which ingredient was the trigger.

If nothing flares up, you’ve found a safe baseline. Write down the approved foods and share the list with your vet – they can help you pick a balanced diet that meets your cat’s needs.

Remember, the trial isn’t a cure‑all. If symptoms persist, a vet check‑up is still the right next step.

A photorealistic scene of a British kitchen counter with a cat sitting beside a bowl of novel protein food, a labelled “trial only” bowl, and a notebook open to a diary entry. Alt: cat food allergy test at home elimination trial.

Phase Action Tip
Start (Week 1-2) Feed only new food + water Use a separate bowl
Mid (Week 3-5) Keep diary of stools and skin Note any tiny changes
Finish (Week 6-8) Re‑introduce old foods one by one Wait 48 hrs between each

Step 4: Re‑introduce Foods Systematically

Now the tricky part begins: bringing the old foods back one by one.

Pick the first protein you dropped – chicken, beef, fish, whatever it was. Scoop a pea‑sized bite into a clean spoon and place it in the bowl.

Wait 48 hours. During that time, watch the litter box, the coat, the scratching spots. Any change? If the stool looks softer or the skin gets itchy, you’ve found a trigger.

If nothing shifts, write down “safe” and move to the next item. Keep the same 48‑hour gap before you test the next food. This gap stops overlap and gives the gut time to settle.

Tip: use a simple chart. Column one – food name. Column two – date offered. Column three – reaction notes. A quick glance will show the pattern without you having to dig through a notebook.

What if more than one ingredient causes a flare? That can happen. In that case, repeat the test with each suspect on its own, wiping the bowl clean each time. The goal is a clean record, not a rushed guess.

When the list of safe foods is complete, share it with your vet. They can help you build a balanced menu that meets the cat’s protein, vitamin and mineral needs. A balanced plan keeps the tummy calm and the coat glossy.

And remember, this re‑introduction stage is not a cure‑all. If symptoms linger despite a clean list, a vet visit is still the right move.

Step 5: Interpret Results and Next Steps

You’ve got the report – now it’s time to make sense of it.

Open the online result page and find the table of ingredients. Each entry has a number next to it. The higher the number, the stronger your cat’s immune response.

Take a moment to compare that list with the foods you fed during the elimination trial. If chicken showed a high score and you fed chicken for the first two weeks, that’s a strong clue.

Sometimes the test flags an ingredient you never offered, like a hidden dairy protein in a treat. Note those for future shopping – they can sneak into kibble or wet food labels.

Action step 1: write down every positive ingredient, its score, and whether it was in the trial diet. A simple two‑column table works fine.

Action step 2: remove any confirmed trigger from the bowl. Stick to a novel protein for at least two weeks and watch the stool and skin. Record any improvement in the same log.

Action step 3: book a follow‑up with your vet. Show them the score sheet; they can confirm the allergy and suggest a balanced replacement diet that meets your cat’s nutritional needs.

Need help reading the numbers? The Becker ENT guide breaks down IgE values and what they mean for pets. For a quick vet‑approved overview of what a pet allergy test looks like, see the Animal Trust explanation.

Tip: keep the log on your fridge. A glance at the sheet will remind you which ingredients are safe and which to avoid, making the next vet visit smoother.

Conclusion

You’ve walked through spotting symptoms, swapping foods, running a trial, and reading the test report. The biggest win? Knowing exactly which ingredients spark your cat’s tummy or skin woes.

With a cat food allergy test at home you get clear numbers without weeks of guesswork. Use the score sheet, ditch the triggers, and stick to a novel protein for a couple of weeks. Watch the litter box and coat – the changes will speak for themselves.

Next step? Grab a simple log, note any improvements, and book a vet follow‑up to fine‑tune a balanced diet. If you need a hassle‑free way to start, UK Pet Food Intolerance offers an at‑home kit that sends results straight to your inbox.

Take action today, and give your cat the calm tummy and glossy coat it deserves.

Remember, the test isn’t a cure‑all, but it gives you a solid starting point for a happier, healthier cat.

Frequently Asked Questions

What is a cat food allergy test at home and how does it work?

A cat food allergy test at home lets you collect a tiny fur or saliva sample from your cat, then mail it to an accredited lab. The lab analyses IgE antibodies that signal a reaction to specific ingredients. Within a few days you get an online report that scores each protein, grain or additive. The whole process takes only a couple of weeks from start to result.

How long does it take to get results?

Most kits promise results within 5‑10 business days after the lab receives your sample. Shipping adds a day or two, so you can usually expect the full report in about two weeks. Some providers offer faster turnaround for an extra fee, but the standard speed is enough to let you plan the next diet trial without long delays.

Do I need a vet to collect the sample?

You don’t need a vet to take the sample, but a vet can show you the safest way to collect it, especially if your cat is nervous. The kit usually includes a gentle swab or a small brush that you roll along the cat’s cheek or whisker area. Just follow the printed instructions and avoid any stress that could affect the sample quality.

Can the test tell me if my cat has a true allergy or just a food sensitivity?

The test measures IgE antibodies, which are linked to true allergies, but it can also flag mild sensitivities that don’t cause a full‑blown reaction. If the score for an ingredient is low, you might still see occasional tummy upset, so a short elimination trial can confirm whether it truly bothers your cat. Talk to your vet to interpret borderline results.

What should I do after I receive the test report?

When the report arrives, compare the high‑scoring ingredients with what you’ve been feeding. Remove any flagged foods for at least two weeks and watch the litter box and coat. Keep a simple diary of stools and itching, then re‑introduce the removed items one at a time to see if symptoms return. This systematic approach lets you build a safe, long‑term diet plan.

Is the test safe for all breeds and ages?

The test is safe for cats of any age, from kittens to seniors, as long as the sample is taken gently. Very young kittens may need extra handling help, and older cats with health issues should have a vet check before starting. No chemicals are added to the sample, so there’s no risk of harming your pet.

Comprehensive Guide to Cat Facial Dermatitis Food Intolerance UK

Your cat’s itchy nose can be a sign of food intolerance, not just a simple allergy. We’ll show you how to spot it and what to do next.

Facial dermatitis often flares up after a new treat or a change in wet food. The skin on the face is thin, so any reaction shows up quickly.

Take Bella, a 4‑year‑old tabby from Manchester. She started scratching her muzzle after her owner tried a grain‑free pâté. Within a week the fur thinned and a red rash appeared.

First, note when the rash shows up and what she ate in the last 24 hours. Second, pause any new foods and go back to a simple diet of boiled chicken and rice. Third, book a vet check to rule out parasites. Finally, consider an at‑home cat food intolerance test to pinpoint the trigger.

Our essential cat sensitivity test kit lets you send in a few strands of fur and get results in days, so you can fine‑tune her diet with confidence.

If you run a pet‑related business, you might also learn about effective SEO services for dentists to see how niche markets attract the right audience.

By watching the signs, keeping a food diary, and using a reliable test, you can ease your cat’s facial dermatitis and bring back her happy whiskers.

Step 1: Recognise the Common Signs

If your cat’s nose looks red, dry or scaly, that’s often the first hint of a food reaction.

Watch for sudden itching around the muzzle, sneezing or a runny nose that shows up after a new treat or a change in wet food.

A quick way to spot the pattern is to keep a simple food diary. Write down everything your cat eats and note any skin changes within 24 hours.

Common signs to log include:
• Red patches that fade and flare back quickly
• Flaky skin that looks dry like a winter lawn
• Pawing at the face or rubbing against furniture
• Unexplained sneezing bursts

If you see more than two of these signs together, it’s worth pausing the new food and returning to a bland diet of boiled chicken and rice for a week.

While you wait, a quick read from Dr Dubey’s guide can help you understand what ingredients often trigger reactions.

Staying focused on the diary can be tough, especially if you juggle work and home. Some owners find the Pomodoro timer for ADHD adults useful to break the task into short, timed slots.

Once you have a clear picture, you can discuss the findings with your vet or consider an at‑home cat food intolerance test to pinpoint the exact trigger.

Don’t forget that dust, scented candles or even new bedding can mimic food‑related dermatitis, so note any changes in the household too.

Step 2: Eliminate Likely Allergens at Home

First, look around the house for anything Bella might be chewing or sniffing. Common culprits are new treats, scented litter, or a fresh carpet cleaner.

Make a simple list of these items. Then, for a week, remove each one at a time. Keep the diet the same, just boiled chicken and rice, while you watch the skin.

If the rash calms down after you drop a certain product, you’ve likely found a trigger. If it stays, keep removing the next suspect.

Don’t forget hidden allergens. Some cat toys have wool or synthetic fibres that can irritate sensitive skin. Swap them for plain cotton or rope toys for the trial period.

While you’re testing, a quick at home sample can give you a clear picture. The premium cat intolerance test kit lets you send a few strands of fur to a lab and get results in a few days.

When the test returns, note which foods or materials showed a reaction. Then reintroduce the safe items one by one, watching for any flare up.

Stick to the plan for at least ten days before deciding a food is safe. Patience now saves weeks of itching later.

Remember to keep the litter box dust free. Unscented, clumping litter reduces the chance of skin irritation from dust particles.

If you have more than one cat, treat each one the same way. A shared environment means the same allergens can affect them both, so a consistent plan helps the whole household.

A photorealistic scene of a British living room where a cat sits on a cosy sofa, surrounded by simple toys and a bowl of boiled chicken and rice, with a small fur sample kit on the coffee table. Alt: cat facial dermatitis food intolerance uk guide showing home allergen removal.

Step 3: Conduct an Elimination Diet – Compare Options

Now that you’ve cleared out the obvious triggers, it’s time to run a structured elimination diet. The goal is simple: feed a limited list of safe foods, then add one new ingredient at a time and watch for any flare‑up.

Start with a bland base – boiled chicken and rice – for five days. Keep the bowl clean, the water fresh, and avoid treats or table scraps. This gives your cat’s skin a chance to settle.

After the base period, pick one new protein or carb to test. Add a small scoop to the meal for two days, then pause and observe. If the rash stays calm, keep that food and move to the next. If you see itching, redness, or a change in stool, note the reaction and drop the ingredient.

It helps to write down each step in a simple chart. Below is a quick comparison of three popular elimination diet approaches you might try.

Option How it works Typical duration
Vet‑guided plan Vet designs a step‑by‑step list of hypoallergenic foods and monitors progress. 4–6 weeks
DIY home trial You choose a limited base, then add one new item every 2‑3 days while tracking symptoms. 2–3 weeks
At‑home test + diet Use an at‑home cat intolerance test to pinpoint likely triggers, then follow a tailored elimination schedule. 1–2 weeks for test, then 2‑4 weeks for diet

Many cat owners find the at‑home test route fastest because it narrows the list before the trial even starts. Platforms like pet food elimination diet guide walk you through each phase, so you don’t miss a step.

Remember to keep your cat’s water bowl separate from any other pets and wash hands after handling food. Patience pays off – a clear plan now means fewer itchy days later.

Step 4: Monitor Progress – Video Guide

Now that you’ve started the diet, the next step is to watch what happens each day. A short video can show you how to set up a simple tracking sheet and what to note.

Grab a notebook or use a phone app. Write the date, the exact food you added, and any change you see on Bella’s nose, skin or stool. Keep the entry to two lines – you’ll actually read it.

Check twice a day, once after a meal and once before bed. If the rash looks calmer, give the new ingredient another two days. If you spot redness, itching or a dip in appetite, pause the food immediately.

Make a colour‑coded chart: green for no reaction, amber for a mild flare, red for a clear flare. The visual cue helps you spot trends without reading long notes.

If you notice a pattern, the same ingredient always brings back the itch, you’ve found a trigger. Remove it from the diet and note the improvement for at least a week.

When the chart stays green for three straight weeks, you can start re‑introducing safe foods one by one. Keep the video handy for a quick refresher on the steps.

Need more detail on how to read the results? Our practical guide to managing cat food intolerance walks you through each symptom and how to act on it.

Remember to keep your vet in the loop. Share the chart and video notes at your next appointment so they can confirm the diet is balanced.

Step 5: Re‑introduce Foods Safely

Now the chart is all green for a few weeks, it’s time to bring back the foods you love. Start with the safest items first – think boiled chicken, plain rice, or a tiny bit of canned salmon.

Pick one food, add just a spoonful to Bella’s bowl, and watch for 48 hours. If the skin stays calm, note a green tick and move on. If you see any itch, redness, or a change in stool, stop that food and mark a red flag.

Keep the portion tiny at first. A bite size lets you see a reaction without overloading her system. Write the date, the food, and what you saw – two lines are enough.

Repeat the cycle with a new ingredient only after the previous one has stayed green for two days. This slow pace helps you spot even a mild trigger that might hide behind a bigger reaction.

Some owners find it helpful to group foods by type – all proteins together, then carbs, then treats. That way you can spot if Bella reacts to a whole class, like all fish, rather than a single brand.

Remember to keep fresh water separate and clean the bowl after each change. A clean bowl means less chance of accidental cross‑contamination.

If you ever feel stuck, the step‑by‑step home test guide shows how to interpret results and decide when a food is truly safe.

When the chart stays green after you’ve tried every safe food, you’ve built a balanced diet that keeps Bella itch‑free. Keep the vet in the loop and enjoy those calm, happy moments.

Step 6: Ongoing Skin Care and Vet Support

Now that Bella’s diet is steady, the work doesn’t stop. Your cat’s skin still needs gentle care every day.

Keep the bowl clean and fresh. Rinse it after each meal and change the water at least twice daily. A clean bowl cuts accidental exposure to hidden irritants.

Use a mild, vet‑recommended shampoo once a week. Scrub gently, rinse well, and pat dry. Avoid human soaps – they can strip natural oils.

Watch for any new itch, redness or change in stool. If you spot a flare, note the date, the food you just added, and call your vet.

A photorealistic scene of a British kitchen table with a calm cat, a bowl of fresh water, a small fur sample kit, and a vet's notebook. Alt: cat facial dermatitis food intolerance uk ongoing skin care.

A quick check‑in with the vet every few weeks helps catch hidden issues early. Bring your food diary and any test results – the vet can tweak the diet or suggest a skin‑soothing supplement. cat food intolerance guide gives clear steps to keep the skin happy.

If the skin stays calm for a month, you can try a very small treat – but only one at a time. Keep watching, and if anything changes, stop the treat straight away.

Remember, diet is only part of the plan. Regular vet support, a tidy environment and a bit of extra love keep Bella itch‑free for the long run.

Conclusion

Dealing with cat facial dermatitis food intolerance in the UK boils down to three simple habits: watch the skin, log the food, and act fast when something changes. A quick glance each morning catches a flare before it spreads, and a tidy diary tells you which bite caused it.

Regular vet visits keep hidden issues like atopic dermatitis out of the picture, and they give you a professional safety net. When the diary shows a clear pattern, you’ve got the proof you need to stick with the safe diet.

If you’re still unsure which ingredient is the culprit, an at‑home test from UK Pet Food Intolerance can point it out without guesswork. A clear result lets you fine‑tune the diet and enjoy a calm, itch‑free cat for the long haul.

Frequently Asked Questions

What causes cat facial dermatitis food intolerance in the UK?

Most cats react to a protein or grain they’ve never eaten before. Common triggers are chicken, fish, beef and dairy. In the UK, many cheap wet foods add extra flavourings that can hide these proteins. When the cat’s immune system spots the new ingredient, the skin on the face can turn red, flaky and itchy. The reaction isn’t an infection – it’s the body’s way of saying ‘stop eating that’.

How can I tell if my cat’s skin issue is from food or something else?

Start by looking at when the rash appears. If it shows up a day or two after a new treat, a change in wet food or a supplement, that’s a clue. Check for other signs like sneezing, watery eyes or tummy upset – they often travel together with food reactions. If the skin problem pops up after a walk in the garden or a new shampoo, it may be environmental instead.

What steps should I take to start an elimination diet for my cat?

First, pick a simple, vet‑approved hypoallergenic food that contains only one animal protein and rice. Feed only that food for at least six weeks – no treats, no table scraps. Keep a small notebook and write the date, what you fed and any change in the rash. If the face clears up, you’ve likely found the culprit. If not, you may need to try a different protein.

How long does it usually take to see improvement after changing diet?

Most owners notice the redness fading within a week or two of switching to a bland diet. The skin can take a little longer to fully heal, so give it three to four weeks before deciding the test worked. If the rash is still there after that time, consider re‑checking the diary for hidden ingredients or try an at‑home food intolerance test.

Is an at‑home food intolerance test reliable for UK cats?

Yes, when the test is done by a lab that checks the cat’s fur for reactions to many common foods. The result tells you which proteins cause a response, so you can avoid them straight away. It’s not a medical diagnosis, but it gives clear guidance that can save weeks of guess‑and‑check. Many cat owners in the UK find it speeds up the elimination diet.

When should I see a vet if my cat’s facial dermatitis doesn’t get better?

If there’s no sign of improvement after four weeks on a simple diet, or if the skin looks infected, crusted or very painful, book a vet visit. The vet can rule out other problems like atopic dermatitis or parasites that need medicine. Bring your food diary and any test results – they help the vet spot the cause faster.

Managing cat chronic diarrhea caused by food intolerance UK: A practical guide

Your cat’s chronic diarrhoea might not just be a random upset—it could be a clear sign of food intolerance.

When the gut can’t break down a protein or grain, the result is watery stools, occasional vomiting, and a tired look.

The first step is to watch the pattern: note when the episodes start, what you fed, and any other symptoms like itching or flatulence.

A simple at‑home fur test can pinpoint the culprits within days, giving you a list of foods to avoid.

From there, a structured elimination diet lets you confirm the trigger. Start with a bland, single‑protein recipe for six to eight weeks, then re‑introduce one ingredient at a time while keeping a diary.

If you need a step‑by‑step plan, our Pet Food Elimination Diet guide walks you through each stage, from choosing the right base food to monitoring progress.

Remember, a test isn’t a medical diagnosis—it’s a tool to help you and your vet make smarter diet choices.

Taking a proactive health view, like the one championed by XLR8well, can keep both you and your cat feeling their best.

First, spot the tell‑tale signs that hint a food is the culprit.

Watch for watery, soft stools that show up at the same time you change kibble or give a new treat. If the loose poo appears a few hours after a meal, note the exact food.

Look for other clues: occasional vomiting, a dull coat, or a bit of flatulence. Some cats also scratch more or develop a mild rash around the belly.

Keep a simple diary. Write the date, what you fed, and any symptom you see. Even a quick note on your phone helps you spot patterns over weeks.

Pay attention to colour and texture. A pale, almost clear stool often points to a lack of fibre, while a dark, tar‑like poop can hint at a different issue. Mucous or blood means you should call your vet right away.

A quick colour‑coded chart can help you spot trends at a glance. Mark each day with a smiley for normal, a neutral face for soft, and a frown for watery. Over a week you’ll see the pattern emerge without any fancy software.

If the diary shows a clear link, you’ve got a strong case to discuss with your vet. They may suggest an at‑home food intolerance test to narrow the list of suspects.

When you step back and review the log, you’ll often see a repeat, same food, same upset. That’s the first solid piece of evidence you need before you move on to testing.

A photorealistic scene of a British cat sitting on a kitchen floor next to a bowl of kibble, with a notebook open showing a simple diary of meals and symptoms. Alt: cat chronic diarrhea caused by food intolerance UK

For extra peace of mind, you can check out resources like XLR8well, which share tips on spotting diet‑related gut issues in pets.

Step 2: Keep a detailed food diary and review your cat’s diet

Now that you’ve spotted the first clues, start writing them down.

Use a notebook or phone note. Record date, time, food brand, type (wet, dry, treat) and any new supplement.

Next, note the stool: colour, texture and extra signs like gas or itching.

Add any other symptoms you see that day – dull coat, limp, vomiting.

Keep the same layout every day. A simple three‑column table works: Food | Stool | Other.

Don’t skip meals you think are harmless; even a bite of table food can matter.

After a week or two, line the pages side by side and look for repeats.

If tuna appears each time the poop is watery, that protein is likely a trigger.

Make a short checklist of the repeat offenders and mark each time you feed them.

This gives you a solid lead on cat chronic diarrhea caused by food intolerance uk.

At this stage, a home test from UK Pet Food Intolerance can confirm the sensitivities you’ve flagged, giving clear numbers to discuss with your vet.

Combine the test results with your diary to plan a six‑week elimination diet: cut the flagged foods, then re‑introduce one at a time while you keep noting changes.

When the diary shows normal stools after a food is removed, you’ve found the culprit.

Stick to this routine and turn guesswork into a clear plan.

Step 3: Implement a systematic elimination diet trial

Now that you have a list of suspect foods, it’s time to start the elimination trial. The goal is simple: feed only a single, hypo‑allergenic base for a set period and watch the stool.

Pick a protein your cat has never eaten – many vets suggest a novel source like duck or rabbit. Use a plain wet formula with no additives, no treats, and no table scraps. Keep the bowl clean and refill it at the same time each day.

Record everything. Write the date, the exact brand, the amount, and any change in stool colour, texture or frequency. A simple three-column table works well – Food | Stool | Notes. If the stool stays firm for the full six weeks, you’ve likely ruled out that ingredient.

If you see a flare-up, stop the trial and go back to the base diet for a few days. Then re-introduce one flagged food at a time, keeping the same record format. Wait 5-7 days between each new ingredient – that’s how long a reaction usually shows up.

A solid plan looks like this: week 1-2 – base diet only; week 3-4 – add first suspect; week 5-6 – add second suspect, and so on. Keep the diary open and compare the weeks. When the stool returns to normal after a specific food is removed, that food is the likely trigger.

The protocol follows the recommendations from veterinary specialists (official trial guide) and matches the diet trial outline used by UK labs (diet trial outline). This approach helps you pin down cat chronic diarrhea caused by food intolerance uk without guesswork.

Step 4: Re‑introduce foods and track results (includes comparison table)

Now the base diet has steadied your cat’s stool, it’s time to test each suspect. The goal is simple: add one food, watch for a flare, then note the result.

Pick the first ingredient you flagged maybe tuna, dairy, or a grain. Mix a measured scoop into the usual bowl. Keep the portion the same each day for five to seven days. If the stool stays firm, move on. If it softens or you see more gas, write “reactive” in your diary.

Repeat the cycle with the next food. Use the same timing for each trial so the gut has a clear reset period. Most owners find a two day break on the base diet between foods helps the gut settle.

Here’s a quick checklist you can print:

Food added Days observed Reaction
Tuna chunks 7 Soft stool
Duck mince 7 No change
Rice and pea mix 7 Increased gas

Notice the pattern? The foods that cause a reaction are likely the triggers behind cat chronic diarrhea caused by food intolerance uk. Remove them from the permanent diet.

Real‑world example: Emma’s cat, Wessie, reacted to a commercial tuna treat within three days. The stool turned watery and the coat looked dull. After swapping to a hypoallergenic duck formula, the stool firmed up in a week.

Another case: a senior tomcat showed no change when a novel rabbit diet was tried, but a sudden flare up appeared after re adding a grain based snack. The owner cut the snack forever and the cat’s digestion stayed stable.

Tip from vets: keep water fresh and feed at the same times each day. Consistency reduces stress, which can mask food reactions.

For more guidance on choosing low allergen options, see this list of hypoallergenic cat food options.

A photorealistic scene of a British kitchen countertop where a cat watches its owner add a small spoonful of new food to a bowl, a notebook with a diary open beside the bowl, soft natural light from a window overlooking a rainy UK street. Alt: cat chronic diarrhea caused by food intolerance UK tracking re‑introduction.

Step 5: Know when professional veterinary assessment is needed

You’ve done the diary, the trial, the re‑introductions. If the stool still swings, or new signs pop up, it’s time to call a vet.

Look for any of these red flags: blood in the poo, weight loss, vomiting that won’t stop, or a fever. Even a sudden change in behaviour, like hiding more or losing appetite, can mean something deeper.

Another clue is when the elimination diet doesn’t settle after six weeks. If the gut keeps acting up, a vet can run blood work, imaging, or a faecal test to rule out infection, parasites, or inflammatory bowel disease.

Schedule a visit if you see any of the above, or if the diarrhoea lasts more than two weeks despite the diet changes. A quick check‑up can save weeks of guesswork.

Ask the vet to review your food diary. Bring the notes – they show the pattern and help the vet spot the trigger faster.

The vet may suggest a full health screen, including blood panels and an ultrasound. They might also run a specific food intolerance test, like the one UK Pet Food Intolerance offers, to get a clear list of problem ingredients.

Sometimes the vet will recommend a prescription diet that meets all nutritional needs while you keep testing at home.

Remember, a vet’s advice doesn’t replace your own observations, but it adds medical certainty. If you feel stuck, trust that a professional can guide you back to a calm, healthy cat.

After the vet visit, keep recording any changes for at least another week. This helps you see if the new diet or medication is working, and gives the vet clear data for the next check‑up.

For more on what vets look for, see the Cats Protection chronic diarrhoea guidelines.

FAQ

What are the most common signs of cat chronic diarrhea caused by food intolerance uk?

Typical signs include watery or soft stools that show up several times a day, a foul smell, and occasional vomiting. You might also see a dull coat, more gas, or your cat scratching more often. These clues often line up with a food trigger, especially if they appear after a new brand or treat. Keep a simple diary of food and stool – it helps spot the pattern fast.

How long should I wait before seeing improvement after changing my cat’s diet?

Most cats need about two to three weeks on a strict, single‑protein diet before you’ll notice a steadier stool. If the stool is still loose after that period, keep the diet steady for another week before adding anything back. Patience is key – jumping in too fast can mask the real trigger and send you back to square one.

When is it necessary to get a vet involved for cat chronic diarrhea caused by food intolerance uk?

Call the vet if you see blood, sudden weight loss, vomiting that won’t stop, or a fever. Also get help when the diarrhoea lasts more than two weeks despite diet changes, or if you spot a change in behaviour like hiding or loss of appetite. A vet can run blood work, imaging, or a faecal test to rule out infection or inflammatory disease.

Can an at‑home food intolerance test help pinpoint the trigger?

An at‑home test works by analysing a tiny fur sample for reactions to many common ingredients. You send the sample to an accredited lab, and within a few days you get a clear report that flags which foods gave a strong reaction. This info lets you cut the right items from the diet and saves time compared with trial‑and‑error alone.

How do I safely re‑introduce foods after an elimination diet?

When you add a food back, give your cat five to seven days to show any reaction. Use the same amount each day and note stool texture, frequency and any extra signs like gas or itching. If nothing changes, you can keep that ingredient. If you see soft stools or extra gas, drop it again and move on to the next suspect.

Are there any simple home remedies while I wait for test results?

While you wait for test results, keep feeding a bland, single‑protein diet and make sure fresh water is always available. Adding a probiotic supplement designed for cats can help settle the gut, but choose one without added grains or dairy. Keep the feeding routine consistent – same times, same bowl – to avoid stress that can worsen the stool.

Conclusion

Dealing with cat chronic diarrhea caused by food intolerance uk can feel endless, but you now have a clear path.

First, watch the stool and note any patterns. Then run a simple at-home fur test to get a list of suspect ingredients. Use a single-protein diet for six weeks, reintroduce foods one by one, and keep a tiny diary.

If the stool steadies, you’ve likely found the trigger. If not, it’s time to call your vet and share the notes.

Remember, the test isn’t a diagnosis, it’s a tool to guide your vet and help you pick the right foods. Platforms like UK Pet Food Intolerance make the test quick and the results easy to read.

Take the next step today: collect a few days of notes, order the test, and give your cat the chance to feel normal again.