

Cat Food Sensitivity Test UK: A Practical Guide for UK Pet Owners
Ever notice your cat rolling around a few minutes after a meal, eyes wide and ears flat? It’s a common scene in many UK households, and it usually means something is off in their diet.
Have you ever wondered whether that one bland food brand or the latest protein source could be the culprit behind those restless evenings? It’s a question that sits heavy on the minds of cat owners who want their pets to feel comfortable and happy.
In this article, we’ll demystify the cat food sensitivity test uk, show you how a simple at‑home kit can give you a clear picture, and help you take confident steps toward a smoother, itch‑free life for your furry friend.
Why does a sensitivity test even matter? Because the most common signs—loose stools, gas, persistent scratching, and that dreaded “why does my cat look so tired?”—often hide in plain sight as reactions to ingredients that look harmless on a label.
Let’s dive in and explore what the test does, how it works, and how you can turn the results into real, actionable dietary changes.
First, the test is all about clarity. It examines a range of ingredients—wheat, corn, soy, fish proteins, and more—to pinpoint which ones are triggering your cat’s discomfort.
The process is straightforward: you collect a small sample of your cat’s food, mail it off, and within a few weeks, a digital report lands in your inbox.
This report is more than a list of numbers. It’s a guide that tells you which foods to avoid, which to consider, and how to structure an elimination diet that’s practical and safe.
Once you’ve got the data, the next step is simple: swap out the problematic ingredients for alternatives that work. This often involves trying a handful of new brands, each time monitoring for improvement.
And you’re not alone. Many cat owners across the UK have already used this process to reduce scratching, improve coat shine, and ease digestive upset.
So, what does this mean for you? It means you have a tool that turns mystery into knowledge, and knowledge into better meals for your cat.
Are you ready to see what’s really in your cat’s bowl? Let’s get started on the path to a calmer, happier cat.
In the sections that follow, we’ll walk through how to order a kit, what to expect from the lab, and how to translate the results into a diet that keeps your cat thriving. Stay tuned.
TL;DR
A UK cat food sensitivity test pinpoints hidden ingredients that may cause digestive upset or itching, turning mystery into clear dietary guidance. By sampling your cat’s food at home and receiving a lab‑verified report, you can swap out triggers, simplify menu, and watch symptoms fade—giving you a calmer, happier life.
Understanding Food Sensitivities in Cats
Let’s face it: when your cat keeps scratching or has gas after meals, it’s easy to feel stuck. You want clarity, not guesswork. In our experience, a practical, evidence‑based approach makes all the difference.
Food sensitivities aren’t always a dramatic allergy. More often they’re reactions to common ingredients—grains, dairy, fish, or processing aids. Recognising this helps you avoid unnecessary changes and focus on what matters: your cat’s comfort.
That’s where a cat food sensitivity test uk comes in. It screens a broad panel of ingredients so you can see patterns emerge without trial-and-error guesswork. It’s not a medical diagnosis, but it gives you real, actionable data to guide meals.
In practice, you’ll collect a small sample from your cat’s current food and send it to a lab. The report then highlights which ingredients are most likely linked to symptoms, and which might be safe alternatives.
So how do you turn that data into meals your cat loves? Start by avoiding flagged items, then trial a few trusted proteins and a single grain at a time. Keep notes on digestion, stool quality, itching, and energy.
In our experience, many owners are surprised by how small changes can help: swapping a single protein or cutting a filler can calm digestion.
We know the UK market has great options, from hypoallergenic kibbles to limited ingredients tins. The key is consistency—stick with tested choices for 6 to 8 weeks and watch for improvements.
If you’re unsure where to start, look for support that translates test results into a practical shopping list and a clear trial plan. Platforms like UK Pet Food Intolerance make this easier by offering at-home tests and straightforward guidance you can implement today.
To recap: identify the symptoms, use a test to reveal ingredients, and run a careful elimination diet with simple steps. The results are a map, not a verdict, and they guide you to calmer meals. You’ll also learn which foods to reintroduce later to confirm sensitivity. Keep the routine simple and predictable across weeks for better results.
Ready to dive in? Start by noting a few details about your cat’s symptoms and meals, then chat with a vet if anything odd crops up.
Does this really work? For many owners, turning the data into a practical plan is the hardest part. With a simple, repeatable process you can follow—one step at a time—your cat can move toward calmer days and happier meals.
Remember, you’re not alone. Many UK owners find that a steady, predictable feeding routine beats the chaos of guessing. Track symptoms, adjust calmly, and celebrate small wins.

How to Choose a Reliable At‑Home Test Kit
Choosing a cat food sensitivity test uk can feel overwhelming. You’re after clarity, not more confusion. In our experience, the right kit turns a jumble of labels into a straightforward action plan.
Step 1 — Define your goals
Start with the end in mind. Do you want to know specific ingredients to avoid, or just confirm whether your cat responds to common triggers? Being precise helps you pick a kit that focuses on the right ingredients and delivers a practical elimination plan.
Step 2 — Check accreditation and lab quality
Look for mention of accredited laboratories and transparent processing. A reputable cat food sensitivity test uk should have a clear description of how samples are handled and how data is generated. If it’s vague, move on.
Step 3 — Assess the sample collection and turnaround
At‑home kits should be easy to use without adding stress to your cat. Check what’s required to collect the sample, how you post it, and what turnaround to expect. In our view, a digital report within a few weeks is reasonable, but confirm the specifics for 2026 timelines.
Step 4 — Read the results format and next steps
Results that translate into practical steps matter. Look for a clear list of foods to avoid, plus recommended alternatives and a suggested elimination plan. A good kit should guide you through a safe trial period with reasonable expectations. Does this really work? It should feel doable, not overwhelming.
Step 5 — Vet integration and support
Some owners want a vet to review the plan. If you’re in that camp, choose a kit that provides support resources or a link to professional advice. In our experience, platforms like UK Pet Food Intolerance make this easier by offering accessible online results and straightforward guidance that fits around life and budget.
Step 6 — Compare cost, convenience, and long‑term value
Cost is important, but so is value. A kit that screens many ingredients may save you months of trial and error. For reference, our Essential Pet Intolerance Test screens 300 items, giving you a broad starting map without a maze of trials. Think about whether you’ll need to repeat testing or update the results as your cat grows or as new ingredients appear on shelves.
Step 7 — Make your decision and plan the first elimination trial
Ready to move forward? Pick a target four‑ to six‑week window for the elimination phase and map your grocery and brand choices accordingly. Record symptoms daily to spot subtle changes, then compare before and after. You’ve got this.
Interpreting Your Test Results: A Step‑by‑Step Video Tutorial
When the digital report lands in your inbox, the first thing you’ll see is a colour‑coded list of ingredients, each marked as ‘high’, ‘moderate’, or ‘low’ intolerance.
Those labels are the compass you’ll use to navigate your cat’s menu. Think of it as a map that tells you where to cut out a suspect ingredient and where you can keep the safe zones.
Start by ticking off any items flagged as ‘high’. These are the top suspects; if your cat’s itching or tummy upset stops when you remove them, you’ve found a culprit.
Next, test the ‘moderate’ group. Swap one ingredient at a time, keeping the rest of the diet constant. Record symptoms each day; this keeps the data clean.
If a moderate ingredient triggers a flare, mark it as a secondary issue. Your cat may tolerate it at low levels, but high doses push the line. That nuance matters in long‑term feeding.
Sometimes the colour codes can be misleading. A ‘low’ score might still cause a sensitive cat to react if the ingredient is in a high‑dose brand. Test the brand, not just the label.
Create a simple chart: column A lists ingredients, column B shows score, column C notes your cat’s reaction after removal. Seeing patterns helps you prioritise which foods to keep or ditch.
Use a daily journal or a spreadsheet; write the food brand, the exact quantity, and any signs of improvement or relapse. Consistency turns anecdote into evidence.
If your cat’s symptoms improve after eliminating a high‑score ingredient but return once you re‑introduce it, that’s confirmation. Note the time it takes—usually 7–10 days for gut changes to surface.
When you’ve sorted the main offenders, move to the low‑score list with caution. Some cats are very picky; a tiny trace can trigger itching, so trial small batches first.
Remember, the goal isn’t to eliminate every single ingredient—most cats thrive on a balanced diet. Think of the test as a guide that nudges you towards a simpler, calmer menu.
Finally, share your findings with your vet. Their professional lens can flag any missed medical conditions and help tweak the plan, turning your data into a truly effective feeding strategy.
A handy tip: keep a small freezer stash of your cat’s favourite food brands. When a new ingredient is flagged, you can switch instantly without buying a fresh bag.
If your cat reacts to more than three ingredients, consider a commercial hypoallergenic diet as a baseline. Then layer in safe proteins gradually, watching for any change.
Use the colour‑coded severity chart as a quick reference: red = stop immediately; orange = monitor closely; green = safe but keep an eye on dosage.
At the end of the elimination phase, compile a one‑page feeding plan. Highlight safe foods, banned ingredients, and a gradual re‑introduction schedule for peace of mind.
Creating a Safe Trial Diet Plan
So you’ve got the test results back — now what? A safe, practical plan that doesn’t feel overwhelming. Let’s map out a path you can actually follow for your cat’s diet, without turning the house into a kitchen lab.
Step 1 — Choose a simple, complete base diet
Start with a straightforward, complete diet that uses a single protein and minimal ingredients. This keeps variables small and makes it easier to notice what’s causing trouble. If you’re unsure, begin with a widely available base brand to reduce guesswork.
Consider a protein your cat hasn’t shown sensitivity to yet. The aim is a balanced foundation you can build on for 4–6 weeks, while avoiding added flavours or fillers that complicate the picture.
Step 2 — Plan the elimination window
Set a definite window—four to six weeks is ideal. During this time, avoid reintroducing ingredients you suspect and keep a consistent feeding routine to reduce stress for your cat. If you’ve got the time, a slightly longer window (up to eight weeks) can be helpful for stubborn cases, but don’t let it drag on.
Step 3 — Reintroduce ingredients one at a time
After the elimination period, reintroduce foods one by one, with 1–2 weeks between each. If symptoms flare, that ingredient is a likely trigger. If not, you may be able to tolerate it in small amounts.
Step 4 — Track symptoms and appetite
Keep a simple diary. Note what your cat ate, appetite, stool consistency, itching, coat condition, and energy. Patterns often emerge when you compare week by week. These notes aren’t about blame; they’re about clarity. Does a new batch cause a spike in scratching? Does a change in stool appear a few days later? You’ll spot the signals faster with a routine.
In our experience, this method works well for cat owners who are testing for cat food intolerance at home. A UK-based at‑home test can provide a starting map that makes these steps less guessy. If you want to dig deeper, the feline trial instructions offer a useful framework to structure your own food trials: feline food trial instructions.
Step 5 — Vet integration and support
Share your findings with your vet. A second opinion helps flag anything you might have missed and ensures your plan stays safe and balanced. If you’re unsure, ask your vet to review the reintroduction schedule before you start.
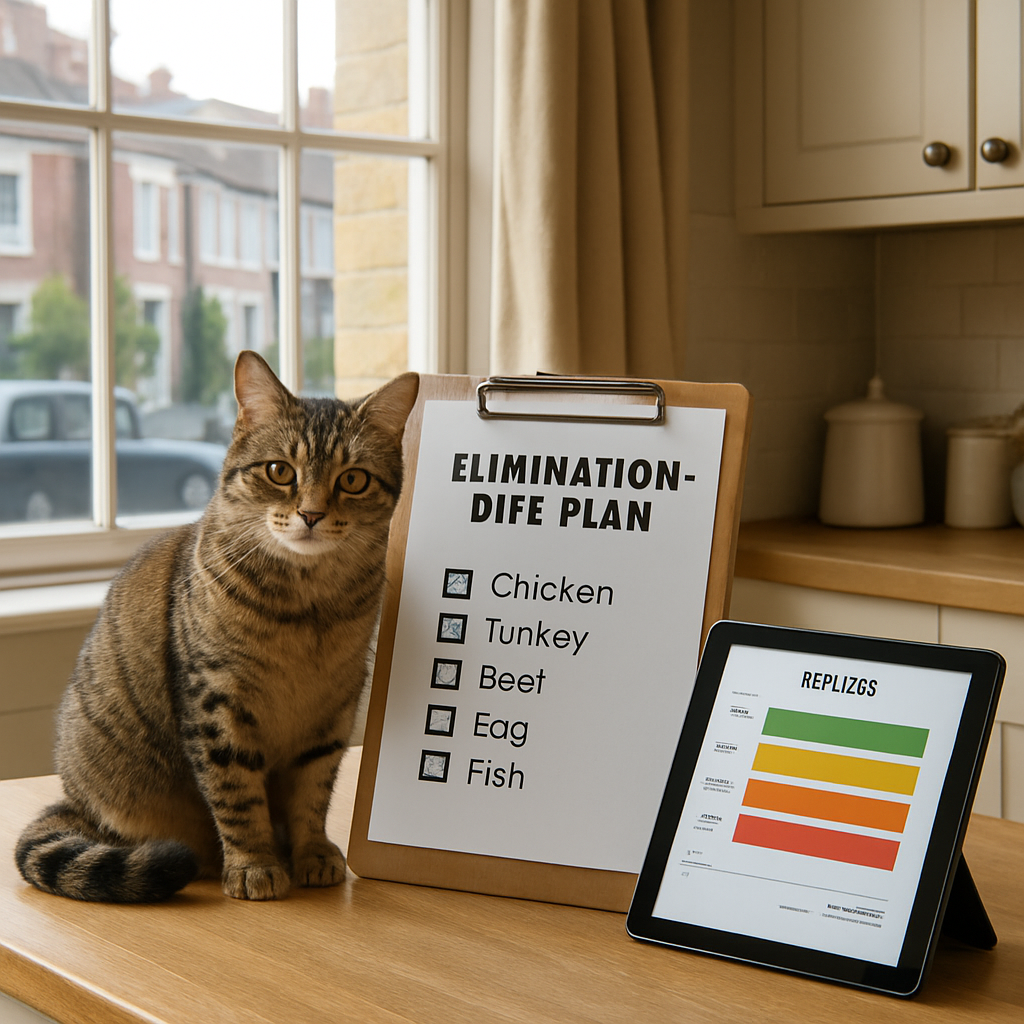
Step 6 — Maintain momentum with a long‑term but flexible plan
As soon as you’ve nailed a few triggers, translate that into a simple, ongoing feeding strategy. Rotate safe proteins gradually to reduce the chance of new sensitivities while keeping meals interesting. Keep the measurements small, and avoid big changes all at once. Your goal isn’t perfection; it’s consistency that your cat can live with day to day.
| Feature | Option / Action | Notes |
|---|---|---|
| Elimination duration | 4–6 weeks | Gives gut and skin time to respond, not just a quick fix |
| Base diet | Single-protein, simple ingredients | Reduces cross‑reactivity and easier tracking |
| Reintroduction pace | 1–2 ingredients every 1–2 weeks | Identifies specific triggers with minimal confounding factors |
| Symptom tracking | Daily notes (itching, stool, energy) | Consistency is key to spotting real changes |
Managing Common Skin and Digestive Symptoms
If your cat keeps scratching, or you notice tummy upset after meals, you’re not imagining it. These symptoms are common signals that a food sensitivity might be at play, and tackling them without a plan just wastes time.
In our experience, a clear, step‑by‑step approach helps you separate noise from real triggers. Let’s walk through a practical, cat‑friendly plan you can feel confident following.
Step 1 — Start with a simple base diet
Choose a complete base diet that uses a single protein and minimal ingredients. This keeps variables small and makes it easier to spot what’s causing trouble. If you’re unsure, a cat food sensitivity test uk can provide a map to guide these steps, so start with a well‑known, widely available brand to reduce guesswork.
Step 2 — Set the elimination window
Four to six weeks is ideal. During this time, avoid reintroducing suspected ingredients. Keep meals consistent to reduce stress and support gut recovery.
Step 3 — Reintroduce ingredients one at a time
Reintroduce foods one by one, with 1–2 weeks between each. If symptoms flare, you’ve found a likely trigger. If not, you may be able to tolerate it in small amounts.
Step 4 — Track symptoms and appetite
Keep a simple diary: note what your cat ate, appetite, stool, itching, coat, and energy. Patterns emerge when you compare week by week.
So, what should you do next? Does this really work when life gets hectic?
If scratching or itching continues after the elimination window, chat with your vet. They can check for other causes and help fine tune the plan.
For reliable background reading on cat allergies, Purina’s guide on cat food allergies is a helpful starting point.
In our experience, starting with the Essential Pet Intolerance Test gives you a practical map you can translate into meals you can actually serve. It’s straightforward, home‑based, and paired with simple reintroduction steps.
Quick tip: keep a small freezer stash of your cat’s favourite brands. That makes swapping ingredients for trials quick and stress‑free, especially if a bag is nearly finished.
Remember, this won’t cure everything overnight, but it can reduce flare-ups and give your cat calmer days and better comfort in the bowl.
You’ve got this—step by step, and you’re not alone today.
We’re here.
What to track day by day
Log your cat’s meals, appetite, stool consistency, and any itching or hair changes. Note the brand, batch, and amount. Small details like the time of feeding and when symptoms appear help you spot patterns faster.
Common mistakes to avoid
Don’t rush the elimination window. If you reintroduce too much too quickly you’ll miss real triggers. Don’t ignore other health issues like fleas, infections, or parasites. And don’t rely on a single diary entry to judge progress—stick with it for several weeks.
Small changes add up to relief.
You’re not alone in this.
We’re here.
Fine‑Tuning the Diet: Long‑Term Adjustments
So you’ve got your test results, you’ve run an elimination, and your cat is looking a little better. What next? The answer isn’t a one‑off tweak; it’s a series of small, deliberate moves that keep the gains steady and build resilience over time. Think of it as maintaining a garden – you water it, prune it, and watch it thrive.
Keep the core proteins steady
Once the offending proteins are out of the equation, lock in a single safe source. Imagine a favourite dish that never changes – that’s what a single‑protein diet should feel like. If you keep that base constant, any flare‑up you spot is easier to trace, and you avoid the chaos of juggling too many variables at once.
For example, a cat who reacts to chicken and wheat often does well on duck. Duck is a novel protein and rarely cross‑reacts, making it a solid baseline. If you’re not sure which novel protein to start with, our Elimination Diet Cat UK: A Practical Guide for UK Cat Owners walks you through real‑world scenarios and helps you pick a protein that’s both safe and palatable.
Rotate safe proteins to stay ahead of new sensitivities
Even the safest protein can become a trigger after a while, especially as cats age or their gut microbiome shifts. A simple rotation schedule keeps the gut flora diverse and reduces the chance of a new allergy popping up. For instance, feed duck for 8–12 weeks, then switch to salmon for the next cycle, and return to duck again.
Keep a tidy log: note the start date, the amount fed, and any subtle changes in stool colour or coat shine. If you spot a dip in appetite or a sudden itch, revert to the previous protein for a week before moving on. This patience pays off in fewer surprises down the road.
Add supportive nutrients that reinforce gut and skin health
Long‑term success isn’t just about proteins – fibre, prebiotics, and omega‑3 fatty acids play a starring role. Soluble fibre calms an irritated gut, while omega‑3s soothe inflamed skin. When choosing a brand, look for a clear list of these ingredients. If you’re unsure which nutrients matter most, the PetsCare guide on cat food allergy management offers a practical rundown of what to look for and why.
Don’t forget a limited‑ingredient wet food once a week if your cat enjoys it. This keeps the palate varied without reintroducing known allergens. Just make sure the wet food’s protein source matches the one you’re feeding dry.
Monitor for life‑change triggers
Cats are sensitive to their environment. A new house, a new pet, or even a change in your own diet can affect their gut flora. Keep a simple checklist: new environment? new household member? new food for yourself? Note these alongside any symptom changes. One owner in the Midlands found that moving to an apartment with higher dust mite levels caused a spike in itching – she solved it with a dust‑mite spray and keeping the cat indoors during peak pollen.
Re‑evaluate every 12–18 months
Food manufacturers frequently update recipes and introduce new ingredients. It’s a good idea to re‑take the cat food sensitivity test uk every 12–18 months to catch any new triggers before they become big problems. If you notice a new change in behaviour or a sudden flare, bring the test results back to your vet for a fresh look.
Use the diet as a living document
Treat your feeding plan like a living document: update it as your cat grows, as seasons change, and as new foods hit the shelves. A simple spreadsheet works wonders – columns for protein, brand, batch, start date, and symptom notes. With data in hand, you can spot patterns you’d otherwise miss.
In short, long‑term success comes from consistency, thoughtful rotation, and a keen eye for subtle shifts. Keep the core protein steady, rotate safely, add supportive nutrients, monitor life changes, and re‑check your results every year or so. With these steps, you’ll maintain a calm, itch‑free life for your feline friend while keeping the menu interesting and nutritious.
FAQ
What exactly is a cat food sensitivity test uk and how does it work?
The test is a simple kit you send to an accredited lab. It analyses a sample of your cat’s food for common allergens like wheat, corn, soy and various protein sources. Once the lab finishes, you receive a digital report that grades each ingredient as high, moderate or low risk. You can then use that list to tweak your cat’s diet without guessing.
Can the test tell me why my cat keeps scratching or has loose stools?
It can point you to likely culprits. If the report flags wheat as high, for instance, and you stop feeding it, you’ll often see itching subside or stools firm up within a few weeks. The test doesn’t diagnose disease, but it removes a huge source of uncertainty about food triggers.
How long does it take to get results and how reliable are they?
Most kits return a digital report in 4–6 weeks. The laboratories behind UK Pet Food Intolerance are ISO‑accredited, so the data are consistent across batches. While no test is 100% foolproof, the lab’s methodology follows industry standards, giving you a solid starting point for diet changes.
Do I need a vet to use this test or can I do it entirely at home?
You can collect the sample, mail it and read the results on your own – that’s the whole point of the at‑home kit. However, it’s still wise to share the report with your vet, especially if symptoms persist or you’re unsure how to adjust feeding. The vet can spot other medical causes that a food test won’t uncover.
What should I do if the test shows several high‑risk ingredients?
Start with the top‑ranked one. Swap out the identified protein or grain, keep the rest of the diet the same and monitor for a 7‑10 day window. If symptoms improve, you’ve found a trigger. If not, move on to the next high‑risk item. Document each change; a simple diary keeps the evidence clear.
How often should I retest my cat after the first kit?
Food brands update their recipes fairly often, so retesting every 12–18 months is sensible. That keeps your diet aligned with current formulations and helps you spot new sensitivities before they become chronic issues. If your cat’s behaviour changes suddenly, a fresh test can provide immediate direction.
Will this test help if my cat’s problem is unrelated to food?
It won’t diagnose skin infections, parasites or hormonal issues, but it rules out a major source of irritation. If the test comes back clean and your cat still shows symptoms, it’s a good signal to pursue other medical investigations with your vet. The test simply removes one big variable from the equation.
How much does a test kit cost and is it worth it?
The Essential Pet Intolerance Test covers 300 ingredients and is priced competitively for the breadth of data it gives. Many owners find that the clarity it provides saves them money on trial‑and‑error diets and vet visits. If you’re struggling with a persistent itch or tummy upset, the upfront cost is often outweighed by the long‑term relief.
Conclusion
So, we’ve walked through the whole journey: from spotting a scratchy paw to mailing a tiny sample and getting a clear, bite‑size list of likely triggers. The real win? You finally have a roadmap instead of a guessing game.
Remember three simple rules that will keep the momentum going. First, keep a tidy diary – jot down what the cat ate, any itch spikes, or changes in stool. Second, give each change a 7‑to‑10‑day window to show results; that’s long enough for gut chemistry to settle. Third, stay patient – the most stubborn allergies can surface after a few weeks of a “clean” diet, so repeat the test if symptoms flare again.
What does this mean for you? You can start by swapping out any high‑risk ingredient flagged in the report and see if the itch subsides. If it does, you’ve found a culprit. If not, move on to the next one. The process is cyclical, not one‑off.
And here’s the thing: the test isn’t a magic bullet, but it is a reliable compass. It saves you time, money and the frustration of endless brand switches. It also gives your vet a concrete starting point when you bring them in for a follow‑up.
Ready to take that first step? Grab your kit, follow the easy instructions and watch your cat’s skin and belly thank you. You’ve got the tools; now it’s time to act.

Leave a Reply
Want to join the discussion?Feel free to contribute!