Dog Allergy Test Price UK: Complete Guide to Costs and Choosing the Right Test

Ever stared at the vet bill, wondered if there’s a cheaper way to pin down why your dog keeps scratching or has an upset tummy?

You’re not alone – many UK pet parents feel stuck between guessing which ingredient is the culprit and splashing out on endless vet visits. The good news is that the market now offers at‑home dog allergy tests, and the dog allergy test price uk has become far more transparent than it used to be.

Think about it way: instead of paying for multiple specialist appointments, you can collect a simple cheek swab from your pup, send it off, and get a detailed report within days. That convenience alone can save you both time and money, especially if you’ve been cycling through hypoallergenic diets with no clear results.

But how much should you expect to spend? Most reputable kits sit in the £70‑£150 range, with a few premium options pushing past £200 for an expanded panel that includes environmental allergens. The price you pay often reflects the breadth of ingredients tested, the speed of results, and whether you get personalised dietary guidance.

In our experience, a mid‑range kit that covers around 60 food and non‑food items hits the sweet spot – it’s thorough enough to uncover hidden sensitivities without breaking the bank. Plus, many providers, including UK Pet Food Intolerance, offer a rapid 48‑hour service for an extra modest fee, which can be a lifesaver when your dog’s itching is getting out of hand.

So, what should you look for beyond the sticker price? Check if the test is processed in an accredited laboratory, whether the report is easy to understand, and if there’s any ongoing support to help you interpret the findings. A clear, jargon‑free result can turn a confusing list of allergens into a practical feeding plan.

Ready to take the guesswork out of your dog’s diet? Start by comparing what’s included in each kit, weigh the cost against the number of allergens covered, and remember that the cheapest option isn’t always the most useful. By investing in the right test, you’re not just buying a result – you’re buying peace of mind for you and a happier, healthier pup.

TL;DR

If you’re paying £70‑£150 for a dog allergy test in the UK, you can expect a 60‑item panel, accredited lab analysis, and results in a few days, plus optional rapid service.

Choosing a kit that offers clear guidance and support, like the Essential test from UK Pet Food Intolerance, turns that price into peace of mind and a healthier, happier pup.

Understanding Dog Allergy Tests: What They Measure

Let’s be honest about what these tests actually measure. For many dog owners, the phrase ‘dog allergy test price uk’ stirs a mix of hope and questions. In our experience, at‑home intolerance tests don’t pretend to diagnose a vet’s allergy. They map immune responses to a wide panel of ingredients and environmental items that might be linked to itchy skin, gut upset, or recurring discomfort.

Most panels cover dozens of items—from common proteins like beef, chicken, and dairy to everyday triggers such as pollen, dust mites, and mould. The sample is usually a simple cheek swab or a tiny blood spot you mail back. The lab then analyses antibodies or other markers to identify potential sensitivities.

What you get in the report is a sensitivity map, not a verdict. A high reaction doesn’t automatically mean your dog must avoid that item forever, and a low reaction doesn’t guarantee safety. Treat it as a starting point for a guided elimination plan and a targeted diet trial.

Reliable interpretation hinges on accredited laboratories and clear reporting. Look for reports that list items with a reaction score and plain-English guidance about how to proceed — which foods to test next, how long to run a diet trial, and how to reintroduce foods later.

Price usually mirrors scope. In the UK you’ll typically pay between £70 and £150 for a roughly 60-item panel, with environmental items adding a little extra. If you want faster turnaround, some providers offer a rapid service for a modest fee. Platforms like UK Pet Food Intolerance make this easier by pairing results with practical dietary guidance.

When to test? If your dog has chronic itching, recurring tummy troubles, or skin problems that linger despite diet changes, a structured test can help you target the diet more quickly and reduce the endless guessing game.

Does it replace veterinary care? No. It’s a helpful piece of information to discuss with your vet and to guide dietary trials. If symptoms worsen or new signs appear, seek veterinary advice promptly.

What the panel covers matters, but how you use the results matters more. A good report should translate data into concrete steps, such as which ingredients to remove for a set period and how to reintroduce them safely. Expect guidance on next steps and whether a follow-up test would be useful.

In our experience, the best tests include both food and environmental items and offer practical post-results support. That support might be a feeding plan template, reminders for reintroduction, or access to a helpline if you get stuck.

Decision framework: check the item list, confirm laboratory accreditation, preview a sample report, and review what kind of dietary support accompanies the results. If you’re unsure, start with a mid-range panel and see how clear the guidance is before committing to more items.

For many families, finally understanding what’s driving symptoms feels like a relief. It’s not magic, but it’s direction you can act on today.

To bring this to life, watch the explainer video below and then use your notes to start a simple, structured elimination plan.
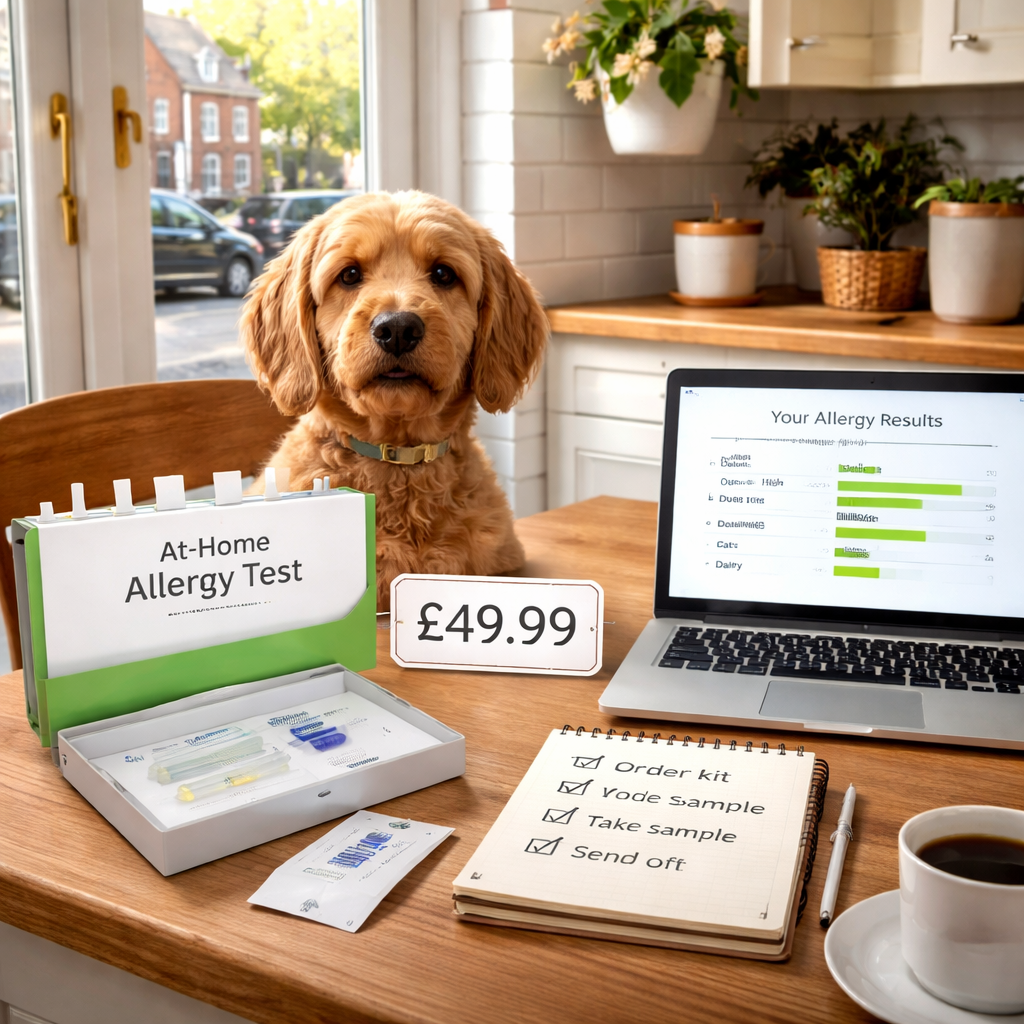
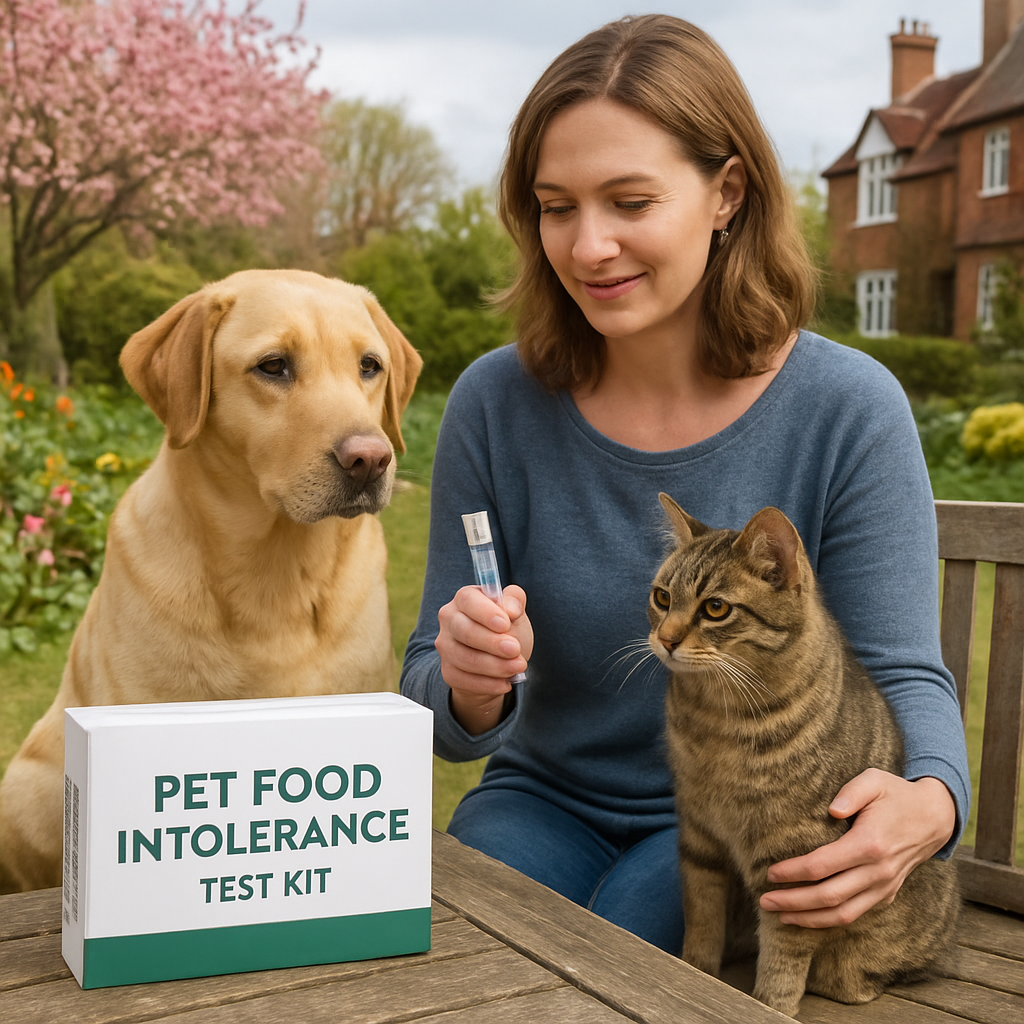
A photorealistic, realism-style scene of a British kitchen table with a dog, an at-home allergy test kit, a price tag, a notebook with checkmarks, and a laptop showing a simple results report. Alt: dog allergy test price uk planning at-home test in a UK kitchen.

Factors Influencing Test Prices in the UK

When you start looking at the dog allergy test price uk, the first thing that jumps out is the spread – you’ll see kits around £70, some hitting £150, and a few premium options nudging past £200. It can feel a bit like shopping for a new phone: the price tag tells you something about what you’re actually getting, but it doesn’t always make sense at a glance.

What’s actually being measured?

Every kit is built around a panel of ingredients – both food and environmental – that the laboratory will test for immune reactivity. The more items on the panel, the higher the cost tends to be. A basic 30‑item panel might cover the most common proteins and a handful of additives, while a comprehensive 60‑item or 80‑item panel adds exotic grains, novel proteins, and things like pollen or mould spores. That extra breadth is what pushes a mid‑range kit into the £120‑£150 bracket.

But it isn’t just the number of allergens. The type of analysis matters too. Some providers use ELISA testing, which is reliable and relatively quick, while others rely on newer DNA‑based methods that can cost a bit more. Those differences show up in the price.

Lab accreditation and turnaround time

Accredited labs add a layer of trust – they follow ISO standards, run quality controls, and usually have a faster turnaround. If you need results in 48 hours, you’re likely paying a premium for that speed. Most UK kits promise results within 3‑5 working days; a rapid‑service add‑on can add £20‑£30 to the base price.

Think about it like ordering a pizza: the standard delivery takes an hour, but you can pay extra for express delivery. For a dog dealing with relentless itching, that extra cost can be worth the peace of mind of getting a plan sooner rather than later.

Support and interpretation

Another hidden cost is post‑test support. Some kits simply hand you a spreadsheet of scores and leave you to decode it. Others bundle a short consultation, a clear step‑by‑step elimination guide, and ongoing email help. That extra guidance often justifies a higher price tag because it saves you time and avoids costly trial‑and‑error feeding regimes.

In our experience, owners who skip the support package end up spending more on vet visits later, trying to figure out why their pup’s skin is still red. A modest increase in the upfront price can actually lower the overall expense.

Seasonal promotions and bulk discounts

Retailers frequently run promotions around holidays or National Pet Week. A £150 kit might drop to £119 for a limited time, or you might snag a bundle that includes a second test at a reduced rate for multi‑dog households. Keep an eye on the website’s offers page – those discounts can make a premium kit feel like a mid‑range one.

And if you’re buying for more than one dog, ask about a family pack. Some providers will shave a few pounds per test, which can be a lifesaver for larger families.

What does this mean for your budget?

Start by asking yourself three questions: How many allergens do you realistically need to test? Do you need results fast? Do you want ongoing guidance? If you answer “yes” to all three, a £130‑£150 kit with a rapid‑service option and support is a sensible middle ground.

On the other hand, if you’re just curious and your dog’s symptoms are mild, a £70‑£90 basic panel might be enough – just be prepared to interpret the report yourself.

One practical tip: compare the Essential Dog Sensitivity Test against other options side‑by‑side. Look at the number of items, the lab accreditation badge, and whether a support package is included. That quick visual check can save you from paying for features you’ll never use.

Bottom line: the price you see is a reflection of panel size, lab quality, turnaround speed, and post‑test support. By understanding each of these factors, you can pick a kit that fits both your dog’s needs and your wallet, rather than guessing based on a headline price alone.

Typical Price Ranges for Common Test Types

When you start comparing dog allergy test price uk options, the first thing you’ll notice is that the cost isn’t just a random number – it mirrors what you actually get. Think about it like buying a pair of shoes: a basic trainer will cost less than a bespoke leather boot, and the same logic applies to allergy testing.

Let’s break it down into the three most common buckets you’ll run into.

1. At‑home serological (cheek‑swab) kits

These are the kits most pet owners reach for first because you can do them in your kitchen while the dog is still drooling over a biscuit. The price swing here is driven by how many allergens the lab screens for.

Basic 30‑item panel – covers the usual suspects like chicken, beef, wheat, corn and the three big pollen groups. You’ll usually see this around £70‑£90. It’s a decent entry point if you’re chasing the biggest culprits.

Mid‑range 60‑item “Essential” kit – adds niche proteins (duck, rabbit), exotic grains (quinoa, millet) and a handful of environmental triggers such as dust‑mite and mould spores. The typical range sits at £130‑£150, and you’ll often get a clear dietary guide bundled in. That’s why many of us at UK Pet Food Intolerance recommend it as a balanced choice for most dogs.
Essential Dog Sensitivity Test – 60‑item panel

Some providers also charge a modest £20‑£30 extra for a 48‑hour rapid‑turnaround if you’re in a pinch.

2. In‑clinic intradermal skin testing

Here you’re paying for a veterinarian’s time, specialised allergen extracts and the precision of watching your pup’s skin react in real‑time. The price range is wide – from about £200 for a straightforward panel to upwards of £700 for a comprehensive environmental screen that includes rare pollens and moulds.

Because it’s hands‑on, you’ll often get a more nuanced picture of environmental sensitivities that a blood test might miss. That’s why it’s the gold‑standard for dogs with chronic itching that doesn’t improve with diet changes.

3. Cytotoxic or food‑intolerance DNA‑based tests

These are the niche, high‑tech options you’ll see advertised as “DNA‑level” insight. They tend to sit at £300‑£1,000, depending on the lab and the number of markers analysed. While they can be thorough, the evidence on accuracy is mixed, so weigh the cost against the proven benefit of a well‑designed serological panel.

For a quick, evidence‑backed snapshot, most UK pet parents find the 60‑item at‑home kit gives the best bang for the buck.

According to Pet Help Reviews, intradermal skin testing is the most expensive route, often running between £200 and £700, while standard blood‑based tests start around £400 in a veterinary setting. That lines up with what we see in the market today.

Quick comparison table

Test Type Allergens Covered Typical UK Price (GBP)
At‑home serological (30‑item panel) Basic food proteins & common pollens £70‑£90
At‑home serological (60‑item Essential kit) 60 food & environmental items £130‑£150
In‑clinic intradermal skin test 40‑50 environmental allergens £200‑£700

So, how do you decide which price bracket makes sense for you?

1️⃣ Identify the main symptom driver – if it’s a food‑related tummy upset, the 30‑item kit might be enough to start. If you’re juggling itching, digestive issues and occasional ear infections, the 60‑item panel saves you a lot of guess‑work.
2️⃣ Factor in support – kits that include a step‑by‑step diet guide or a short vet‑chat add £10‑£30 but often cut weeks of trial‑and‑error.
3️⃣ Consider turnaround – a rapid‑service surcharge is worth it when your dog’s flare‑ups are acute.

Bottom line: you don’t have to splurge on the most expensive option to get reliable insight. Match the panel size and support level to your dog’s symptom profile, and you’ll land on a price that feels fair for both your budget and your pup’s comfort.

How to Choose a Reliable Test Provider

Choosing a dog allergy test provider can feel like navigating a maze. You want clarity, not hype. In our experience, the best choices balance solid lab work with practical support that helps you act quickly for your pup.

So what should you look for first? Does the provider clearly explain what’s included, how long results take, and what kind of aftercare support you’ll get? If you’re nodding yes, you’re on the right track.

  • Panel breadth and item coverage: how many foods and non-foods are tested, and which items are included in the panel.
  • Lab accreditation and data quality: is the testing performed in an accredited laboratory with transparent quality controls?
  • Turnaround and speed: what are the standard processing times, and is there a rapid 48‑hour option if you need results quickly?
  • Post‑test support: does the provider offer a clear dietary guide, elimination‑trial plan, and help interpreting results?
  • Pricing transparency: are you seeing all costs up front, with no hidden extras for shipping, re‑testing, or add‑ons?

For many dog owners, the 60‑item Essential kit offers a sensible balance of breadth and practical guidance. Essential Dog Sensitivity Test – 60-item panel – is a common starting point because it covers a wide range without overwhelming you with data. You’ll often also find a short diet guide included, which cuts weeks off trial‑and‑error feeding.

Turnaround matters, especially when symptoms are flaring. Look for clear timing promises: a standard report in a few days, with an optional rapid service if your dog’s itching or GI upset is acute. And read the fine print—some providers bundle consults or follow‑up support that pays off if you’re unsure how to act on the results.

How to compare providers in practice

  1. List your top priorities: speed, depth of testing, and post‑test support. Rank them 1–3 so you can weigh options quickly.
  2. Create a side‑by‑side: items tested, the lab’s accreditation status, turnaround times, and whether a diet plan is included.
  3. Ask exact costs: confirm the base kit price and any add‑ons (rapid results, extra consults, or guidebooks).
  4. Check recent user feedback from reputable sources or the provider’s own customer stories, avoiding unverifiable testimonials.

What should you watch out for? Overhyped promises, vague “lab‑only” results, or a lack of actionable next steps. If a provider can’t translate the results into a practical elimination plan, you’ll end up chasing symptoms instead of solving the root cause. Does this approach feel realistic for your situation?

So, what’s next for you? Start by listing your dog’s most troublesome symptoms and compare three providers side by side. With clear criteria in hand, you’ll pick a test that moves you from uncertainty to a practical feeding plan—and that’s what really matters in the long run.

At‑Home vs. Veterinary Clinic Tests: Pros & Cons

Let’s get real about the two paths you’re weighing for your dog’s allergy puzzle. At-home tests are incredibly convenient, but veterinary clinic tests offer hands-on assessment you can’t replicate at home. If you’re a UK pet owner trying to cut through the noise, here’s a down-to-earth breakdown you can act on.

In our experience at UK Pet Food Intolerance, the big trade-off is speed and simplicity versus depth and professional interpretation. You’ll often get a quick, affordable baseline with at‑home serological tests, but you may miss nuances that a vet can spot in real time with intradermal skin testing.

So, what should you prioritise? It comes down to what you need most: speed, clarity, and whether you value professional guidance alongside the results.

At‑home tests: pros

  • Convenience you can do in your kitchen. No appointment, no travel, just follow the kit’s instructions and ship the sample.
  • Lower upfront cost for many basic panels. You can often start narrowing down suspects without a vet bill.
  • Clear, actionable guidance bundled with the results. Plenty of kits include step‑by‑step elimination plans to curb guesswork.
  • Faster initial feedback in many cases. Most UK kits deliver results within a few days, with rapid options available if symptoms are screaming.

At‑home tests: cons

  • May not capture the full environmental picture. Some issues require vet‑level interpretation alongside clinical history.
  • Results aren’t a medical diagnosis. They’re a guide to potential triggers, not a guarantee of what really causes symptoms.
  • Can require careful management at home to avoid misinterpreting data, especially if you’re juggling multiple potential culprits.
  • Post‑test support varies. Some providers offer strong coaching, others hand you a report and leave you to figure out the next steps.

Clinic tests: pros

  • Hands‑on assessment by a trained veterinarian. You may get a more nuanced view of environmental sensitivities through intradermal testing or specialised panels.
  • Greater confidence for complex cases. If itching persists despite diet changes, a veterinary test can provide deeper insight than at‑home options.
  • Established pathways for follow‑up care. Vets can integrate test results with your dog’s medical history and medications.

Clinic tests: cons

  • Higher cost overall, especially for comprehensive environmental screens or multi‑test panels.
  • Need for appointments and travel, which can be stressful for anxious pets and busy owners.
  • Turnaround times vary; some tests require scheduling, lab processing, and follow‑up visits, which may take longer than home testing.

So, which path fits your dog’s story? If you’re chasing quick clues and want practical diet guidance, an at‑home route with solid post‑test support is a strong start. If your dog’s symptoms are persistent or complex, a vet‑led approach can complement home testing by adding professional interpretation and a broader range of tests.

For many dog owners dealing with itchy skin or digestive quirks, a balanced plan works best: begin with a well‑structured at‑home test to flag likely culprits, then loop in a vet if symptoms don’t improve or if results feel ambiguous. If you’re curious about a trusted, breadth‑oriented option, consider the Essential Dog Sensitivity Test – 60‑item panel as a practical next step. Essential Dog Sensitivity Test – 60‑item panel can streamline your elimination process while you monitor real‑world changes. Think of it as a smart, guided starting point rather than a final verdict.

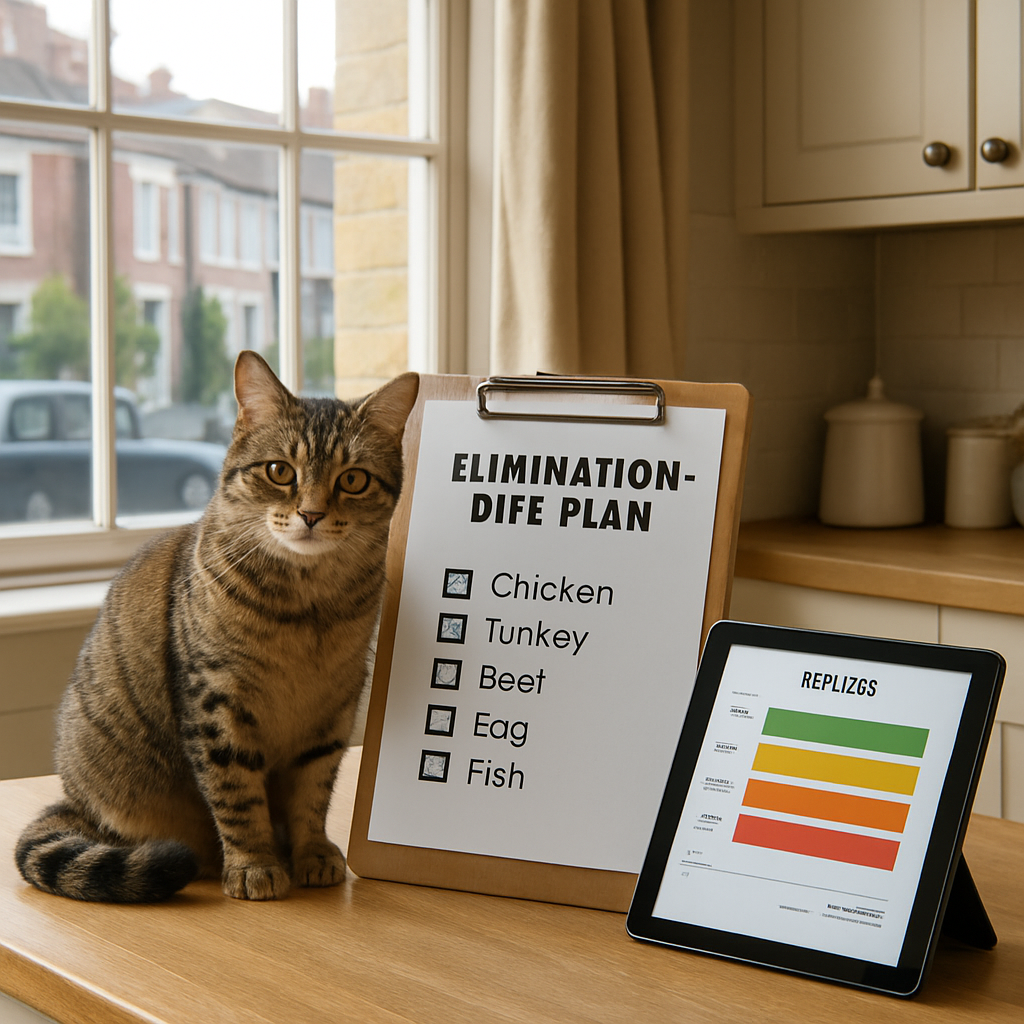
A photorealistic scene in a cosy UK kitchen showing a dog and owner reviewing a dog allergy test report on a tablet, with packaging and price cues visible, warm daylight, a cup of tea in the background, and a calm, content dog beside a bowl. Alt: UK dog allergy test price uk in a home setting

Frequently Overlooked Costs and How to Budget

When you’re staring at the sticker price of a dog allergy test, it’s easy to think the £130‑£150 you see on the page is the whole story. In reality, there are a few sneaky expenses that pop up later – things like shipping, extra sample handling, or the cost of a proper elimination diet.

Shipping and handling fees

Most kits include free standard delivery to the UK, but if you need the test sooner you’ll probably be offered an express option. That can add £10‑£15 to the total. It sounds minor, but for a tight budget that extra charge can feel like a surprise.

Tip: keep an eye on the checkout page for any “priority shipping” tick‑boxes. If you’re not in a rush, stick with the standard service – the lab turnaround time usually isn’t affected by how fast the kit reaches you.

Sample re‑shipping or retesting

Sometimes a sample can get lost in transit or arrive damaged. A reputable provider will send a replacement at no extra cost, but a few smaller companies charge a re‑shipping fee. That could be another £5‑£10.

What we’ve seen work best is to double‑check the lab’s sample‑return instructions and use the pre‑paid return envelope that comes with the kit. A little extra care now avoids a needless expense later.

Elimination diet costs

The test itself is only the first piece of the puzzle. Once you have a list of potential triggers, you’ll need hypoallergenic or novel‑protein foods to run a trial. Those specialty diets can run £30‑£50 a bag, and you’ll need at least two weeks’ supply per ingredient.

Here’s a quick budgeting trick: pick the top three items from the report and buy a small trial‑size pack of each. Many online pet stores offer sample packs for under £15, which lets you test without committing to a full‑size bag.

Professional support add‑ons

Some kits bundle a short phone consult or email follow‑up for an extra £20‑£30. If you’re comfortable reading the report yourself, you can skip this and save the money. But if you’re unsure how to interpret a high‑reactivity score, that little extra guidance can stop you from making costly diet mistakes later.

We often recommend checking the provider’s FAQ or support page first – you might find the answers you need without paying for a one‑on‑one chat.

Hidden subscription traps

A handful of companies market the test as a “one‑off purchase” but then prompt you to sign up for a monthly supplement plan. Those recurring fees can add up to £10‑£20 a month. Always read the fine print before you tick any “subscribe for updates” boxes.

Pro tip: use a separate email address for the order if you want to avoid unwanted newsletters.

How to build a realistic budget

Start with a simple spreadsheet. List the base price of the test, add a line for shipping (standard or express), then estimate the cost of the top three trial foods. Finally, include any optional support or potential re‑shipping fees.

For most UK pet parents, the total lands somewhere between £200 and £260 – a figure that feels far more manageable when you’ve broken it down.

If you want a concrete example of how to plan the diet side of things, our blog post on how to use a home dog allergy test walks you through buying small trial packs and tracking symptoms over a six‑week period.

Seasonal discounts and bundles

Keep an eye on the provider’s promotions page around holidays or National Pet Week. A £150 kit might drop to £119 for a limited time, or you might snag a bundle that includes a second test for a multi‑dog household at a reduced rate.

When you see a discount, double‑check what’s included – sometimes the cheaper price strips out the support guide or rapid‑turnaround service, which could cost you more in the long run.

Bottom line: the headline “dog allergy test price uk” is just the starting point. By accounting for shipping, sample handling, diet trial costs, and optional support, you can set a realistic budget that won’t surprise you at checkout. And with a clear plan in place, you’ll be one step closer to a calmer, itch‑free pup without breaking the bank.

Conclusion

We’ve walked through what drives the dog allergy test price uk, from the size of the allergen panel to lab accreditation and those little extras that sneak into the final bill.

So, where does that leave you? If you’ve spotted a pattern – itching after meals, a rumbling tummy, or stubborn ear infections – the numbers we crunched should give you a realistic sense of the investment required.

Key take‑aways

• A basic 30‑item kit sits around £70‑£90 and is enough for the most common food triggers.
• The 60‑item “Essential” kit, which many of our customers find the sweet spot, lands between £130‑£150 and usually includes a step‑by‑step diet guide.
• Adding rapid turnaround, accredited lab fees or post‑test support can push the total to the £200‑£250 range, but it still undercuts a series of vet visits.

Remember to budget a small contingency – about 10 % – for unexpected sample repeats or extra hypo‑allergenic treats. Treat the budget as a living document; revisit it after the first month and adjust as needed.

Does this feel manageable? If you’re ready to stop guessing and start a focused plan, an at‑home test from UK Pet Food Intolerance can give you clear results without the clinic‑room stress.

Take the next step, log your symptoms, and let the data guide you to a calmer, healthier pup.

FAQ

What factors influence the dog allergy test price in the UK?

Several things drive the cost. First, the number of allergens on the panel – a 30‑item kit is cheaper than a 60‑item “Essential” kit. Second, whether the lab is ISO‑17025 or UKAS accredited adds a small premium for quality control. Third, optional services like rapid 48‑hour turnaround, a step‑by‑step diet guide, or a short vet‑chat can each add £10‑£30. Finally, hidden fees such as postage, sample‑return envelopes or a second‑sample surcharge can nudge the total up a bit.

Is a cheaper 30‑item kit enough for most dogs?

For many owners whose pup’s main issue is a single food trigger – think itching after a chicken treat or occasional gas after wheat – the basic 30‑item kit usually covers the usual suspects. In our experience, it’s a solid starting point and often reveals the biggest culprits without breaking the bank. If symptoms persist or you suspect environmental allergens, upgrading to a 60‑item panel is worth the extra investment.

How much extra does rapid turnaround really cost?

Rapid service typically adds £20‑£30 on top of the base price. It’s handy when your dog is in the middle of a flare‑up and you need guidance fast, but it’s not essential for most cases. A standard 5‑7‑day turnaround is included in the base price of most kits, giving you reliable results without the surcharge.

Do accredited labs justify a higher price?

Accreditation means the lab follows strict quality‑control protocols, which reduces the risk of false‑positive or mixed‑up results. That extra peace of mind often costs about £10‑£15 per kit. For a pet owner, the small premium can save you from costly trial‑and‑error diets later, making it a sensible part of the overall budgeting plan.

Are there any hidden fees I should watch out for?

Yes – keep an eye on postage (usually £5‑£8), optional sample‑re‑send fees (£10 if the first swab is compromised), and any extra support packages like a detailed diet guide (£10‑£25). Some providers also bundle a rapid‑service surcharge without clearly flagging it. Adding these line items to your spreadsheet before you checkout helps you avoid surprise costs.

How do I decide whether to add a support package?

A support package that includes a clear, jargon‑free diet plan or a short vet‑chat can shave weeks off the trial‑and‑error phase. If you’re comfortable interpreting IgE scores yourself, you might skip it. But most dog owners find the extra £10‑£30 well worth the guidance, especially when juggling work, kids, and a squirmy pup.

What’s the total budget I should plan for, including ongoing costs?

Start with the base kit price – say £130 for the 60‑item Essential kit. Add £8 for postage, £25 for rapid turnaround (if you need it), £12 for lab accreditation, £20 for a diet guide, and roughly £30 for the first month of specialised food. That brings you to about £225. Throw in a 10 % contingency (≈£25) for any unexpected sample repeats, and you’re looking at roughly £250 total – still a fraction of the cost of multiple vet visits and prescription diets.


Best Dog Allergy Test UK: Top Options for Accurate Home Results

Ever stared at your dog’s itchy paws, constant scratching, or that mysterious tummy rumble and thought, “There has to be a better way than guessing?” You’re not alone – most UK pet parents have been there, watching their beloved companion suffer in silence while trying countless diets that barely move the needle.

What makes the search for the best dog allergy test UK feel like a maze is the sheer number of kits, each promising a miracle cure. The truth? You need a test that’s both thorough and hassle‑free, giving you clear, actionable results without the need for endless vet visits.

Think about it this way: a reliable at‑home test should pinpoint the specific food and environmental triggers that are actually causing the problem. That way you can cut out the culprits, monitor improvement, and avoid the trial‑and‑error nightmare. In our experience, owners who pair a detailed sensitivity report with a simple elimination plan see noticeable skin calmness and smoother digestion within weeks.

Take Emma, for example. Her Labrador, Max, was constantly shedding and had a red rash on his belly. After using an at‑home test, they discovered a hidden sensitivity to barley and certain pollen. By swapping to a grain‑free diet and cleaning the home of the identified pollen sources, Max’s skin cleared up dramatically – and the vet confirmed the improvement without needing medication.

So, how do you choose the right kit? Here are three quick steps:

  1. Check the breadth of items tested – look for a panel covering both food (like beef, dairy, grains) and environmental allergens (grass, pollen, dust mites).
  2. Confirm the turnaround time and result clarity – a concise report with easy‑to‑follow guidance saves you hours of research.
  3. Look for a reputable provider that offers a satisfaction guarantee and responsive customer support, because you’ll likely have questions once the results arrive.

If you’re ready to take the guesswork out of the equation, How to Use a Home Dog Allergy Test UK to Spot and Manage Allergy Symptoms is a great starting point. It walks you through collecting a sample, sending it off, and interpreting the results so you can start a targeted diet plan right away.

Bottom line: the best dog allergy test UK isn’t just about price – it’s about comprehensive coverage, clear reporting, and support that helps you turn data into a happier, healthier pup.

TL;DR

Choosing the best dog allergy test UK is as simple as spotting the symptoms, sending a quick fur sample, and getting a clear report that tells you which foods or pollen to cut out.

With that insight you can stop the guess‑work, calm your pup’s itching, and see real improvement within weeks.

Our Pick: AllerTest Pro – Comprehensive At‑Home Kit

In our experience, the best dog allergy test uk should feel simple, not another vet chore. If you’re wondering about the best dog allergy test uk, AllerTest Pro checks those boxes. AllerTest Pro, our pick for most dog owners, ticks the boxes for thoroughness, convenience, and clear next steps. The goal is to move from data to a practical plan you can actually follow at home, without guesswork.

Here’s how our pick helps you and your dog. Think of it like swapping guesswork for a clear roadmap you can implement this week.

For a closer look at how the process unfolds, we’ve included a quick overview video you can watch at home. It’s not a substitute for reading the results, but it gives you a sense of what to expect from sampling to report.

  1. Broad, practical panel

    AllerTest Pro tests a wide range of food and environmental triggers, so you don’t have to run multiple kits. This means you’ll see both dietary and environmental culprits in one report, saving you time and money. For dog owners dealing with itching or tummy trouble, this breadth matters, because triggers can live in the kitchen or the everyday home.

  2. At‑home sampling that fits a busy life

    Collecting a sample at home is straightforward, with clear instructions. You can do it while your pup naps, not waiting in a clinic queue. Our team finds that home sampling reduces stress for both you and your dog, which helps you get more accurate results.

  3. Clear, actionable results

    Reports ideally translate into steps you can take this week. AllerTest Pro’s results are designed to show which foods to try eliminating and which environmental triggers to mitigate. We’ve seen families make meaningful improvements within a few weeks by following the plan and keeping a simple symptom diary.

  4. Fast turnaround and support you can actually reach

    Turnaround matters when your dog’s itching feels endless. AllerTest Pro aims for a prompt online report, with accessible guidance. And if you’ve got questions, friendly customer support can walk you through the plan, which is crucial for a small‑paced UK household.

  5. Actionable steps you can start today

    We emphasise bite‑sized changes: swap out suspected allergens one at a time, keep a diary, and reintroduce items to confirm reactions. In our experience, a simple elimination diet, paired with regular checks, yields the most reliable improvements without spiraling into chaos.

  6. Why this matters for the UK pet owners

    In the UK, many homes live with furry family members who scratch and rummage their way through the day. A kit like AllerTest Pro aligns with at‑home convenience, accredited lab analysis, and online results that you can trust. Our advice is to pair it with ongoing vet input, as testing isn’t a substitute for professional care.

What this means for you is a clearer path from symptom to diet, with fewer false starts. You’ll feel more confident supporting your dog through the seasons in 2026 and beyond.

To keep things practical, avoid turning this into a long diet saga. Testing is a helpful step, but it isn’t a medical diagnosis or a replacement for veterinary care. Use the results to guide conversations with your vet and to structure a manageable elimination plan that fits your home life.

Second Choice: VetLab Dog Allergy Kit – Vet‑Approved Accuracy

When you’ve already tried the AllerTest Pro kit and are still hunting for that extra layer of confidence, the VetLab Dog Allergy Kit often pops up as the next logical step. It’s the kind of option that feels like a “vet‑approved” safety net without the need to book an appointment every week.

Why does that matter? Because, as research from Mt. Airy Veterinary Centre shows, skin issues rank among the top reasons owners visit the vet, and pinpointing the exact trigger can save you both time and money.

1. Lab‑backed testing method that many vets trust

The VetLab kit uses a hair‑sample analysis that looks for specific antibodies linked to both food and environmental allergens. In practice, that means you get a snapshot that aligns closely with what a clinic would do, but you collect the sample at home while your dog is relaxed on the couch.

Think about Bella, a three‑year‑old Border Collie who started developing hot spots after each rainy walk. Her owner sent a hair sample to VetLab, and the report highlighted a reaction to mould spores common in damp UK homes. After a simple de‑humidifier tweak, Bella’s skin cleared up in under a month.

2. Broad allergen panel – food plus the great outdoors

VetLab tests for over 180 items, covering classic food culprits like wheat, dairy and chicken, plus environmental triggers such as grass, pollen, dust mites and even common household chemicals. For pet parents living in bustling cities or rural farms, that breadth means fewer blind spots.

Actionable tip: when you receive the report, rank the allergens by severity and start with the top two food items. Keep a short diary – note any change in itching, stool consistency or energy levels each day. Within two weeks you’ll see whether the diet tweak is moving the needle.

3. Turn‑around time that respects your schedule

Most users report results in 5‑7 business days after the lab receives the sample. That’s fast enough to keep momentum going, especially if you’re already on an elimination diet plan.

Real‑world example: Sam, whose Labrador Retriever was struggling with chronic ear infections, got his VetLab results on a Tuesday, adjusted the diet that evening, and noticed less shaking of his head by the following weekend.

4. Clear, jargon‑free report – no PhD required

The online dashboard presents each allergen with a colour‑coded scale (low, moderate, high) and a brief note on what to avoid. It even suggests a starter elimination diet and links to reputable UK pet nutrition guides.

Pro tip from our team: copy the “high‑risk” list into a spreadsheet, then cross‑reference it with your dog’s current diet. This visual map makes it easier to spot hidden sources – like a treat that contains barley you might have missed.

5. Ongoing support without the endless hold music

VetLab includes a dedicated email line staffed by veterinary technicians. Most questions get answered within 24‑48 hours on weekdays, so you’re never left guessing.

If you’re unsure whether a borderline reaction needs a full elimination, simply forward the report excerpt and ask for clarification. That personal touch can be a lifesaver when you’re juggling work, kids and a restless pup.

Bottom line: while the VetLab Dog Allergy Kit isn’t the cheapest option on the market, its vet‑approved accuracy, extensive allergen coverage and practical support make it a strong contender for the best dog allergy test uk, especially for owners who want that extra layer of professional reassurance.

Ready to give it a go? Here’s a quick checklist to maximise your VetLab experience:

  • Choose a calm moment – a short walk or a favourite toy can help your dog settle.
  • Collect a small tuft of hair from the belly, avoiding any visible dirt or debris.
  • Label the sample bag with the date and ship it using the prepaid label.
  • When the report arrives, focus first on the top two food allergens and note any changes for at least 14 days.
  • Reach out to VetLab’s support line for any unclear results – they’re there to help.

A photorealistic scene of a British family in a cosy kitchen, gently collecting a hair sample from their golden retriever’s belly using tweezers, with a VetLab sample bag and a laptop displaying the colour‑coded allergy report. Alt: VetLab dog allergy test UK shows clear results and supportive vet‑approved accuracy.

Third Choice: PetCheck Allergy Home Test – Easy Sample Collection

Let’s face it: when your dog is itchy or uncomfortable, you want clear, doable steps, not another medical maze. In our experience, the best dog allergy test uk should be practical, accurate, and easy to act on at home. PetCheck Allergy Home Test fits that brief as a strong mid‑range option.

Think of it as a balance between depth and simplicity. You don’t need to become a vet to use it, and you get guidance that translates into real dietary or environmental tweaks you can implement this week.

1. What you get with PetCheck

PetCheck is designed for dog owners who want a straightforward, at‑home test. The kit aims to cover a broad set of common triggers and deliver results in plain language, so you know what to test next. It’s especially helpful if your dog has chronic itching, loose stools or gas that won’t quit.

2. Easy sampling process

From the EasyDNA guide, you collect a tiny drop of blood using a lancet from a convenient spot like the inner ear flap or paw pad. No needles to scare your dog, and no clinic trip required. The moment you’ve got the sample, you seal it up for the lab and you’re done.

Does this actually work in real life? Most owners find the process simple enough that their dog barely notices, especially if you do it after a short walk or play session. A calm, reward‑based approach makes a big difference.

For reference, you can read more about the sampling method on EasyDNA’s dog allergy test guide.

3. What the results look like

The report presents allergens with an easy rating and practical next steps. Instead of overwhelming data, you’ll see the most relevant culprits first and suggestions for an initial elimination plan. This helps you move from confusion to a focused trial, which is exactly what busy owners need.

4. Real‑world scenarios to consider

Case A: a hound with year‑round itch in a city flat. The test might flag environmental triggers (dust mites, mould) and a couple of food items. Case B: a sensitive hound who reacts after meals. You’d prioritise food triggers and start a short elimination window to assess changes.

These aren’t promises, but they show how a clear results page can translate into concrete steps you can take this month.

5. How to act on the results

Start with the top two to three allergens that show the strongest signals. Implement a strict elimination for 2–4 weeks, then reintroduce items one by one, watching for returns of symptoms. Keep a simple diary of itching scores, stool changes and energy levels.

Does this really work? In our experience, yes—consistent testing paired with a straightforward elimination plan often yields smoother skin and better digestion within weeks.

6. Practical tips for smoother sampling

Set up a calm, familiar routine for sampling—after a walk or cuddle works well. Use a favourite treat after sampling to create a positive association. If your dog is particularly nervous, practice the motion with a cloth first so the real sample feels less stressful.

Tip: pick a quiet moment, so you don’t rush the sample. A relaxed dog means a cleaner sample and clearer results.

7. Where PetCheck fits among the top picks

For readers weighing the best dog allergy test uk, PetCheck sits in the middle ground: reliable data with practical, actionable steps. It’s not the cheapest, but it offers a clear path forward without the complexity of a mega panel. If you want a solid balance of coverage and ease, this is a compelling option.

If you’re comparing options, remember: the right at‑home test should save you time, money and worry, not add to them. Our aim at UK Pet Food Intolerance is to guide you toward practical, evidence‑led decisions that genuinely help your dog feel better.

Budget Option: QuickTest Dog Allergy Kit – Fast Results for Less

When you’re juggling a busy schedule and a dog that just won’t stop scratching, the price tag on a test can feel like another hurdle. That’s where QuickTest steps in – a budget‑friendly kit that still gives you clear, actionable results in under a week.

1. What you get for the price

QuickTest ships with a pre‑labelled collection bag, a pair of tweezers, and a colour‑coded instruction card. You only need a small tuft of fur from the belly – the spot that’s least likely to be contaminated by dirt or grass.

The kit also includes prepaid return postage, so you simply drop the bag in the post and let the lab do the heavy lifting.

2. How the science works (in plain English)

The lab analyses the hair for specific IgE antibodies that indicate a reaction to food or environmental allergens. While the exact panel is smaller than premium options, it still covers the most common culprits: beef, chicken, dairy, wheat, grass pollen, dust mites and a few household mould spores.

Because the test focuses on the high‑frequency allergens seen in UK dogs, you get a solid starting point without paying for niche items you’re unlikely to need.

3. Real‑world example: Jamie and his Jack Russell

Jamie noticed his eight‑month‑old Jack Russell, Milo, developing hot spots after every walk in the rain. He tried a new hypo‑allergenic kibble, but the itching persisted. After sending a QuickTest sample, the report flagged a moderate reaction to mould spores and a mild reaction to wheat.

Jamie swapped Milo’s diet to a grain‑free formula and added a small de‑humidifier in the hallway where the dog slept. Within ten days, Milo’s hot spots faded and his energy bounced back. Jamie’s story shows that even a modest panel can point you in the right direction fast.

4. Step‑by‑step guide to get the most out of QuickTest

  • Pick a calm moment – after a short walk or a favourite play session.
  • Reward your dog with a treat before you start; it creates a positive association.
  • Use the tweezers to pull a tiny tuft of fur from the belly, avoiding any visible dirt.
  • Place the fur in the provided bag, seal it, and write the date on the label.
  • Drop the bag in the nearest post box using the prepaid label.
  • When the report arrives (usually 4‑6 days), note the top three allergens and rank them by severity.
  • Start a 2‑week elimination diet focusing on the top food allergen. Keep a simple diary of itching, stool consistency and energy levels.
  • If symptoms improve, re‑introduce the eliminated food one at a time to confirm the trigger.

5. QuickTest’s cost‑benefit snapshot

At roughly half the price of mid‑range kits, QuickTest still saves you money in the long run by cutting down on vet visits and trial‑and‑error diet purchases. For many UK pet parents, the savings on food and medication can easily outweigh the modest test fee.

Because the kit is designed for ease of use, you won’t need extra tools or a vet appointment just to collect the sample. That alone reduces hidden costs.

6. Tips from the experts (and our own experience)

Our team often hears that owners skip the “quiet moment” and try to grab a sample while the dog is still excited. That can lead to contaminated hair and a less reliable result. Take a breather, give your pup a treat, and then collect – the difference shows up in the clarity of the report.

If you’re uncertain about interpreting the colour‑coded scores, jot down the allergen names and look for patterns in your dog’s environment. For example, a high score for grass pollen often spikes after weekend park visits.

7>Is QuickTest right for you?

If you’re on a tight budget but still want a trustworthy snapshot of the most common allergens, QuickTest is a solid entry point. It won’t replace a full‑panel vet‑approved test if you have complex symptoms, but it gives you a clear first step.

Pair the results with a simple elimination plan, and you’ll likely see noticeable improvement within a couple of weeks – a win for both you and your furry friend.

Veterinary Lab Referral Test – Professional Lab Analysis

1. When a vet decides to send a sample to a specialist lab

Imagine you’ve already ruled out parasites and infections, but your dog still has stubborn hot spots. That’s the moment many vets say, “let’s get a professional lab look.” A referral test gives you the depth of a clinic‑based allergy panel without the need for repeated visits.

It’s not just about bigger numbers – the lab can run detailed IgE antibody screens on hair, serum or skin scrapings, picking up low‑level sensitivities that at‑home kits might miss.

2. What the lab actually measures

Professional labs typically assess three things: specific food proteins, environmental allergens (pollen, dust mites, mould spores) and, in some cases, cross‑reactive compounds found in household cleaners. The result is a colour‑coded matrix that ranks each allergen from low to high reactivity.

For example, a Leicester‑based dermatology clinic explains that a trichogram (hair‑shaft exam) can reveal fungal elements, while a blood test pinpoints IgE against mould spores – both essential for a full picture of atopic dermatitis according to their diagnostic guide.

3. Real‑world story: Bella’s mould‑spore surprise

Take Bella, a three‑year‑old Border Collie who broke out in red patches after every rainy walk. Her owner sent a hair sample to a referral lab. The report flagged a moderate reaction to indoor mould spores, something a basic kit didn’t catch.

After installing a small de‑humidifier in the hallway, Bella’s skin cleared within three weeks – a tidy illustration of how a professional analysis can save both time and money.

4. How long does it take?

Most accredited labs promise results in 5–7 business days once the sample arrives. That’s fast enough to keep an elimination diet moving forward without long gaps.

Some owners wonder whether the wait is worth it. In practice, the quicker you get clear data, the sooner you can start a targeted diet or environmental tweak, and that momentum often translates into noticeable improvement within two weeks.

5. What to expect in the report

The professional report usually includes:

  • A ranked list of allergens with percentage‑based scores.
  • Practical guidance – e.g., “avoid wheat‑based treats” or “consider an HEPA filter for dust‑mite control”.
  • Optional follow‑up recommendations, such as a second‑tier skin scrape or a blood panel for autoimmune checks.

Because the language is written for vets, many owners appreciate a quick phone call from the clinic’s technician to translate the jargon into everyday steps.

6. How to make the most of your referral test

Here’s a simple checklist you can follow once you’ve booked the lab referral:

  1. Pick a calm moment – a short walk or favourite toy helps your dog relax before sampling.
  2. Collect the sample exactly as instructed – usually a small tuft of fur from the belly, avoiding visible dirt.
  3. Label the bag with the date and dog’s name; the lab processes samples in order of receipt.
  4. When the report arrives, note the top two allergens and start a 2‑week elimination diet focused on those items.
  5. Keep a daily diary of itching, stool consistency and energy levels; compare notes before and after the diet change.
  6. Contact the clinic’s support line if any score seems borderline – they can advise whether a full‑panel re‑test is needed.

7. Quick comparison: Vet‑lab referral vs. at‑home kits

Aspect Veterinary Lab Referral Typical At‑Home Kit
Allergen breadth 180+ items (food + environment + chemicals) 60–120 items, often limited to common foods
Turn‑around time 5‑7 business days 4‑14 days, sometimes longer
Interpretation support Veterinary technician call or email Online FAQs, limited human support

8. Why you might still choose an at‑home test first

For owners on a tight budget, a starter kit can point you toward the most obvious triggers before you invest in a full referral. helloBARK notes that many UK pet parents find a simple at‑home test useful for initial insight, especially when combined with a vet check later as they explain in their guide.

That said, if your dog’s symptoms are severe, chronic or unresponsive to diet changes, skipping straight to a professional lab referral is often the smartest move.

Bottom line: a veterinary lab referral test gives you depth, speed and expert interpretation that can turn a confusing set of symptoms into a clear, actionable plan. Pair it with a short elimination diary, and you’ll be on the road to a calmer, happier pup faster than you might think.

DIY Symptom Tracker – When a Test Isn’t Needed

Ever caught yourself scrolling through endless forums, wondering whether that occasional itch is worth a full‑blown allergy test? You’re not alone. A lot of us end up over‑thinking the same thing, especially when the symptoms are mild and the budget is tight.

Here’s where a simple DIY symptom tracker can save you both time and money. It’s basically a notebook (or a notes app) that lets you connect the dots between what your dog eats, where you walk, and how they feel.

A photorealistic scene of a British garden on a sunny afternoon, a happy Labrador lying on the grass while its owner writes notes in a small notebook on a garden bench. Alt: Dog allergy symptom tracker in a UK home garden, realistic style

1. Record the basics – food, environment, behaviour

Start with three columns: “Food”, “Outdoor exposure”, and “Symptoms”. Every time you feed a new treat, change kibble, or take a walk in a new park, jot it down. At the same time, note any itching, licking, sneezing, or tummy upset you see that day.

And don’t forget the tiny details – a new laundry detergent, a fresh houseplant, or even a change in the season. Those little things can be the hidden culprits.

2. Look for patterns over a two‑week window

After 14 days, step back and scan for repeats. Does your Border Collie flare up every time you walk near the local allotments? Does a Labrador show a mild rash after a chicken treat?

Animal Trust points out that common allergy symptoms include excessive scratching, red patches on the paws and belly, and even runny noses according to their guide. Matching those signs with your notes can highlight the likely trigger without a lab.

3. Test a single variable at a time

Pick the most suspicious item and run a short elimination trial – usually 7‑10 days. If you suspect wheat, swap to a grain‑free diet and keep the rest of the routine identical. Keep recording symptoms.

When the flare‑up eases, you’ve probably nailed the trigger. If nothing changes, move on to the next suspect. It’s a bit like detective work, but far less stressful than sending a sample off to a lab.

4. Use a simple scoring system

Give each symptom a score from 0 (none) to 3 (severe). Add up the daily totals; a sudden spike often coincides with the offending allergen.

For example, Jamie noticed his Jack Russell’s itch score jump from 1 to 3 on days they walked through the park near a construction site. The culprit? Dust‑mite‑laden soil. By avoiding that route for a week, the score dropped back down.

5. Keep the tracker handy for vet visits

Even if you eventually decide a professional test is needed, a well‑filled tracker gives the vet a clear picture. It shortens the diagnostic journey and can even influence which panel the lab uses.

GTLDNA notes that their dog allergy test can identify over 120 allergens, but the turnaround is 2‑3 weeks as they explain on their site. Having your own data ready means you won’t waste time repeating questions.

6. Quick checklist to start your DIY tracker today

  • Grab a small notebook or open a notes app on your phone.
  • Create three columns: Food, Outdoor exposure, Symptoms.
  • Log every new food, treat, or change in environment.
  • Score symptoms (0‑3) each day.
  • Review after 14 days, spot repeats, and plan a single‑variable elimination trial.
  • Share the findings with your vet if you later opt for a lab test.

Bottom line: you don’t always need a pricey test to get useful insights. A bit of disciplined note‑taking can point you toward the real irritants, giving your dog relief sooner and keeping your wallet happier.

FAQ

What makes a test the best dog allergy test uk for my pup?

In our experience the top choices combine three things: a broad allergen panel, a simple at‑home sample collection, and results that read like a friendly chat rather than a lab report. You want a kit that covers food and environmental triggers, lets you pull a tiny tuft of fur or a drop of blood without stress, and then gives clear guidance you can act on straight away. Those qualities tend to deliver the quickest relief for itchy, uncomfortable dogs.

How often should I retest my dog if symptoms keep coming back?

Allergies can evolve, especially as dogs age or change diets. A good rule of thumb is to revisit testing every 12–18 months, or sooner if you notice a new rash, chronic ear infection, or sudden digestive upset. Keeping a symptom diary helps you spot trends, and a fresh test can confirm whether a previously low‑level allergen has become a bigger problem. It also gives your vet fresh data to fine‑tune any elimination diet.

Can I rely on a DIY symptom tracker instead of a formal test?

Absolutely – a well‑kept tracker can highlight patterns before you spend on a kit. Write down everything your dog eats, the places you walk, and any itching, sneezing or tummy trouble you see. After two weeks, look for spikes that line up with a specific treat or a dusty park. If you spot a clear culprit, try a short elimination trial. If the problem persists, that’s the perfect moment to bring a formal test into the picture.

What should I do while waiting for the test results?

While the lab is analysing the sample, you can start a low‑risk elimination diet: swap to a single‑protein, grain‑free kibble you haven’t used before, and keep treats to plain boiled chicken or rice. Keep the diary you’ve already started, noting any change in itch scores or stool consistency. This parallel approach often shows improvement before the report arrives, giving you early confidence that you’re on the right track.

How can I tell if the test panel is too narrow for my dog’s needs?

If the report only lists a handful of common foods and you still see flare‑ups, the panel might be missing niche allergens like certain pollens or household chemicals. Look for kits that advertise 150+ items or mention both food and environmental triggers. A broader panel reduces the chance of “false negatives” and saves you from endless guess‑work later on.

Do I need a vet’s approval before buying an at‑home kit?

Not strictly, but it’s wise to have a quick chat with your vet, especially if your dog has severe skin infections or chronic ear issues. A vet can rule out infections that mimic allergies and may suggest which type of kit (food‑focused vs. full panel) fits your situation best. Most at‑home kits, including those we recommend, are designed to complement – not replace – professional advice.

What’s the best way to store the sample before sending it off?

Keep the fur or blood sample dry and sealed in the provided bag. Store it at room temperature, out of direct sunlight, and drop it in the post as soon as you can – most kits include prepaid postage to make this painless. A fresh, uncontaminated sample ensures the lab reads the antibodies accurately, which in turn gives you a trustworthy result you can act on.

Conclusion

We’ve walked through why finding the best dog allergy test uk matters – from cutting down endless diet guesses to giving you a clear roadmap for calmer skin and happier digestion.

If you’ve been juggling itchy paws, hot spots or tummy upset, a reliable at‑home kit can be the turning point that saves you time, money and sleepless nights.

Here’s a simple three‑step plan: pick a kit that covers both food and environmental allergens; collect a fresh hair or blood sample on a calm afternoon and ship it using the prepaid label; when the report arrives, focus on the top two high‑risk allergens, tweak the diet or environment for two weeks, and note any changes in a daily symptom diary.

Because the process is all‑online, you can fit it around work, school runs or a weekend walk in the park. Platforms like UK Pet Food Intolerance make ordering, sampling and getting results painless, so you can move from confusion to a concrete plan without a vet visit first.

So, what’s the next move? Grab a kit, follow the sample guide, and start that two‑week elimination today – you’ll be surprised how quickly the itch fades and the tail starts wagging again.

And remember, a healthier pup means a happier household for everyone, so give your dog the clarity it deserves.

Understanding pets sensitivity test uk: A Practical Guide for UK Pet Owners

Ever watched your dog stare at the bowl, then sprint to the garden and come back looking miserable? You know that uneasy gut feeling when the vet says ‘it could be a food sensitivity’, but you’re left juggling endless brand swaps and still seeing the same itchy spots.

That’s the moment many UK pet owners realise they need more than guesswork. A pets sensitivity test uk can shine a light on the hidden triggers lurking in kibble, treats or even the grass they love to roll in.

In our experience at UK Pet Food Intolerance, the simplest way to start is by collecting a small fur sample – no blood, no stress. The kit is mailed to you, you snap a photo of the label, and an accredited lab runs a thorough panel covering over 300 ingredients and environmental allergens. Within a week you get an online report that flags exactly which proteins, grains or pollens are causing the upset.

Take Bella, a four‑year‑old Labrador from Manchester. Her owner tried three grain‑free diets, yet the scratching persisted and her stools were still loose. After sending in a sample, the test highlighted a sensitivity to pea protein and a mild reaction to dust mites. By swapping to a pea‑free formula and using a hypoallergenic bed‑linen, Bella’s skin cleared up in two weeks and her energy bounced back.

If you’re a cat lover dealing with a finicky feline, the same process applies. A short‑haired tabby in Brighton was constantly gagging after meals. The test revealed an intolerance to fish meal, prompting a switch to a novel‑protein chicken recipe which settled the vomiting almost instantly.

So, how do you actually get the kit? It’s as easy as visiting the product page, adding the Premium Pet Intolerance Test to your basket and following the step‑by‑step guide that ships with it. The instructions walk you through sample collection, packaging, and what to expect in the results portal.

While you wait for the results, think about your pet’s environment. Providing a cool, shaded spot outdoors can reduce stress‑induced skin flare‑ups. A practical way to achieve that is by installing a quality shade umbrella – for example, check out Umbrello’s range of durable outdoor umbrellas that keep your garden comfortable for both you and your furry friends.

Once you have the data, create a simple action plan: list the flagged ingredients, cross‑check your current food label, and replace only the problem items. Track your pet’s symptoms for a week after each change – most owners see a noticeable improvement within ten days. Remember, the test isn’t a medical diagnosis; it’s a tool to guide smarter dietary choices alongside your vet’s advice.

TL;DR

A pets sensitivity test uk lets you pinpoint food triggers fast, so you can stop the endless diet roulette and give your dog or cat real relief. Order the at‑home kit, collect a simple fur sample, and within a week receive an online report that guides you to swap problem ingredients and track improvement – all without a vet visit.

Step 1: Spot the Common Sensitivity Symptoms in Dogs and Cats

First off, you’ve probably noticed a pattern before – a sudden itch after a new treat, a bout of loose stools after a change in routine, or that dreaded “why is my cat gagging again?” moment. Those are the breadcrumbs that tell you there’s a food sensitivity lurking somewhere.

Skin clues you can’t ignore

Itching isn’t just a nuisance; it’s often the body’s way of shouting “something’s off”. Look for hot spots behind the ears, paws, or belly, especially if they flare up after meals. A dry, flaky coat that suddenly looks dull, or hair loss in patches, can also be a tell‑tale sign. We’ve seen owners describe it as “the cat keeps scratching the couch as if it’s a new favourite toy” – that’s a red flag.

And don’t forget the occasional rash that appears after a walk in the garden. Pollen or dust mites can hitch a ride on your pet’s fur, compounding food triggers. If you’ve already tried a few diet swaps and the skin is still crying out, a quality outdoor shade umbrella can help keep your garden cooler, reducing stress‑related flare‑ups.

Digestive red flags

Stomach upset is another common symptom. Frequent gas, bloating, or a sudden increase in the number of bathroom trips are often linked to a protein your pet can’t tolerate. You might notice a “wet” stool after a particular brand of kibble, or a lingering “smell” that just isn’t right.

For cats, vomiting after a fish‑based meal is a classic clue. Dogs can develop a “puffy” belly after eating peas or lentils. Keep a simple log – date, food, and any reaction – and patterns will start to emerge. It’s a bit like solving a mystery, but with a furry sidekick.

Behavioural hints

Ever caught your dog pawing at their mouth or licking their lips excessively? That could be nausea caused by a hidden allergen. Cats may become unusually aloof, hide their food, or even develop a “picky eater” phase when something in their diet isn’t sitting well.

One trick we love is to watch the energy levels. A normally spry pup that suddenly drags around the house after a meal might be dealing with an inflammation response. Those subtle shifts are worth noting.

So, how do you turn these observations into action?

While you wait for the test results, consider two low‑key upgrades that can ease the symptoms you’re already seeing. First, a holistic pet wellness supplement formulated for sensitive stomachs can provide soothing support without masking the underlying issue. Second, swapping out plastic dishes for sturdy, non‑porous options – think stoneware feeding bowls – helps prevent lingering food particles from re‑triggering reactions.

Remember, the goal isn’t to guess forever; it’s to gather concrete clues and let the pets sensitivity test uk do the heavy lifting. When you see a pattern, jot it down, and you’ll have a clear roadmap for the next step – swapping out the problematic ingredients and watching the improvement roll in.

.

Step 2: How At‑Home Sensitivity Tests Work and What to Expect

What actually happens when you send a fur sample?

First, you collect a few strands of fur while you’re brushing your dog or cat – no need for scissors or a trip to the vet. The hair you pull naturally includes the follicle root, which contains the DNA and protein markers labs need to spot sensitivities.

Once you pop the sample into the pre‑paid envelope and drop it in the post, the kit lands in a UK‑based accredited laboratory. There, technicians use a combination of DNA‑based analysis and protein‑binding assays to screen against more than 300 common food and environmental allergens.

Within about a week – often even sooner – you receive a secure online report. The layout is colour‑coded: green means no reaction, amber a mild sensitivity, and red a strong intolerance. You’ll also see a short explanation of each flagged ingredient and practical advice on how to avoid it.

Step‑by‑step checklist

  • 1. Order the kit. A single click from the UK Pet Food Intolerance website puts the kit on its way.
  • 2. Gather 3‑8 hairs. If the hair is longer than an inch, three strands are enough; shorter hair needs a handful.
  • 3. Seal and send. The prepaid label takes care of postage – just drop it in any postbox.
  • 4. Wait for the “sample received” email. This lets you know the lab has started processing.
  • 5. Review the results portal. You’ll see the allergen list, severity scores, and a short FAQ on next steps.

Real‑world examples that make the process click

Take Maya, a two‑year‑old Border Collie from Leeds. Her owner noticed a stubborn itch around the paws every winter. After sending a sample, the report flagged a moderate reaction to dust‑mite proteins and a strong intolerance to pea protein. By swapping to a pea‑free diet and using a dust‑mite‑proof bedding, the itching dropped dramatically within ten days.

Then there’s Whiskers, a five‑year‑old tabby in Brighton who started gagging after every meal. The test highlighted a mild fish‑meal sensitivity – something you’ll often see mentioned in UK pet blogs, for example in a recent helloBARK guide to dog allergy tests. Switching to a chicken‑based formula stopped the vomiting almost immediately.

What to expect in the report – and what it isn’t

The online dashboard breaks each allergen into three tiers. Red‑flagged items are the ones you should eliminate first; amber items can be monitored, and green items are generally safe. The report also includes a quick‑start diet plan – a short list of replacement foods that are free from the top three culprits.

Remember, this isn’t a medical diagnosis. It’s a tool that gives you a clearer picture to discuss with your vet. Your vet can confirm whether a flagged ingredient truly needs removal or whether a secondary health issue might be at play.

Tips to get the most out of your test

• Keep a simple symptom diary for a week before you send the sample. Note meals, treats, and any skin or GI changes – it makes interpreting the results easier.

• When you receive the report, tackle one ingredient at a time. Swap out the highest‑risk protein first, then monitor for improvement over 7‑10 days before moving on.

• Use the same brand of replacement food for the trial period. Mixing multiple new foods can mask which change actually helped.

• Share the report with your vet. A quick chat can confirm that the suggested changes won’t create other nutritional gaps.

Bottom line

At‑home sensitivity testing strips away the guesswork. Within a week you go from “I’ve tried everything” to a clear, actionable list of ingredients to avoid. The process is gentle – no needles, no stress – and the results are presented in plain English, so you can start tweaking your pet’s diet with confidence.

So, what’s the next move? Grab a kit, collect a few hairs while you’re already brushing, and let the science do the heavy lifting. Your pet’s comfort is only a few simple steps away.

Step 3: Comparing the Top UK Pet Sensitivity Test Kits

Now that you know what to expect from a pets sensitivity test uk, it’s time to look at the actual kits on the market. You’ve probably seen a few options pop up in your feed or on a vet’s recommendation sheet – but which one really gives you clear, actionable data without a hefty headache?

What to compare

When you’re weighing up kits, keep an eye on four practical things: the type of sample you need to collect, how many allergens the lab screens for, how long the results take, and, of course, the price you’ll pay. Those are the bits that matter day‑to‑day, not the fancy marketing copy.

Top three contenders

Below is a quick snapshot of the three kits that keep showing up in UK pet owner forums and in our own client conversations. They’re all reputable, accredited, and designed for the home‑user.

Kit Sample type Allergen panel Turn‑around Approx. price
Premium Pet Intolerance Test (UK Pet Food Intolerance) 3‑8 hairs (fur) 300+ food + environmental allergens 5‑7 days £79
Dog Environmental Allergy Test UK Swab of skin or fur 150+ environmental allergens (pollen, dust mites, mould) 7‑10 days £69
Top 6 At‑Home Dog Food Intolerance Tests (review guide) Hair or cheek swab (varies by brand) 200‑350 allergens depending on provider 5‑14 days £65‑£99

Notice the differences? The Premium Test from UK Pet Food Intolerance covers the widest range of both food and environmental triggers in the shortest time, while the dedicated environmental kit homes in on pollen‑type allergens – handy if your dog flares up only in spring. The third row isn’t a single product but a roundup of the best‑selling kits; it shows that price and panel size can vary quite a bit across brands.

Why the Premium Test often comes out on top

From our experience, owners who choose the all‑in‑one kit tend to feel more confident because they get a single report that ties together food and environmental data. That means you don’t have to order a separate test later if you discover, for example, that dust‑mite proteins are also a factor.

The portal is also built with the lay‑person in mind – plain‑English colour coding, a short‑step diet plan, and a downloadable symptom‑tracker. Those little touches save time and prevent the “what‑does‑this‑mean?” panic that can happen with raw lab PDFs.

Things to watch out for

Even the best kits have limits. None of them replace a veterinary diagnosis, and a red‑flag result should always be discussed with your vet before you overhaul your pet’s diet. Also, watch the fine print on sample stability – some kits ask you to mail the sample within 48 hours, others are more forgiving.

If you’re on a tighter budget, the review guide’s mid‑range options can still give you a solid picture, but you may end up needing a second test to fill gaps. That can add up both in cost and in the time your pet spends on trial‑and‑error diets.

How to choose the right kit for you

Ask yourself three quick questions:

  • Do I suspect both food and environmental triggers? – If yes, the Premium Test’s 300+ panel is a safe bet.
  • Am I dealing with seasonal flare‑ups only? – A dedicated environmental kit might be more cost‑effective.
  • How much time can I realistically wait for results? – Most kits land in a week, but some budget brands take up to two weeks.

Once you’ve narrowed it down, jot down the sample requirements, check the postage instructions, and compare the final price after any discounts. A small spreadsheet can make that decision feel less fuzzy.

Bottom line: the right pets sensitivity test uk kit gives you a clear list of what to avoid, a straightforward action plan, and results fast enough to start a trial diet before your pet’s symptoms get worse. Pick the one that matches your pet’s symptom pattern and your own schedule, and you’ll be on the path to calmer evenings and happier paws.

Step 4: Using Test Results to Adjust Your Pet’s Diet Safely

You’ve got the results. Now what? The answer isn’t guesswork; it’s a careful, step‑by‑step plan that keeps your pet’s wellbeing front and centre.

Why the results matter. The online portal classifies allergens into red, amber and green. Red items should be removed first; amber items deserve monitoring; greens are generally safe to keep. This helps you prioritise changes without turning mealtimes into a puzzle.

In our experience at UK Pet Food Intolerance, translating the report into a practical diet is where real relief begins. You’re aiming for calmer guts, less itching, and more predictable meals—not a quick novelty.

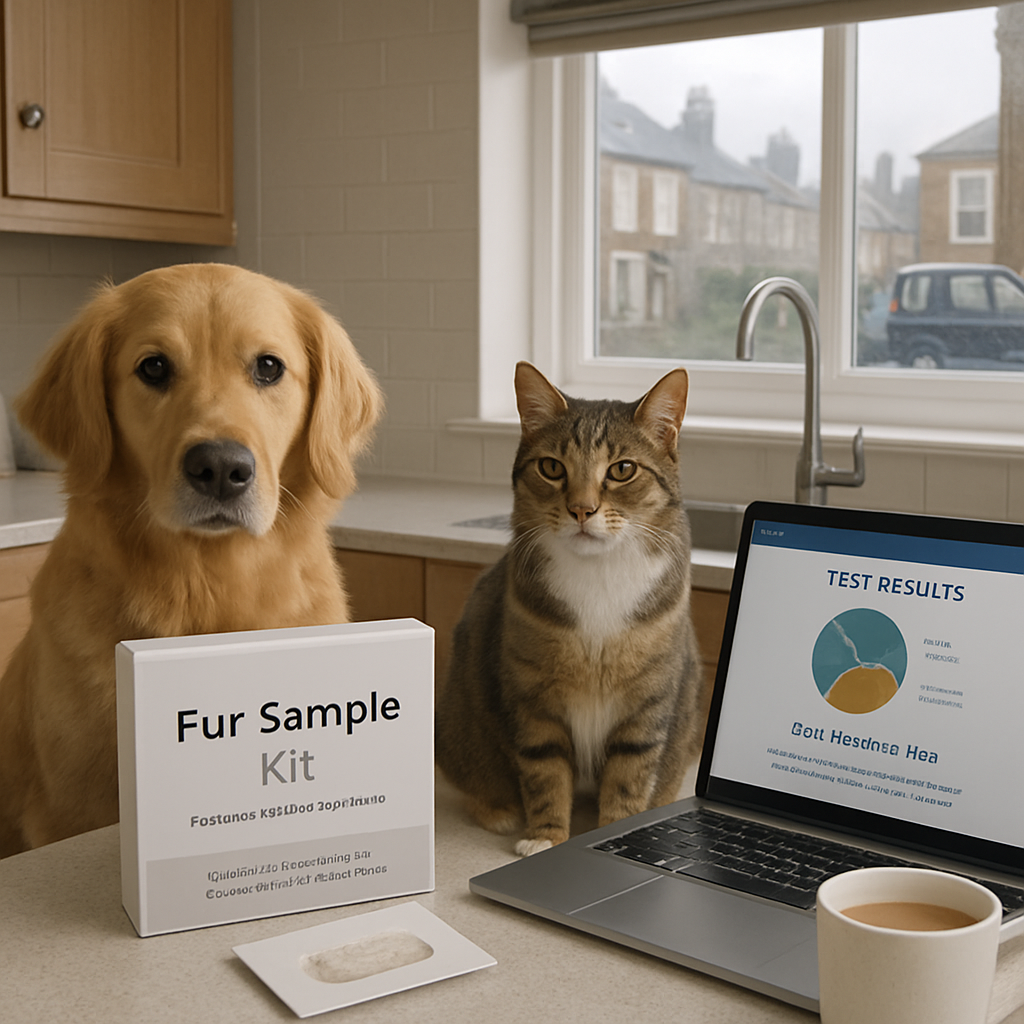
A photorealistic scene in a British kitchen showing a dog and cat calmly beside a fur-sample kit and a laptop displaying a test results portal, with a cup of tea on the counter and a window with a grey UK sky outside. Alt: UK pets sensitivity test uk at-home fur sample kit with diet transition planning in a British home.

From results to an action plan: use the report to create a simple elimination list. Pick one high‑risk protein to swap first, and set a realistic timeline so your pet’s digestion can adjust. If you have multiple triggers, address the most impactful one first to see a clear signal before moving on.

  • Limit changes to one variable at a time (protein source, carbohydrate, or additive).
  • Choose a single, tested replacement food to avoid cross‑contamination of new ingredients.
  • Plan a gradual transition over 7–14 days, depending on what your pet tolerates.
  • Monitor daily for signs of GI upset, skin flare‑ups, or fatigue, and log everything.

Practical transition steps: start with 75% familiar food and 25% new, then advance to 50/50, then 75/25 if there’s no problem. By day 10–14, many pets can handle 100% of the new diet. If you see vomiting, diarrhoea, or intense itching, slow the pace or revert briefly to the previous ratio. This is normal and manageable when done calmly.

Tracking progress: Keep a simple diary. Note meals, treats, and timing, plus any skin or GI changes. A quick weekly check‑in with your vet helps catch issues before they become trips to the emergency line.

Vet collaboration matters: A test is a guide, not a diagnosis. Share the results portal with your vet and align on a plan that ensures balanced nutrition and addresses any concurrent health issues.

How this fits our approach at UK Pet Food Intolerance: Our aim is to give you a clear, actionable plan you can actually follow. The kit is simple to use at home, and the results portal translates complex data into practical steps your pet can handle.

One practical example: If the test flags pea protein and dust mites, you’d swap to a pea‑free formula and consider dust‑mite proof bedding. You’ll likely see smoother evenings within a week, provided the transition is gradual and well‑managed.

If you want a quick read on safe transitions, a practical guide is available here: changing cat food safely.

Step 5: When to Seek Veterinary Advice After Testing

After you’ve run a pets sensitivity test uk, you’ll feel a sense of clarity you’ve been chasing. The results give you a sharper map, but they aren’t a medical diagnosis. Think of the test as a conversation starter with your vet, not the final word on your pet’s health.

So, what should you do next? The answer isn’t one-size-fits-all. The goal is to separate urgent concerns from sensible, measured changes you can make with professional guidance. You’ll want to act quickly on true red flags, but give a vet some time to weigh the data and your pet’s overall health picture.

Urgent red flags that need immediate veterinary attention

First, some signs can’t wait. If your dog or cat has repeated vomiting or diarrhoea with lethargy, or if they suddenly struggle to breathe, collapse, or have a seizure, seek urgent veterinary help right away. These symptoms can point to serious, time‑sensitive issues that aren’t resolved by dietary tweaks alone.

Other immediate concerns include not eating for more than 24 hours, severe swelling, or blood in vomit or stools. A sudden, dramatic change in energy, mood, or behaviour also deserves prompt assessment. If you’re ever in doubt, it’s safer to err on the side of professional input rather than hoping it will pass.

For a quick reference you can check with a quick search, RegPets offers a clear overview of urgent signs UK pet owners should recognise. Urgent signs UK pets—bookmark it for moments when you’re unsure what counts as an emergency.

Interpreting your results with your vet

Your online results portal flags allergens in red, amber, or green. Red items are high‑priority removals; amber items warrant close monitoring; greens are generally safe to keep. Share the portal with your vet and discuss which flagged ingredients are most likely contributing to ongoing symptoms, and whether nutritional adjustments are needed to avoid gaps in balance and energy.

Remember, the test is a tool to guide discussion, not a substitute for a clinical diagnosis. Your vet can confirm whether a flagged ingredient truly needs removal or whether another health issue might be at play. In our experience, a joint review with your vet often yields a practical, safe elimination plan that preserves essential nutrients.

How to use the portal with your vet

Take the results to a scheduled appointment rather than waiting for a crisis. The data is there to support a calm, informed conversation. If your vet agrees, you can pilot a targeted elimination diet under supervision, avoiding drastic changes that could destabilise digestion or mood.

Platforms like UK Pet Food Intolerance make this easier by providing a clear, shareable results portal and plain‑English guidance your vet can reference. That collaboration is where real relief begins.

Practical steps you can take at home while awaiting vet advice

  • Keep a simple diary of meals, treats, and timing, plus any skin or GI changes. This makes pattern‑finding faster and less stressful.
  • Address one high‑risk protein or ingredient at a time. A single change is easier to track than a dozen at once.
  • Choose a single, well‑balanced replacement food and stick with it for a trial period. Mixing several new items can blur which change helped.
  • Plan a gradual transition over 7–14 days, then monitor closely for any signs of intolerance, itching, or GI upset.

What we’ve learned works well in practice

In our experience at UK Pet Food Intolerance, the best outcomes come from treating the test results as a starting point for conversation with your vet. Move deliberately, document diligently, and give your pet’s digestion time to adjust. The goal isn’t quick fixes; it’s predictable meals, calmer skin, and more comfortable days.

If you’re ever unsure, don’t hesitate to reach out to your vet with the results portal in hand. You’ll likely find a practical elimination plan that fits your pet’s life, your routine, and your budget. And remember, we’re here to help you translate complex results into simple, doable steps that keep your canine or feline friend thriving.

FAQ

What exactly is a pets sensitivity test uk and how does it work?

In short, it’s an at‑home kit that analyses a few strands of your dog’s or cat’s fur for protein‑binding markers. You collect the hair, pop it into the prepaid envelope and send it to an accredited UK lab. Within about a week the lab returns an online report that flags foods and environmental allergens in red, amber or green, giving you a clear starting point for discussion with your vet.

Do I need a vet’s prescription before I can order a pets sensitivity test uk?

No prescription is required. The kits are designed for pet owners to use independently, although we always recommend you keep your vet in the loop. Sharing the results portal with them helps ensure any dietary changes stay nutritionally balanced and safe for any underlying health conditions.

How reliable are the results from a pets sensitivity test uk?

The accuracy hinges on two things: a proper sample and a certified laboratory. When you follow the collection instructions – three to eight hairs with the root attached – the lab can detect reactions to over 300 common ingredients. While the test isn’t a medical diagnosis, it reliably highlights likely triggers, and most owners see a noticeable improvement once they address the red‑flagged items.

What should I do if the test flags multiple allergens?

Start with the strongest red‑flagged ingredient. Swap your pet’s food to a formula that omits that protein, then monitor symptoms for 7‑10 days. If improvement is modest, move on to the next red item. Keeping changes one‑at‑a‑time prevents you from guessing which ingredient made the difference and gives you solid evidence for each step.

Can a pets sensitivity test uk help with skin itching as well as digestive upset?

Absolutely. Many owners think food only affects the tummy, but allergens can provoke itchy skin, ear infections or even respiratory signs. The test screens both food and environmental allergens like dust‑mite proteins, so you’ll get a picture of anything that might be driving that constant scratching or hot spots.

How long does the whole process take from ordering the kit to getting results?

Ordering is instant – you click ‘add to basket’ on the website and the kit ships within a day or two. Once you mail the sample, the lab usually processes it in 5‑7 days. You’ll receive an email notification when the report is ready, and the online dashboard is accessible 24/7, so you can start planning changes as soon as you’re comfortable.

Is the pets sensitivity test uk suitable for senior pets or those with existing health issues?

Yes, but a little extra caution helps. Older dogs and cats often have multiple sensitivities, so the test can be a useful roadmap. However, because senior pets may have kidney or joint concerns, always run the results past your vet before overhauling the diet. A gradual transition and close monitoring are key to avoiding unintended nutrient gaps.

Conclusion

So, after all that digging, what’s the bottom line for you and your four‑legged mate?

A pets sensitivity test uk gives you a clear roadmap – not a medical verdict, but a practical guide that pinpoints the ingredients most likely to be behind the itching, the upset tummy, or that stubborn gas.

Because the kit only needs a few hairs, you can start the process from your kitchen without a vet visit, and within a week the online portal hands you colour‑coded results you can actually read.

From there, the simplest path is to tackle the highest‑risk red‑flag ingredient first, swap to a single, well‑balanced replacement food, and monitor for changes over ten days. One change at a time keeps the evidence crystal clear.

If you’ve got an older dog or a cat with multiple sensitivities, the same step‑by‑step approach works – just move a little slower and keep your vet in the loop.

And remember, the test is a tool to empower you, not to replace professional advice. Sharing the report with your vet turns a home‑based insight into a collaborative plan that protects nutrition and health.

Ready to stop the guessing game? Grab a kit, collect a few strands while you brush, and let the science do the heavy lifting. In a few short weeks you could be swapping itchy evenings for calm cuddles.

We’re here if you need a hand navigating the results, and the next calm, itch‑free day is just a kit away.

Dog Environmental Allergy Test UK: A Practical Guide to Choosing, Using and Interpreting At‑Home Results

Have you ever wondered if your dog’s itchy skin or constant scratching is actually a clue to something you didn’t even suspect? The answer might lie not in a vet’s office, but in the very fabric of your home. Imagine a test that tells you whether a pollen burst, a new detergent, or even a change in the garden is the culprit.

That’s the promise of a dog environmental allergy test in the UK – a quick, at‑home way to spot hidden allergens that can turn a happy pup into a constant itch‑monster. The science behind it is simple: a few cheek swabs or fur samples are analysed in a lab that looks for specific immune responses. The result is a clear, bite‑size list of things that trigger your dog’s skin and gut woes.

So, what’s the first step? Think of the most obvious changes you’ve made in the last few weeks. Maybe you’ve switched to a new shampoo, added a balcony plant, or moved your dog’s bedding. Pick one variable at a time, and let the test do the heavy lifting. It saves you the guesswork and the cost of endless trial‑and‑error diets.

If you’re ready to dive deeper, you’ll find a practical guide that walks you through sample collection, shipping, and interpreting results. It’s all laid out in plain English – no lab jargon, just the facts you need to make a change. For a step‑by‑step walkthrough, check out How to Use a Home Dog Allergy Test UK to Spot and Manage Allergy Symptoms.

Once you have the results, the next challenge is turning data into action. Start with the top culprit on your list. If it’s pollen, try keeping windows closed during peak seasons. If a particular food additive appears, switch to a hypo‑allergenic diet that eliminates that ingredient. The key is to make one change at a time so you can see which tweak has the biggest impact.

For dog owners who also run a small pet‑care business, there’s another hidden risk: data security. Even a tiny shop can fall victim to cyber‑attacks. Learn how to protect your business data by exploring practical cybersecurity compliance measures. Protect your business data.

In short, a dog environmental allergy test offers a clear window into what’s irritating your pup – and it can be done from the comfort of your kitchen. The information you gain not only restores comfort for your furry friend but also saves you the time and money of endless vet visits. Start with a single test, watch the results, and take small, focused steps toward a calmer, healthier dog. The journey is simple, the science is sound, and the payoff is a tail‑wagging life without itching.

TL;DR

If your dog’s itching or tummy troubles feel random, a dog environmental allergy test uk can pinpoint the culprit, turning guess‑work into clear action today. At UK Pet Food Intolerance, we send you a kit, analyse the sample, and deliver results with quick guidance today to ease your pet’s discomfort.

1. Understanding Environmental Allergies in Dogs

If your dog keeps itching and scratching, you’re not imagining it. It can be exhausting to watch a happy pup struggle through nights of discomfort. Understanding what’s truly going on helps you move from frustration to real, practical relief for both of you.

Environmental allergies are triggered by things in the world around us—pollen, mould spores, dust mites, grasses, even scented detergents. They’re different from food sensitivities because you can’t see them as plainly, and they often come and go with the seasons or changes in the home. Think of it like a daily irritant you can’t see until it starts to show up as skin trouble or itchy ears.

Dogs with environmental allergies usually show itchy skin, recurrent ear infections, rubbing their face on carpets, or hot spots. Some also have watery eyes, sneezes, or a damp, irritated underside. The pattern matters: if it correlates with seasons or with a new product in the home, you might be dealing with environmental triggers. You’re not imagining the link between what’s in the air and how your dog feels; this is where a targeted test can help cut through the guesswork.

In the UK, at-home dog environmental allergy tests offer a practical way to identify likely irritants without endless vet visits. The test uses a fur or cheek swab that’s sent to an accredited lab to check immune responses to common environmental items. The result is a clear list of likely triggers to target in your home and routine, which makes it easier to design a calmer environment for your dog.

What the test tells you is powerful, but it isn’t a medical diagnosis on its own. It’s a guide to reduce exposure and test changes one by one. You’ll still work with your vet or a pet nutrition adviser to refine management, especially if skin infections or GI symptoms appear. The right plan combines data with careful monitoring and professional guidance, so you’re not guessing your way through another season of itching.

One big advantage is the home-collection aspect. It saves time, and you can observe how small changes affect your dog’s comfort. Start with the most plausible culprit and make one adjustment at a time so you can see what actually helps. Does this approach really work for your dog? Often, yes—consistency and observation beat a flood of half‑measures any day.

So, what should you do next? Consider the likelihood of pollen, detergents, or a new plant in the garden, and start with simple environmental controls. Keep windows closed during peak pollen times, wash bedding regularly, and choose fragrance-free products for washing as a baseline. If a particular additive shows up on your list, swap to a hypoallergenic option. Small, incremental changes work best and are easier to sustain than sweeping overhauls.

To stay organised across weeks of trial and observation, you’ll want solid data to back your decisions. a practical step-by-step guide on tagging and labeling sessions for review can help you track symptoms alongside test results without losing momentum. And if you’re looking for a grounded, expert‑driven perspective on health decisions, Dr Dubey‘s practical health guidance offers clear, everyday insights that translate well to pet care. These resources complement the at‑home test by helping you turn data into calmer days for your dog.

In our experience, the goal isn’t perfection but progress. By combining a thoughtful test with steady environmental tweaks, many owners start to see fewer flare-ups and more wagging tails. If you’re curious about how to interpret results and translate them into concrete steps at home, you’re in the right place—and you’re not alone in this.

2. How an At‑Home Dog Allergy Test Works

Ever wonder how a simple cheek swipe can reveal a whole list of triggers that keep your pup scratching? The answer lies in a mix of biology, lab science and a bit of tech‑savvy. Let’s walk through the process together.

What’s actually happening?

When you give your dog a quick cheek swab or a hair clip, you’re collecting a sample of immune cells and proteins. These tiny bits travel to an accredited lab where they’re examined for specific antibodies—mostly IgE—that fire up in response to allergens like pollen, dust mites or even certain detergents.

Step 1: Order the kit

You’ll click the order button, pick the type of test that covers environmental allergens, and the kit ships straight to your door. No need to drop by a vet or deal with a courier.

Step 2: Take the sample

Inside the kit is a small, easy‑to‑use swab. You simply wipe the inside of your dog’s cheek or a short strand of hair. A few gentle strokes are enough. If you’re nervous, remember that dogs usually tolerate it as long as you keep it quick and calm.

Step 3: Send it back

Once the sample’s collected, you place it in the pre‑labelled envelope, drop it in the mailbox or hand it to a courier. The lab then does the heavy lifting: it runs a panel that checks for dozens of common allergens that affect dogs in the UK.

After the kit is received, the lab takes a few days to analyse the sample. Most companies deliver results within two to three weeks, and you’ll get a clear report online that tells you which allergens are causing trouble and how strong the reaction is.

Step 4: Interpret the findings

The report is split into categories: high, mild or none. A ‘high’ result means that your dog’s immune system strongly reacts to that trigger. A ‘mild’ result suggests a weaker response that might still bother your pup in sensitive moments.

Step 5: Take action

Here’s where the real value comes in. If pollen shows up as a top culprit, keep windows shut on high‑pollen days, use a HEPA filter and wash your dog after walks. If dust mites are flagged, consider allergen‑proof bedding and vacuum more often. The goal is to tackle one trigger at a time, so you can see what really makes a difference.

It’s worth noting that an environmental test won’t replace a vet visit, but it gives you a focused starting point. Pair the results with your vet’s guidance to tweak your dog’s diet or environment safely.

For a deeper dive into how these tests work and what they can uncover, you might find this guide useful: best dog allergy tests in the UK. And if you’re curious about the science behind environmental allergies, this article offers a clear overview: dog environmental allergy guide.

With the data in hand, you’ll have a practical roadmap to a calmer, itch‑free pup—no more endless trial‑and‑error diets or mystery triggers. And that’s the power of the dog environmental allergy test uk: quick, accurate and entirely at home.

3. Choosing the Right Test Kit for Your Dog

When you’re knee‑deep in itch‑reports and vet bills, the first thing that comes to mind is: which kit should I grab? You want the right fit, the right coverage, and a clear path to action.

We’ve walked through the science of how a cheek swipe can reveal allergens. Now let’s line up the actual products you can buy straight from your inbox.

Think of this like picking a map for a road trip. A great map shows the main roads, landmarks, and any detours you might need to avoid. The same goes for an allergy test kit: it needs to cover the allergens your dog actually faces, be easy to use, and give you fast, trustworthy results.

What matters most when you’re choosing a kit?

1️⃣ Coverage – Does it look at the common culprits in the UK? Pollen, dust mites, mould, certain detergents and fabrics? 2️⃣ Sample type – Do you need a cheek swab, a hair clip or a simple fur grab? 3️⃣ Turn‑around – How long until you see the report? 4️⃣ Guidance – Will the test include a plan on what to change next?

In our experience, the Premium Pet Intolerance Test is the all‑rounder. It screens for a wide range of environmental triggers plus the food sensitivities that often sneak in behind skin issues. The Essential kit is a slimmer version, great for owners who have already narrowed down a few suspects.

Here’s a quick comparison to help you decide:

Feature Premium Pet Intolerance Test Essential Pet Intolerance Test Generic Home Test
Allergen coverage ~70 environmental allergens + 100 food items ~35 environmental allergens + 50 food items ~20 environmental allergens (varies by brand)
Sample type Cheek swab & fur clip Cheek swab only Cheek swab or fur clip
Turn‑around time 7–10 business days 5–7 business days 6–8 business days
Guidance included Full action plan + diet tips Basic action checklist Optional guide (varies by brand)
Lab accreditation Accredited UK lab Accredited UK lab Depends on brand

Does that make sense? You’re probably wondering, “But what if my dog reacts to something unusual, like a new paint in the garage?” The Premium test will pick up a broader range of non‑food items – think dust, pollen, detergents – so it’s worth the extra cost if you suspect a wide array of triggers.

Step‑by‑step: 1) Pick the kit that matches your budget and suspicion level. 2) Order online; the kit arrives with clear instructions. 3) Collect the sample using the simple swipe or fur clip method. 4) Send it back in the pre‑labelled envelope. 5) Within a week or so, log into your account – the report is all digital, no paperwork.

What if the results show a “high” reaction to a common allergen like grass pollen? The test report will recommend keeping windows shut on hot, dry days, using a HEPA filter, and washing the dog after walks. If the top culprit is a detergent, you’ll swap to a fragrance‑free, hypo‑allergenic brand.

For owners who have tried a few trials before, the Essential test can be a budget‑friendly entry point. It covers the most common environmental triggers that affect the majority of UK dogs. If you notice a persistent itch that’s not resolved after a season or two, consider upgrading to Premium for a deeper dive.

We’ve seen families go from “I don’t know what’s scratching my dog” to a clear list of triggers in under two weeks. The key is not to jump to the most expensive kit first; start where you’re most uncertain and add breadth only if the first results leave you in doubt.

Remember, the test kit is a tool, not a magic wand. Combine it with your vet’s advice and the lifestyle tweaks you can realistically implement. A simple switch to a detergent that doesn’t irritate can be the difference between a tired, scratching dog and a relaxed, tail‑wagging companion.

Bottom line: pick the kit that matches the scope of your mystery and the time you can dedicate to action. If you’re ready to tackle a whole spectrum of allergens, the Premium option is worth the investment. If you’re testing the waters, the Essential test gives you a solid start without a hefty price tag.

Now that you know which kit fits your needs, it’s time to order, collect and finally put your dog’s comfort back on track.

Cat Food Sensitivity Test UK: A Practical Guide for UK Pet Owners

Ever notice your cat rolling around a few minutes after a meal, eyes wide and ears flat? It’s a common scene in many UK households, and it usually means something is off in their diet.

Have you ever wondered whether that one bland food brand or the latest protein source could be the culprit behind those restless evenings? It’s a question that sits heavy on the minds of cat owners who want their pets to feel comfortable and happy.

In this article, we’ll demystify the cat food sensitivity test uk, show you how a simple at‑home kit can give you a clear picture, and help you take confident steps toward a smoother, itch‑free life for your furry friend.

Why does a sensitivity test even matter? Because the most common signs—loose stools, gas, persistent scratching, and that dreaded “why does my cat look so tired?”—often hide in plain sight as reactions to ingredients that look harmless on a label.

Let’s dive in and explore what the test does, how it works, and how you can turn the results into real, actionable dietary changes.

First, the test is all about clarity. It examines a range of ingredients—wheat, corn, soy, fish proteins, and more—to pinpoint which ones are triggering your cat’s discomfort.

The process is straightforward: you collect a small sample of your cat’s food, mail it off, and within a few weeks, a digital report lands in your inbox.

This report is more than a list of numbers. It’s a guide that tells you which foods to avoid, which to consider, and how to structure an elimination diet that’s practical and safe.

Once you’ve got the data, the next step is simple: swap out the problematic ingredients for alternatives that work. This often involves trying a handful of new brands, each time monitoring for improvement.

And you’re not alone. Many cat owners across the UK have already used this process to reduce scratching, improve coat shine, and ease digestive upset.

So, what does this mean for you? It means you have a tool that turns mystery into knowledge, and knowledge into better meals for your cat.

Are you ready to see what’s really in your cat’s bowl? Let’s get started on the path to a calmer, happier cat.

In the sections that follow, we’ll walk through how to order a kit, what to expect from the lab, and how to translate the results into a diet that keeps your cat thriving. Stay tuned.

TL;DR

A UK cat food sensitivity test pinpoints hidden ingredients that may cause digestive upset or itching, turning mystery into clear dietary guidance. By sampling your cat’s food at home and receiving a lab‑verified report, you can swap out triggers, simplify menu, and watch symptoms fade—giving you a calmer, happier life.

Understanding Food Sensitivities in Cats

Let’s face it: when your cat keeps scratching or has gas after meals, it’s easy to feel stuck. You want clarity, not guesswork. In our experience, a practical, evidence‑based approach makes all the difference.

Food sensitivities aren’t always a dramatic allergy. More often they’re reactions to common ingredients—grains, dairy, fish, or processing aids. Recognising this helps you avoid unnecessary changes and focus on what matters: your cat’s comfort.

That’s where a cat food sensitivity test uk comes in. It screens a broad panel of ingredients so you can see patterns emerge without trial-and-error guesswork. It’s not a medical diagnosis, but it gives you real, actionable data to guide meals.

In practice, you’ll collect a small sample from your cat’s current food and send it to a lab. The report then highlights which ingredients are most likely linked to symptoms, and which might be safe alternatives.

So how do you turn that data into meals your cat loves? Start by avoiding flagged items, then trial a few trusted proteins and a single grain at a time. Keep notes on digestion, stool quality, itching, and energy.

In our experience, many owners are surprised by how small changes can help: swapping a single protein or cutting a filler can calm digestion.

We know the UK market has great options, from hypoallergenic kibbles to limited ingredients tins. The key is consistency—stick with tested choices for 6 to 8 weeks and watch for improvements.

If you’re unsure where to start, look for support that translates test results into a practical shopping list and a clear trial plan. Platforms like UK Pet Food Intolerance make this easier by offering at-home tests and straightforward guidance you can implement today.

To recap: identify the symptoms, use a test to reveal ingredients, and run a careful elimination diet with simple steps. The results are a map, not a verdict, and they guide you to calmer meals. You’ll also learn which foods to reintroduce later to confirm sensitivity. Keep the routine simple and predictable across weeks for better results.

Ready to dive in? Start by noting a few details about your cat’s symptoms and meals, then chat with a vet if anything odd crops up.

Does this really work? For many owners, turning the data into a practical plan is the hardest part. With a simple, repeatable process you can follow—one step at a time—your cat can move toward calmer days and happier meals.

Remember, you’re not alone. Many UK owners find that a steady, predictable feeding routine beats the chaos of guessing. Track symptoms, adjust calmly, and celebrate small wins.

A descriptive prompt for an AI image generator, related to the surrounding text. Alt: Keyword-rich alt text here.

How to Choose a Reliable At‑Home Test Kit

Choosing a cat food sensitivity test uk can feel overwhelming. You’re after clarity, not more confusion. In our experience, the right kit turns a jumble of labels into a straightforward action plan.

Step 1 — Define your goals

Start with the end in mind. Do you want to know specific ingredients to avoid, or just confirm whether your cat responds to common triggers? Being precise helps you pick a kit that focuses on the right ingredients and delivers a practical elimination plan.

Step 2 — Check accreditation and lab quality

Look for mention of accredited laboratories and transparent processing. A reputable cat food sensitivity test uk should have a clear description of how samples are handled and how data is generated. If it’s vague, move on.

Step 3 — Assess the sample collection and turnaround

At‑home kits should be easy to use without adding stress to your cat. Check what’s required to collect the sample, how you post it, and what turnaround to expect. In our view, a digital report within a few weeks is reasonable, but confirm the specifics for 2026 timelines.

Step 4 — Read the results format and next steps

Results that translate into practical steps matter. Look for a clear list of foods to avoid, plus recommended alternatives and a suggested elimination plan. A good kit should guide you through a safe trial period with reasonable expectations. Does this really work? It should feel doable, not overwhelming.

Step 5 — Vet integration and support

Some owners want a vet to review the plan. If you’re in that camp, choose a kit that provides support resources or a link to professional advice. In our experience, platforms like UK Pet Food Intolerance make this easier by offering accessible online results and straightforward guidance that fits around life and budget.

Step 6 — Compare cost, convenience, and long‑term value

Cost is important, but so is value. A kit that screens many ingredients may save you months of trial and error. For reference, our Essential Pet Intolerance Test screens 300 items, giving you a broad starting map without a maze of trials. Think about whether you’ll need to repeat testing or update the results as your cat grows or as new ingredients appear on shelves.

Step 7 — Make your decision and plan the first elimination trial

Ready to move forward? Pick a target four‑ to six‑week window for the elimination phase and map your grocery and brand choices accordingly. Record symptoms daily to spot subtle changes, then compare before and after. You’ve got this.

Interpreting Your Test Results: A Step‑by‑Step Video Tutorial

When the digital report lands in your inbox, the first thing you’ll see is a colour‑coded list of ingredients, each marked as ‘high’, ‘moderate’, or ‘low’ intolerance.

Those labels are the compass you’ll use to navigate your cat’s menu. Think of it as a map that tells you where to cut out a suspect ingredient and where you can keep the safe zones.

Start by ticking off any items flagged as ‘high’. These are the top suspects; if your cat’s itching or tummy upset stops when you remove them, you’ve found a culprit.

Next, test the ‘moderate’ group. Swap one ingredient at a time, keeping the rest of the diet constant. Record symptoms each day; this keeps the data clean.

If a moderate ingredient triggers a flare, mark it as a secondary issue. Your cat may tolerate it at low levels, but high doses push the line. That nuance matters in long‑term feeding.

Sometimes the colour codes can be misleading. A ‘low’ score might still cause a sensitive cat to react if the ingredient is in a high‑dose brand. Test the brand, not just the label.

Create a simple chart: column A lists ingredients, column B shows score, column C notes your cat’s reaction after removal. Seeing patterns helps you prioritise which foods to keep or ditch.

Use a daily journal or a spreadsheet; write the food brand, the exact quantity, and any signs of improvement or relapse. Consistency turns anecdote into evidence.

If your cat’s symptoms improve after eliminating a high‑score ingredient but return once you re‑introduce it, that’s confirmation. Note the time it takes—usually 7–10 days for gut changes to surface.

When you’ve sorted the main offenders, move to the low‑score list with caution. Some cats are very picky; a tiny trace can trigger itching, so trial small batches first.

Remember, the goal isn’t to eliminate every single ingredient—most cats thrive on a balanced diet. Think of the test as a guide that nudges you towards a simpler, calmer menu.

Finally, share your findings with your vet. Their professional lens can flag any missed medical conditions and help tweak the plan, turning your data into a truly effective feeding strategy.

A handy tip: keep a small freezer stash of your cat’s favourite food brands. When a new ingredient is flagged, you can switch instantly without buying a fresh bag.

If your cat reacts to more than three ingredients, consider a commercial hypoallergenic diet as a baseline. Then layer in safe proteins gradually, watching for any change.

Use the colour‑coded severity chart as a quick reference: red = stop immediately; orange = monitor closely; green = safe but keep an eye on dosage.

At the end of the elimination phase, compile a one‑page feeding plan. Highlight safe foods, banned ingredients, and a gradual re‑introduction schedule for peace of mind.

Creating a Safe Trial Diet Plan

So you’ve got the test results back — now what? A safe, practical plan that doesn’t feel overwhelming. Let’s map out a path you can actually follow for your cat’s diet, without turning the house into a kitchen lab.

Step 1 — Choose a simple, complete base diet

Start with a straightforward, complete diet that uses a single protein and minimal ingredients. This keeps variables small and makes it easier to notice what’s causing trouble. If you’re unsure, begin with a widely available base brand to reduce guesswork.

Consider a protein your cat hasn’t shown sensitivity to yet. The aim is a balanced foundation you can build on for 4–6 weeks, while avoiding added flavours or fillers that complicate the picture.

Step 2 — Plan the elimination window

Set a definite window—four to six weeks is ideal. During this time, avoid reintroducing ingredients you suspect and keep a consistent feeding routine to reduce stress for your cat. If you’ve got the time, a slightly longer window (up to eight weeks) can be helpful for stubborn cases, but don’t let it drag on.

Step 3 — Reintroduce ingredients one at a time

After the elimination period, reintroduce foods one by one, with 1–2 weeks between each. If symptoms flare, that ingredient is a likely trigger. If not, you may be able to tolerate it in small amounts.

Step 4 — Track symptoms and appetite

Keep a simple diary. Note what your cat ate, appetite, stool consistency, itching, coat condition, and energy. Patterns often emerge when you compare week by week. These notes aren’t about blame; they’re about clarity. Does a new batch cause a spike in scratching? Does a change in stool appear a few days later? You’ll spot the signals faster with a routine.

In our experience, this method works well for cat owners who are testing for cat food intolerance at home. A UK-based at‑home test can provide a starting map that makes these steps less guessy. If you want to dig deeper, the feline trial instructions offer a useful framework to structure your own food trials: feline food trial instructions.

Step 5 — Vet integration and support

Share your findings with your vet. A second opinion helps flag anything you might have missed and ensures your plan stays safe and balanced. If you’re unsure, ask your vet to review the reintroduction schedule before you start.

photorealistic UK kitchen scene showing a cat beside a labelled elimination-diet plan on a clipboard, daylight streaming through a sash window in a British kitchen, with a tablet beside showing a colour-coded results chart. Alt: Cat food sensitivity test uk elimination plan in a cosy British kitchen.

Step 6 — Maintain momentum with a long‑term but flexible plan

As soon as you’ve nailed a few triggers, translate that into a simple, ongoing feeding strategy. Rotate safe proteins gradually to reduce the chance of new sensitivities while keeping meals interesting. Keep the measurements small, and avoid big changes all at once. Your goal isn’t perfection; it’s consistency that your cat can live with day to day.

Feature Option / Action Notes
Elimination duration 4–6 weeks Gives gut and skin time to respond, not just a quick fix
Base diet Single-protein, simple ingredients Reduces cross‑reactivity and easier tracking
Reintroduction pace 1–2 ingredients every 1–2 weeks Identifies specific triggers with minimal confounding factors
Symptom tracking Daily notes (itching, stool, energy) Consistency is key to spotting real changes

Managing Common Skin and Digestive Symptoms

If your cat keeps scratching, or you notice tummy upset after meals, you’re not imagining it. These symptoms are common signals that a food sensitivity might be at play, and tackling them without a plan just wastes time.

In our experience, a clear, step‑by‑step approach helps you separate noise from real triggers. Let’s walk through a practical, cat‑friendly plan you can feel confident following.

Step 1 — Start with a simple base diet

Choose a complete base diet that uses a single protein and minimal ingredients. This keeps variables small and makes it easier to spot what’s causing trouble. If you’re unsure, a cat food sensitivity test uk can provide a map to guide these steps, so start with a well‑known, widely available brand to reduce guesswork.

Step 2 — Set the elimination window

Four to six weeks is ideal. During this time, avoid reintroducing suspected ingredients. Keep meals consistent to reduce stress and support gut recovery.

Step 3 — Reintroduce ingredients one at a time

Reintroduce foods one by one, with 1–2 weeks between each. If symptoms flare, you’ve found a likely trigger. If not, you may be able to tolerate it in small amounts.

Step 4 — Track symptoms and appetite

Keep a simple diary: note what your cat ate, appetite, stool, itching, coat, and energy. Patterns emerge when you compare week by week.

So, what should you do next? Does this really work when life gets hectic?

If scratching or itching continues after the elimination window, chat with your vet. They can check for other causes and help fine tune the plan.

For reliable background reading on cat allergies, Purina’s guide on cat food allergies is a helpful starting point.

In our experience, starting with the Essential Pet Intolerance Test gives you a practical map you can translate into meals you can actually serve. It’s straightforward, home‑based, and paired with simple reintroduction steps.

Quick tip: keep a small freezer stash of your cat’s favourite brands. That makes swapping ingredients for trials quick and stress‑free, especially if a bag is nearly finished.

Remember, this won’t cure everything overnight, but it can reduce flare-ups and give your cat calmer days and better comfort in the bowl.

You’ve got this—step by step, and you’re not alone today.

We’re here.

What to track day by day

Log your cat’s meals, appetite, stool consistency, and any itching or hair changes. Note the brand, batch, and amount. Small details like the time of feeding and when symptoms appear help you spot patterns faster.

Common mistakes to avoid

Don’t rush the elimination window. If you reintroduce too much too quickly you’ll miss real triggers. Don’t ignore other health issues like fleas, infections, or parasites. And don’t rely on a single diary entry to judge progress—stick with it for several weeks.

Small changes add up to relief.

You’re not alone in this.

We’re here.

Fine‑Tuning the Diet: Long‑Term Adjustments

So you’ve got your test results, you’ve run an elimination, and your cat is looking a little better. What next? The answer isn’t a one‑off tweak; it’s a series of small, deliberate moves that keep the gains steady and build resilience over time. Think of it as maintaining a garden – you water it, prune it, and watch it thrive.

Keep the core proteins steady

Once the offending proteins are out of the equation, lock in a single safe source. Imagine a favourite dish that never changes – that’s what a single‑protein diet should feel like. If you keep that base constant, any flare‑up you spot is easier to trace, and you avoid the chaos of juggling too many variables at once.

For example, a cat who reacts to chicken and wheat often does well on duck. Duck is a novel protein and rarely cross‑reacts, making it a solid baseline. If you’re not sure which novel protein to start with, our Elimination Diet Cat UK: A Practical Guide for UK Cat Owners walks you through real‑world scenarios and helps you pick a protein that’s both safe and palatable.

Rotate safe proteins to stay ahead of new sensitivities

Even the safest protein can become a trigger after a while, especially as cats age or their gut microbiome shifts. A simple rotation schedule keeps the gut flora diverse and reduces the chance of a new allergy popping up. For instance, feed duck for 8–12 weeks, then switch to salmon for the next cycle, and return to duck again.

Keep a tidy log: note the start date, the amount fed, and any subtle changes in stool colour or coat shine. If you spot a dip in appetite or a sudden itch, revert to the previous protein for a week before moving on. This patience pays off in fewer surprises down the road.

Add supportive nutrients that reinforce gut and skin health

Long‑term success isn’t just about proteins – fibre, prebiotics, and omega‑3 fatty acids play a starring role. Soluble fibre calms an irritated gut, while omega‑3s soothe inflamed skin. When choosing a brand, look for a clear list of these ingredients. If you’re unsure which nutrients matter most, the PetsCare guide on cat food allergy management offers a practical rundown of what to look for and why.

Don’t forget a limited‑ingredient wet food once a week if your cat enjoys it. This keeps the palate varied without reintroducing known allergens. Just make sure the wet food’s protein source matches the one you’re feeding dry.

Monitor for life‑change triggers

Cats are sensitive to their environment. A new house, a new pet, or even a change in your own diet can affect their gut flora. Keep a simple checklist: new environment? new household member? new food for yourself? Note these alongside any symptom changes. One owner in the Midlands found that moving to an apartment with higher dust mite levels caused a spike in itching – she solved it with a dust‑mite spray and keeping the cat indoors during peak pollen.

Re‑evaluate every 12–18 months

Food manufacturers frequently update recipes and introduce new ingredients. It’s a good idea to re‑take the cat food sensitivity test uk every 12–18 months to catch any new triggers before they become big problems. If you notice a new change in behaviour or a sudden flare, bring the test results back to your vet for a fresh look.

Use the diet as a living document

Treat your feeding plan like a living document: update it as your cat grows, as seasons change, and as new foods hit the shelves. A simple spreadsheet works wonders – columns for protein, brand, batch, start date, and symptom notes. With data in hand, you can spot patterns you’d otherwise miss.

In short, long‑term success comes from consistency, thoughtful rotation, and a keen eye for subtle shifts. Keep the core protein steady, rotate safely, add supportive nutrients, monitor life changes, and re‑check your results every year or so. With these steps, you’ll maintain a calm, itch‑free life for your feline friend while keeping the menu interesting and nutritious.

FAQ

What exactly is a cat food sensitivity test uk and how does it work?

The test is a simple kit you send to an accredited lab. It analyses a sample of your cat’s food for common allergens like wheat, corn, soy and various protein sources. Once the lab finishes, you receive a digital report that grades each ingredient as high, moderate or low risk. You can then use that list to tweak your cat’s diet without guessing.

Can the test tell me why my cat keeps scratching or has loose stools?

It can point you to likely culprits. If the report flags wheat as high, for instance, and you stop feeding it, you’ll often see itching subside or stools firm up within a few weeks. The test doesn’t diagnose disease, but it removes a huge source of uncertainty about food triggers.

How long does it take to get results and how reliable are they?

Most kits return a digital report in 4–6 weeks. The laboratories behind UK Pet Food Intolerance are ISO‑accredited, so the data are consistent across batches. While no test is 100% foolproof, the lab’s methodology follows industry standards, giving you a solid starting point for diet changes.

Do I need a vet to use this test or can I do it entirely at home?

You can collect the sample, mail it and read the results on your own – that’s the whole point of the at‑home kit. However, it’s still wise to share the report with your vet, especially if symptoms persist or you’re unsure how to adjust feeding. The vet can spot other medical causes that a food test won’t uncover.

What should I do if the test shows several high‑risk ingredients?

Start with the top‑ranked one. Swap out the identified protein or grain, keep the rest of the diet the same and monitor for a 7‑10 day window. If symptoms improve, you’ve found a trigger. If not, move on to the next high‑risk item. Document each change; a simple diary keeps the evidence clear.

How often should I retest my cat after the first kit?

Food brands update their recipes fairly often, so retesting every 12–18 months is sensible. That keeps your diet aligned with current formulations and helps you spot new sensitivities before they become chronic issues. If your cat’s behaviour changes suddenly, a fresh test can provide immediate direction.

Will this test help if my cat’s problem is unrelated to food?

It won’t diagnose skin infections, parasites or hormonal issues, but it rules out a major source of irritation. If the test comes back clean and your cat still shows symptoms, it’s a good signal to pursue other medical investigations with your vet. The test simply removes one big variable from the equation.

How much does a test kit cost and is it worth it?

The Essential Pet Intolerance Test covers 300 ingredients and is priced competitively for the breadth of data it gives. Many owners find that the clarity it provides saves them money on trial‑and‑error diets and vet visits. If you’re struggling with a persistent itch or tummy upset, the upfront cost is often outweighed by the long‑term relief.

Conclusion

So, we’ve walked through the whole journey: from spotting a scratchy paw to mailing a tiny sample and getting a clear, bite‑size list of likely triggers. The real win? You finally have a roadmap instead of a guessing game.

Remember three simple rules that will keep the momentum going. First, keep a tidy diary – jot down what the cat ate, any itch spikes, or changes in stool. Second, give each change a 7‑to‑10‑day window to show results; that’s long enough for gut chemistry to settle. Third, stay patient – the most stubborn allergies can surface after a few weeks of a “clean” diet, so repeat the test if symptoms flare again.

What does this mean for you? You can start by swapping out any high‑risk ingredient flagged in the report and see if the itch subsides. If it does, you’ve found a culprit. If not, move on to the next one. The process is cyclical, not one‑off.

And here’s the thing: the test isn’t a magic bullet, but it is a reliable compass. It saves you time, money and the frustration of endless brand switches. It also gives your vet a concrete starting point when you bring them in for a follow‑up.

Ready to take that first step? Grab your kit, follow the easy instructions and watch your cat’s skin and belly thank you. You’ve got the tools; now it’s time to act.

dog food for sensitive stomach uk trial – a practical guide for owners

If you’ve noticed your pup tossing the litter or shedding fur between meals, you’re probably thinking about dog food for sensitive stomach UK trial.

It feels like a never‑ending detective story, doesn’t it? Every new batch feels like a gamble.

But the truth is, a smart trial can cut that mystery in half.

That’s where a simple at‑home test from UK Pet Food Intolerance steps in.

The kit is all‑in‑one: you collect a small drool sample, seal it, and ship it off.

Within a few weeks you’ll get an online report telling you which proteins, grains, or additives are causing the fuss.

That means you can swap to a low‑residue or hypoallergenic line without the trial‑and‑error that usually ends in a pantry full of unopened bags.

Remember, sensitive stomach isn’t just about food—stress, parasites, or a sudden change in routine can all play a part.

So, when you do decide to run a trial, give your dog a two‑week window to settle before you switch again.

Give yourself a little grace—your furry friend will thank you with wagging tail, steadier coat, and fewer vet visits.

A good trial isn’t a 24‑hour sprint; it’s a 14‑day cycle where you feed the same food, record stool colour, frequency, and any itchiness, then pause for the results.

Many owners skip the pause step, jumping straight to the next brand, which only muddles the data.

Once you know which ingredients trigger discomfort, you can work with your vet or a dietitian to craft a menu that’s both nutritious and gentle on the gut.

And remember, even the best‑sourced dog food can cause a hiccup if your dog’s microbiome is out of balance, so a probiotic supplement might be a helpful sidekick.

Give yourself time, listen closely, and your dog’s tummy will thank you.

TL;DR

If your pup is tossing kibble or shedding fur between meals, a dog food for sensitive stomach uk trial can pinpoint the culprit ingredient and bring back that calm wagging tail you love. By collecting a simple drool sample at home, you’ll receive an online report, clear guidance and a practical menu plan that reduces upset, itching and gives your dog a happier, healthier gut—no endless guessing games needed.

Understanding Your Dog’s Sensitive Stomach: Symptoms and Causes

Picture this: you’re pulling the leash for your favourite pup, but every time you stop for a breath you hear a faint rumble that sounds suspiciously like a stomach protest. If you’ve seen your dog wobble, vomit a bit or drop a shiny coat, you’re likely dealing with a sensitive stomach. It’s more common than most pet‑owners realise, especially when the kibble switches brands or when a new treat lands on the floor.

What does a sensitive stomach actually mean? In simple terms it’s a gut that reacts too easily to certain proteins, grains or additives that are usually harmless for most dogs. The reaction can trigger a range of symptoms, from mild tummy discomfort to a full‑blown flare‑up that leaves you scratching your head and your dog scratching their back.

Let’s break it down into the three big symptom categories you’ll want to keep an eye on.

1. Digestive Upset

Loose stools, diarrhoea or, in the worst cases, chronic constipation. The gut’s upset can leave your dog looking like they’ve just taken a tumble down a hill—eyes red, face flushed and a rumble that’s almost audible.

2. Skin & Itchiness

When the body is under stress, it can manifest on the skin. Look for hot spots, dry patches or that persistent scratching that never seems to stop. A sensitive stomach is a classic culprit behind itchy coats, especially when the itch is more pronounced on the belly, back or paws.

3. Behavioural Shifts

Dogs who’re in pain or discomfort often change their eating habits. They may start snatching food from the bowl, refuse to eat altogether or seem unusually lethargic after a meal. These subtle shifts can be the first sign your dog’s gut is saying “no more, thanks”.

But why does this happen? The gut is a complex ecosystem, and when a dog is exposed to an ingredient they can’t digest or one that triggers an immune reaction, the whole system can go off‑balance. Stress, sudden diet changes, parasites, or even seasonal allergies can act as a spark. Even a tiny change in a dog’s routine—like a new toy that’s made of a synthetic material—can tip the scale.

Now that you’re on board with the basics, let’s talk about the practical side: how can you pinpoint the exact trigger? The answer is a Practical Choices to Calm Your Dog’s Digestive Upset kit. By collecting a simple drool sample at home, you can get an online report that lists which proteins, grains or additives are causing the fuss. The kit is straightforward: a cheek swab, a seal, a postage‑paid envelope and you’re done. The lab does the heavy lifting and you’ll receive a clear guide on what to avoid and what to keep.

Watching a short guide on how to read the results can make a world of difference. It’s like having a detective on standby, ready to point out the sneaky culprits in your dog’s diet.

A realistic photograph of a calm, brown‑haired dog resting on a cosy sofa in a bright UK living room, a dog food trial kit visible on a nearby table. The scene conveys a relaxed, domestic setting that appeals to pet owners looking to improve their dog’s health.

Once you know the culprits, the next step is to switch to a diet that’s free of those triggers. Low‑residue or hypoallergenic options are common choices, but remember: the best diet is one that the whole family—including you—can maintain long‑term. If you’re curious about how a broader health approach might help both you and your dog, check out XLR8well, a partner that specialises in proactive health solutions for the whole household.

In the end, a sensitive stomach isn’t a permanent label. With the right information and a thoughtful trial, you can often restore balance and give your dog the steady, happy gut they deserve. Give it a try, keep an eye on the symptoms, and you’ll soon feel the difference in your pup’s energy and wag.

Choosing the Right Trial Dog Food: What to Look For

Remember that first moment you watched your pup toss a kibble, stare at the bowl, and then walk away? It’s a clear sign of a tummy that’s on edge. That moment is the cue to start a trial that actually works.

When you’re hunting for a dog food for sensitive stomach UK trial, the goal isn’t just a “clean‑up” brand – it’s a food that your dog can digest comfortably and that you can trust. The real question is: how do you separate the good from the confusing?

Ingredient Transparency

Start with a label that reads like a conversation. You want clear, single‑source proteins and a list that tells you exactly where each ingredient comes from. A good test kit will point out proteins, grains and additives; your food should match that clarity.

Smart Bark’s recent review of UK dog foods stresses the importance of clear ingredient sourcing for sensitive pets – it’s a reliable benchmark if you’re unsure which brand’s list to trust. Smart Bark’s guide breaks down the pros and cons of each label.

Single‑Protein, Single‑Carb

For a trial, pick a formula that isolates one protein and one carbohydrate source. Think of it like a test tube – you only want one variable at a time. That way, if symptoms flare, you know exactly what to eliminate.

Novel Proteins & Grain‑Free

When common proteins like chicken or beef keep causing trouble, shift to novel proteins such as rabbit, venison or even fish. Grain‑free is a no‑go for many sensitive dogs, but if your trial kit flags wheat or corn as irritants, a grain‑free line can be the sweet spot.

Probiotics & Prebiotics

Gut health is a two‑way street. Look for foods that include prebiotic fibres or a probiotic blend. They work together to restore microbial balance after a trial, especially if your dog’s gut was already off‑kilter.

Texture and Palatability

Your dog’s enthusiasm for the food is a litmus test. A kibble that’s too hard might trigger chewing issues, while a wet or semi‑wet texture can help soothe an inflamed lining. Test the texture in small portions first.

Watch the first few bowls. If the dog licks the bowl clean in less than a minute and shows no signs of discomfort, that’s a positive sign.

That quick clip shows a typical trial process: a 14‑day window, stool tracking and a calm feeding routine. It’s a handy visual if you’re new to the concept.

Transition Tips & Monitoring

Once you’ve chosen a candidate, roll it out over 14 days. Feed the same meal every day, keeping portion size and feeding times consistent. Log stool colour, frequency and any itching or scratching.

If you spot improvement, great – you’ve narrowed it down. If not, the culprit remains hidden. In that case, repeat the cycle with a different protein or grain, keeping the record straight.

The PDSA guide on conducting a food trial offers a step‑by‑step checklist you can print or keep on your phone. It’s a practical tool to avoid skipping steps that can skew results. PDSA’s checklist is straightforward and vet‑approved.

Remember, the trial isn’t a one‑off; it’s a learning loop. Keep the data tidy, talk to your vet about any persistent issues and let the trial guide you to a diet that’s genuinely soothing for your pup.

Trial Protocols: How to Run a Successful At‑Home Trial

If you’re reading this, you want real, workable steps to stop the guesswork on your dog’s gut. A solid at‑home trial can cut the noise and bring you real signals. Let’s map out a protocol that fits a busy life in the UK.

So, what should you do first? Decide the goal: identify a single protein and carbohydrate that won’t upset the tummy. Then set a two‑week window to test it, with careful notes you can actually follow.

Does this really work? Yes, with a clear plan and disciplined logging. It’s not glamorous, but it’s practical and surprisingly reliable when you stick to it.

Before you start: establish a baseline

Start with a simple diary. Jot down the dog’s usual energy, stool pattern, any itching or discomfort. Keep it light—just a couple of lines per day so you won’t abandon it midweek.

Next, define your single variable. Pick one protein and one carbohydrate you’re willing to trial, and avoid mixing extras during the period. This makes it easier to tell what moved the needle.

Single‑variable rule

Limit the trial to one new protein and one carbohydrate source. If you introduce extra flavours, treats, or grain blends, you blur the data and slow your progress. Simplicity is your ally here.

4 steps to run the 14‑day window

  • Step 1: Choose a formula with a single protein and a single carbohydrate source.
  • Step 2: Keep meals consistent—same portion size, same feeding times, and no extra treats.
  • Step 3: Log stool colour and frequency, plus any itching, vomiting, or changes in energy.
  • Step 4: At day 14, pause the trial diet and review the data with your vet or a pet nutritionist.

What to watch for and how to adjust

If you see improvement, you’ve likely found the culprit or a close proxy. If not, cycle to a different protein or grain and run another 14‑day window. Keep the diary tidy and compare before/after patterns.

How does home testing fit in? In our experience, at‑home intolerance testing can help pinpoint likely ingredients before you begin the trial. Platforms like UK Pet Food Intolerance make this easier by delivering clear results online and guiding diet decisions after the test.

For a deeper, step‑by‑step design, you can consult the NX Diet Trial for Dogs guide. It offers practical structure you can adapt to your dog’s needs. NX Diet Trial for Dogs guide.

Ready to start? Grab a notebook, choose your protein and carb, and set the two‑week clock. You’ve got this.

Along the way, keep it human‑scale. If your dog’s tummy seems unsettled on day three, don’t panic—double‑check feeding times and portion sizes, look for hidden treats, and log events. If you’re unsure, calling your vet for a quick check is wise.

Finally, celebrate tiny wins. A calmer afternoon, a days‑long normal stool pattern, or fewer itchy moments are real progress. With patience and careful notes, you’ll land on a diet that genuinely suits your dog.

Stay curious, stay consistent, and you’ll see results.

Comparing Top UK Trial Brands: A Quick Reference

Running a trial is like detective work – you’re hunting for the single ingredient that keeps your pup happy. But with so many brands shouting “we’re hypoallergenic,” how do you actually tell the good from the fluff?

What to Look For

First, pin down the two pillars that matter most: ingredient clarity and single‑protein, single‑carb focus. If you can read the label and spot the source of every ingredient, you’re already on the right track.

Second, think about the texture. A kibble that’s too hard can irritate a sensitive gut; a moist or wet option often feels gentler. And don’t forget the grain‑free angle – it’s a quick way to cut out wheat, corn or rye, which are common triggers.

Top Picks for Sensitive Stomachs

We’ve boiled the market down to a handful that have shown consistent results for owners dealing with tummy troubles.

  • Forthglade Cold‑Pressed – Low‑heat processing keeps nutrients intact, and the grain‑free line uses sweet potato as a friendly carb.
  • Fish4Dogs “Finest” – Fish is a novel protein with plenty of omega‑3s, and the recipes avoid artificial fillers.
  • Lily’s Kitchen Grain‑Free – A B‑Corp brand that uses high‑quality fresh meat and skips grains entirely.

Curious how they stack up against the broader range? Check out the best dog food UK guide for a wider comparison.

How to Pick the Right One

Start with a two‑week trial. Feed the same food every day, record stool colour and any itching, and keep the feeding routine steady.

At day fourteen, pause and look back. If the gut’s calmer, you’ve probably found a match. If not, swap to the next brand on your list – remember to keep the record tidy so you can compare.

Want to make the process even smoother? Pair the trial with an at‑home intolerance test. It can highlight proteins or grains that your pup might be reacting to, saving you a few rounds of guessing.

Feature Brand Notes
Protein source Forthglade – Chicken, Turkey, Salmon All single‑protein, grain‑free
Carb option Sweet potato or pea Low‑residue, easy to digest
Texture Cold‑pressed kibble, wet trays available Gentle on sensitive gut

Price is a real consideration. Brands like Forthglade offer subscription discounts that can bring a 10% off bulk orders, and you can pick up a 2‑kg trial bag for a decent price. Fish4Dogs and Lily’s Kitchen tend to sit a bit higher, but their novelty protein and ethical sourcing justify the cost for many owners.

Another practical tip: check where the brand ships from. If the food is produced locally in the UK, you’ll usually get fresher ingredients and shorter shipping times. Plus, the carbon footprint is lower – a win for the planet and your conscience.

Don’t forget to talk to your vet before you switch. Even if you’ve run a trial, a quick chat can help confirm that you’re on the right track and catch any underlying health issues that need medical attention.

Finally, remember that a trial isn’t a one‑off experiment. It’s a learning loop: each round gives you more clues. Over time, you’ll build a clear picture of what your dog tolerates and what triggers discomfort.

A photorealistic image of a dog sitting beside a bowl of grain‑free dog food on a British kitchen table, sunlight streaming in, with a calm expression on the dog’s face. Alt: dog food for sensitive stomach UK trial

Managing Side Effects and When to Seek Veterinary Advice

Tummy hiccups during a dog food for sensitive stomach uk trial are common. It’s not a failure—it’s data showing you what your dog tolerates. Let’s get practical about handling the bumps without derailing the trial.

So, what counts as a side effect during a trial? Think changes you notice after eating—unsettled stool, gas, vomiting, itchiness, or a coat that looks dull. Not every sniffle means a disaster, but persistent or escalating signs deserve a pause and a closer look.

What to watch for in the early days

  • Vomiting or diarrhoea lasting more than a day—especially if the stools are watery or bloody.
  • Severe or persistent gas that causes discomfort or behavioural changes.
  • Dehydration signs like dry gums, lethargy, or sunken eyes.
  • Significant weight loss or reduced appetite that continues beyond a few days.

If you notice mild symptoms, don’t panic. You can often steer the situation with careful tweaks rather than a full stop to the trial.

Gentle, practical steps to take if side effects appear

First things first: pause the trial diet for a short refresh. Make sure fresh water is always available and check for hidden treats or table scraps that could be upsetting the gut.

Then, review the variables. Are you keeping portion sizes identical every day? Is feeding time consistent? Any new treats or supplements could be the culprit.

Next, reintroduce with restraint. Return to the trial food gradually over 3–5 days, starting with a small portion mixed with the old food and increasing the trial portion slowly. This helps you tell which change actually triggers symptoms.

Maintain a simple environment—avoid new flavours, additives, or conflicting chews for a bit. A calm gut loves a predictable routine.

Consider gut-supporting options like a modest amount of prebiotics or a probiotic, but only after you’ve discussed it with your vet. Not every dog needs them, and timing matters.

Remember to document everything. A clear diary of what was eaten, stool colour and frequency, itchiness, and activity makes the pattern easier to spot. If you’re unsure, your vet or a pet nutritionist can help you interpret the data and adjust the plan.

When to seek veterinary advice

If any red flags pop up, don’t delay. Seek veterinary input if vomiting persists beyond 24–48 hours, if there’s blood in the stool, if your dog refuses water or becomes markedly lethargic, or if there’s noticeable weight loss. Severe or rapid changes require professional assessment to rule out infections, parasites, or other health issues.

In our experience, timely vet involvement keeps a trial from becoming a prolonged problem and helps you differentiate between a tolerance issue and an underlying condition.

If you’re navigating this at home and feel stuck, remember that at-home intolerance testing can complement your approach by pinpointing potential trigger ingredients before you adjust the diet further. Platforms like UK Pet Food Intolerance make this easier by delivering clear results online, helping you tailor the next steps with confidence. For more practical ideas on what gentle, stomach-friendly options look like, check out this guide from Pets Well-Being UK: Practical guidance on gentle dog foods for sensitive stomachs.

In short: stay observant, stay kind to the gut, and use the data you collect to inform the next sensible step. Your calm, consistent approach often yields real, lasting relief for a dog that’s been riding the ups and downs of a sensitive stomach.

Conclusion

You’ve taken the first step, so let’s pause and reflect today.

A trial is less a guessing game and more a detective story you’re writing with your pup.

What you’ve seen so far—whether it’s a wobble in stool or a sudden itch—already gives a clue.

The real win is pairing clues with a clear action plan.

Set a tidy two‑week window, stick to one food, log, pause.

If the signs improve, you’ve likely found a match; if not, you’ve just scoped another suspect.

And remember: every small tweak is data, not drama.

When results arrive, read them like a map—look for patterns and decide what to keep.

You might find a novel protein or grain‑free option is the missing piece, or a probiotic boost helps.

Take the next step with confidence: pick a single protein, keep the routine steady, and let the data guide you.

If you hit a roadblock, bring the log and test report to your vet for a quick check.

Bottom line: a dog food for sensitive stomach uk trial is about progress, patience, and a calm rhythm for both of you.

Give yourself credit for every win, and soon you’ll see the mystery turn into a clear path.

FAQ

What is a dog food for sensitive stomach UK trial and why do I need one?

A trial is a structured experiment you run at home. You pick a single protein and carbohydrate, feed it for 14 days, and record stool colour, frequency and any itching. It helps cut through guesswork, so you only switch to a brand that actually calms your dog, not just one that feels fancy.

How do I choose the right food for my trial?

Start with a single‑protein, single‑carb formula and check the label for clear sourcing. Look for grain‑free or low‑residue options if your dog is sensitive. Stick to one brand per 14‑day cycle to keep the data tidy. If you’re unsure, ask your vet for a quick recommendation before you start.

What should I log during the 14‑day window?

Keep a tiny diary: the exact food amount, feeding times, stool colour on a quick chart, any scratching or gas, and energy level. A simple three‑column table works: date, stool type, notes. Consistency makes the comparison real and lets you see clear patterns when you pause the trial.

When do I pause the trial and review the results?

On day 14, stop feeding the new food. Review the diary and look for consistent improvements – softer stools, fewer itchy moments, steady appetite. If the signs improve, you’ve found a match. If not, you need another 14‑day round with a different protein or carb, keeping the record straight.

Can I add a probiotic during the trial?

Probiotics are helpful when the gut is already upset, but avoid adding them until the trial is finished. Introducing a probiotic mid‑trial can mask whether the food itself is causing issues. After you finish the 14 days, you can start a probiotic to support gut balance if the owner or vet recommends it.

What if my dog shows vomiting or bloody stool during the trial?

If vomiting lasts more than 24 hours, bloody stool appears, or your dog stops drinking water, pause the trial immediately. Call your vet right away – these symptoms could signal an infection or underlying issue beyond food intolerance. The goal is safety first, not speed.

How long should I keep the trial results in my records?

Keep the diary for at least a month after the trial ends. Patterns can surface over time, and you’ll have a clear history if you need to discuss it with a vet or switch to a different diet. The longer you track, the more confident you can be about what truly calms your pup.

Quick Action Checklist

Here’s the low‑down on what you can do right after you get your trial kit.

Unpack the kit with a grin. The saliva swab is tiny, the seal clear, and you’ll feel like a scientist cracking a mystery.

Set a simple log on your phone or a sticky note. Jot the date, brand, portion and time. That tiny habit turns chaos into data.

Mark the first bite. Watch your pup’s face—any squint, paw lift or sudden pause? That’s your first clue that something might be off.

Start the 14‑day window. Feed the same brand, same amount, every day. Keep treats off the table unless you’re testing a specific product.

Every evening, note stool colour on a simple chart: green, brown, yellow or darker. If it’s off‑colour or loose, record it—no judgement, just facts.

Add a quick note on energy and itchiness: “burst of energy” vs “scratched behind the ear” helps spot patterns later.

At day 14, pause the new food and re‑introduce the old one. This swing lets your gut settle and shows the real difference.

Run a quick check with your vet. Share the diary; they’ll spot red flags you might miss and give you a green light to move forward.

Look at the numbers. If stools are calmer and your pup is happier, you’ve found the match. If not, swap the protein or carb and repeat.

How to identify dog food intolerance uk: a practical step‑by‑step guide

Let me be honest: you’ve probably watched your pup’s coat go from glossy to dull in the blink of an eye, or maybe your cat’s tummy has been throwing a tantrum more often than a toddler in a candy aisle.

Sound familiar? That could be more than a coincidence. Many pet owners in the UK are turning to food intolerance as the hidden culprit behind digestive upset, itching, and those stubborn loose stools that just won’t quit.

So, what do you do when you’re faced with a mystery that feels like a puzzle with missing pieces? First, pause and notice the pattern. Is the problem only around mealtimes? Does it flare after a new brand lands on the shelf? A little diary can do wonders: jot down dates, food changes, and symptoms.

Next, rule out the obvious. A quick vet visit can screen for infections or allergies that aren’t diet‑related. If everything checks out, the next step is to look at the menu your pet is eating. Think about the ingredients that come up in every brand you’ve tried – wheat, corn, chicken, and so on.

Now, imagine a test that lets you keep your pet at home, collect a small sample, and get a clear answer without a trip to the lab. That’s where at‑home food intolerance kits come in. They’re simple to use, give you results online, and provide a guide you can use to tweak the diet safely.

Here’s a quick, practical checklist to get started: 1. Keep a symptom log for two weeks. 2. Pick a brand with the least ingredients you suspect. 3. Use a test kit to analyse your pet’s tolerance. 4. Adjust the diet based on the findings and watch for improvement.

Remember, it’s not a quick fix, but it is a clear, evidence‑led path that can transform how your pet feels day‑to‑day.

Ready to find the root of those itchy nights and restless mornings? Let’s dive in.

TL;DR

If your dog’s coat is dull, tummy uneasy or itching spikes, you’re chasing a way to identify dog food intolerance UK without a lab visit. Our at‑home test kit captures a sample, delivers online results, and guides you to tweak the diet safely—so you can say goodbye to restless nights.

Step 1: Spot the Symptoms

Let’s be honest – if you’ve seen your pup’s coat go from glossy to dull in a blink, you’re already on the right track.

The first clue is always a pattern that shows up every time your dog digs into the bowl. A sudden itch, a bout of loose stools, or a tummy rumble right after a meal – those are the early flags you should watch.

So, what should you do next? Start a symptom diary. Grab a notebook or use a simple app, and log the date, the exact brand and portion size, and any reaction that follows.

Keep it short but consistent – a few sentences per entry is enough. After two to three weeks, you’ll have a handful of data points that can reveal a clear picture.

Spotting the Pattern

Look for spikes that line up with a new batch or a brand change. If your dog’s stomach starts to protest right after switching from, say, “Classic Chicken” to “Premium Beef,” that’s a strong signal.

Notice also the type of reaction: itching ears, a dry, flaky coat, or a persistent sneeze. These symptoms often surface within hours of the offending food, so the timing is key.

Once you’ve identified a potential trigger, cross‑check it with the ingredient lists of the foods you’ve tried. Common culprits in the UK market are wheat, corn, and chicken by‑products.

If you see the same ingredient repeatedly showing up with symptoms, you’re on to something. Don’t jump to a vet visit just yet – a food sensitivity could explain a lot.

Want to dive deeper? Platforms like Umbrello offer at‑home kits that can help you pinpoint sensitivities without a lab trip.

Alternatively, XLR8Well provides a straightforward sample collection process with online results that give you a clear action plan for tweaking your dog’s diet.

Once you have the data, start eliminating one ingredient at a time and observe the changes. It’s a bit of trial and error, but the insights you gain are worth the effort.

The goal is to build a clearer picture, not to blame the vet or the food brand outright. This first step sets the stage for the next part of your journey.

Above, you can see a typical test kit in action, giving you a sense of how simple the process is. The video walks you through sample collection, packaging, and sending it off to a lab.

A realistic depiction of a dog owner at home taking a food sample from their pet, with a notebook, a test kit, and a British kitchen setting. Alt: dog food intolerance test at home

Now that you’ve spotted the symptoms and gathered a solid diary, you’re ready to move on to the next step – actually testing your dog’s food tolerance. Keep the records handy, and you’ll have a solid foundation for the next phase.

Step 2: Keep a Food Diary

Picture this: you’re pouring a bowl of kibble, and a few minutes later your pup starts scratching or has a sudden tummy rumble. The first instinct is to blame the brand, but the real trick is to capture every detail before you jump to conclusions. That’s why a food diary is the unsung hero of uncovering food intolerance.

Why a diary matters

Dogs don’t tell you what’s wrong, they only show you symptoms. By logging each meal, portion size, brand and any treats, you create a timeline that turns vague patterns into clear evidence. It’s the same way a vet charts a history—only you’re doing it at home, and the data you collect can steer you right to the culprit.

How to set it up

Grab a simple notebook, a spreadsheet or an app—whatever feels natural. Record:

  • Food type: dry, wet, homemade, or a mix.
  • Brand and batch number (if available).
  • Portion size and any extra supplements or treats.
  • Feeding time and your pup’s reaction.
  • Any symptoms that pop up: itching, flatulence, loose stools, or behavioural changes.

Consistency is key: jot down every meal for at least 14 days. That two‑week window gives you enough data to spot repeat spikes and rule out random flare‑ups.

Quick tip: use a template

If the idea of starting from scratch feels daunting, try this free benefits of keeping a dog food diary guide. It’s packed with a ready‑made table that makes logging a breeze.

Spotting patterns

Once you’ve got a stack of entries, look for dates that line up with symptoms. Did itching start after you switched from brand X to brand Y? Did gas spike after a particular batch of wet food? Those are your red flags. Don’t just eyeball it; colour‑code your notes if that helps you see the story at a glance.

Turning data into action

Now that you’ve identified a suspect ingredient or brand, you can test your hypothesis. A simple step is to eliminate that food for a week and see if symptoms recede. If they do, you’ve found a likely trigger. If nothing changes, move on to the next suspect.

When to bring in a test

If the diary points to a complex pattern—say, multiple foods or an ingredient you can’t isolate—a home‑based intolerance test can confirm the findings. UK Pet Food Intolerance’s at‑home kit takes a small sample, sends it to accredited labs, and delivers clear guidance on which foods to avoid or re‑introduce. It’s a natural next step when the diary alone can’t give a definitive answer.

Remember, a diary isn’t a diagnostic tool on its own, but it’s the foundation that makes any subsequent test worthwhile. The more accurate your records, the faster you’ll narrow down what’s truly bothering your pup.

Step 3: Choose an Elimination Diet

So you’ve logged a few red‑flag meals and you’re ready to put the theory to work. The trick is picking an elimination diet that’s simple enough to stick to, yet strict enough to unmask the culprit.

First thing: decide how many foods you want to cut out. If you’re dealing with a single suspected protein, you can keep things neat by ditching just that one. But if you’ve spotted several potential offenders, a broader sweep is safer.

Think of it like a mystery novel – you need to remove every suspect, then re‑introduce them one by one to see which one stirs up the drama.

Single‑Protein vs. Multi‑Ingredient Trials

Single‑protein diets keep the variables tight. You feed your pup only one type of meat or fish for 4‑6 weeks, then slowly bring back others. It’s the gold standard when you suspect a specific protein is the villain.

Multi‑ingredient trials are handy if you’re unsure whether a grain or preservative is at fault. In this case, you eliminate everything on your suspect list, then re‑introduce one ingredient group at a time.

Practical Tips for a Smooth Start

1. Read the labels – look for hidden wheat, corn, soy or artificial colours. If you’re unsure, ask the retailer for a full ingredient list.

2. Choose a base food you love – you’ll be feeding it twice as often, so it should be tasty and safe. Raw, single‑protein meals are a favourite for many owners, as they cut out a lot of the usual suspects.

3. Keep a tidy diary – note the brand, batch, feeding time and any reaction. Consistency is key to spotting real patterns.

Does this sound like a lot of work? Not really – the bulk of the effort is in the first week, after which you simply watch and record.

Re‑Introduction: The Slow‑Mo Method

Once you’ve hit the 4‑week mark and your pup’s symptoms are flatlining, it’s time to bring back foods one by one. Wait at least seven days before adding the next item.

If a symptom re‑appears, that food is the offender. If not, you move on. Keep the diary handy; it’s the evidence you’ll need to explain the findings to your vet if you choose to involve them.

When to Pause the Diet

If your dog’s health feels worse – weight loss, lethargy, or new gastrointestinal signs – pause the trial. A severe reaction might mean you’ve eliminated something essential, or that a different underlying issue is at play.

In that case, reach out to a holistic vet or a nutritionist who can help tweak the plan safely.

Quick Comparison Table

Feature Option Notes
Scope of Elimination Single‑Protein Diet Fast, focused; ideal for protein‑related symptoms.
Scope of Elimination Multi‑Ingredient Diet Broader; covers grains, additives, and more.
Typical Duration 4‑6 weeks Enough time for gut to heal and symptoms to stabilize.

Want a real‑world example? Many owners who started with a single‑protein trial found that a sudden flare in itching vanished after six weeks. Then, by re‑introducing chicken after a week’s break, the skin settled back into its usual shine.

And if you’re curious how a raw, single‑protein food can fit into this, the ProDog raw feeding guide gives a handy rundown of how to structure a diet free from common allergens.

So, what’s the next move? Pick a plan that fits your dog’s current diet, stick to the diary, and watch for the subtle signs that tell you whether the culprit is back on the menu.

Remember, patience is part of the process – the clearer the data you collect, the sooner you can get your pup feeling like the happy, healthy companion you know them to be.

Step 4: Re‑introduce Foods Safely

After a clean break from the suspect ingredients, you’re ready to bring the food back, one bite at a time. Think of it like a detective’s final interrogation – you only ask one suspect a question, then wait for the reaction.

First, give your pup a full week on the new, clean diet. Watch for any subtle itchiness, a whisper of gas or a sudden change in coat shine. If all looks calm, it’s time to roll out the first test piece.

Step‑by‑step re‑introduction checklist:

  • Choose a single item. Pick a single protein, grain or treat that was on your elimination list.
  • Small dose. Start with a quarter of the usual portion – a nibble is enough to trigger a response.
  • Observe. Keep a diary for 48‑72 hours. Note scratching, belly bloating or any mood shift.
  • Wait. If no signs pop up, let your dog settle for at least a week before the next round.

Why the strict pacing? Your dog’s gut needs time to reset. A sudden spike can mask a mild intolerance or, worse, create a new problem.

Let’s run through a quick example: Maria’s labrador, Max, had a flare‑up after a switch to a wheat‑based kibble. After a two‑week elimination, she re‑introduced a small spoonful of beef once a day. No itching, no gas – good sign. She waited a week, then added a single carrot to the mix. Within 48 hours, Max started licking his paws again. The carrot was the culprit. Now he’s on a grain‑free, single‑protein regime and his coat is shining again.

Keep the diary handy. A visual log can turn a vague “maybe” into concrete evidence. Colour‑code symptoms – yellow for mild, red for obvious. This makes the pattern obvious at a glance.

If you’re feeling unsure, the Elimination Diet Dog UK: A Practical Guide for Pet Owners walks you through each step with clear examples and a printable template.

Remember, you’re not testing for an allergy – you’re looking for a tolerance window. If you find a food that keeps the symptoms at bay, you can keep it, or you can use it as a baseline to re‑introduce others safely.

Now, what about the environment? A hot, sunny day can amplify itching or gastrointestinal upset. If your dog spends time outdoors during re‑introduction, consider a shaded area. Umbrello offers durable, UV‑protected patio umbrellas that keep your pup cool and calm – a handy side‑kick while you’re fine‑tuning the diet.

Once you’ve cycled through all suspects, you should have a clear “do‑not‑eat” list and a handful of safe favourites. This gives you and your vet a solid foundation to build a long‑term nutrition plan that keeps your pet healthy and happy.

A realistic photo of a dog owner at home, gently placing a small portion of food on a bowl beside a laptop showing a diet plan, with a sunny balcony in the background and a modern Umbrello patio umbrella casting shade. Alt: dog owner re‑introducing food at home.

Step 5: Evaluate Results and Adjust

You’ve done the hard yards. You’ve tracked symptoms, run an elimination plan, and perhaps used an at‑home test to flag triggers. Now it’s time to translate that data into real, workable changes for your dog.

This is the moment where the numbers meet daily life. If the results aren’t a clean yes or no, that’s normal. Use your symptom diary alongside the lab results to see where patterns truly align, not where they merely look obvious at first glance.

Here’s a practical seven‑step approach you can actually follow:

  • Compare results with your symptom diary. Do improvements line up with a specific ingredient you avoided? If yes, you’ve got a solid lead.
  • Discuss the findings with your vet or a veterinary nutritionist. Ask for an interpretation of the lab report in the context of your pet’s symptoms.
  • Establish a safe baseline diet based on the results. Feed it consistently for 2–3 weeks while you monitor changes.
  • Plan a careful re‑introduction schedule. Re‑introduce one item at a time, waiting 7–14 days before testing the next, and document every reaction.
  • Track outcomes with colour‑coded notes. Yellow for mild signs, red for clear flare‑ups, helps you see trends quickly.
  • Be mindful of delayed reactions. Some responses don’t show up for 24–72 hours after a test bite, so keep the diary active for several days after each reintroduction.
  • Watch for environmental confounders. Heat, exercise, or stress can mimic or mask symptoms—note these in the diary too.

What happens next depends on what you discover. If a single ingredient consistently trips symptoms, you’ve likely found a trigger. If several foods cause mild responses, you may need to broaden the elimination or work with a nutritionist to tailor a long‑term plan.

In practice, we see owners succeed when they stick to a clear baseline and reintroduce foods slowly. A dog might tolerate a hydrolysed protein base well, then react to a common allergen only after a month of testing—proof that time and method matter more than guessing.

For extra clarity, our at‑home tests deliver straightforward results online, then guide you on next steps. Platforms like UK Pet Food Intolerance simplify turning lab data into practical diet choices you can follow at home. To understand the elimination diet concept further, you can read this overview from cerascreen: Elimination diets and intolerance testing explained.

Does this feel doable? Yes. Start by choosing a 2–3 week baseline, then schedule your first reintroduction window. Small, steady steps beat big leaps every time.

Step 6: Long‑Term Monitoring and Adjustments

Now that you’ve cracked the code and found the trigger, the real work begins: keeping your pup thriving long after the test bite.

1. Set a rhythm for monitoring

Think of it like a regular check‑in. Pick a simple schedule: diary entries every 3‑4 days for the first month, then once a week once things level out.

Why? Symptoms can flare up weeks after a change, especially if the gut is still healing. Regular notes catch those late‑onset reactions before they become big problems.

2. Keep your diary alive but lightweight

Don’t overload it. A quick table on a phone or a sticky note works. Note the date, the food batch, any treats, and a 1‑2 word symptom tag (itchy, flatulent, calm).

Colour‑code the tags—red for clear flare, yellow for mild. That visual cue makes spotting patterns a breeze.

3. Use the lab report as a roadmap

Your at‑home kit will give you a list of ingredients to avoid and a baseline diet to start with. Treat that report like a map: follow the avoidance path, then slowly re‑introduce one ingredient at a time.

If you’re curious how hydrolysed diets work in practice, check out Acorn House Vets’ guide on hydrolysed diets. It explains why a protein broken down into smaller pieces can be gentler on a sensitive gut.

Practical tip:

Set a reminder on your phone for the first re‑introduction day. That way you won’t forget to start the week‑long observation period.

4. Re‑introduce with patience

Give each new food a full seven days before adding another. If symptoms pop up, mark that ingredient as a culprit and move on.

Remember, the goal isn’t to eliminate everything but to find a safe, balanced menu that keeps your dog comfortable.

5. Track long‑term health markers

Beyond the diary, keep an eye on weight, coat sheen, and overall energy. If your pup starts losing weight or looks lethargic, pause and reassess.

It can help to photograph your dog’s coat every month; visual evidence shows subtle changes you might miss otherwise.

6. Stay flexible and revisit the plan

Food tolerance can change with age, activity level, and even stress. Plan a quarterly review: re‑order a small sample kit, run a fresh test, and adjust the diet as needed.

Think of it as a living document—your dog’s needs evolve, and so should their meals.

7. When to involve a vet or nutritionist

If symptoms recur despite adjustments, or if you notice new issues (e.g., weight loss, persistent vomiting), bring a vet into the conversation. They can run supplementary tests to rule out other conditions.

Many vets are happy to interpret your test kit results and help fine‑tune the plan.

8. Celebrate small wins

Noticing a shinier coat or a calm belly after a month of adjustments? Give yourself a pat on the back. Positive reinforcement keeps you motivated and shows your dog that change works.

Keep the momentum going by sharing your progress on a private group or with a friend who’s also on a food trial.

So, what should you do next? Stick to your monitoring rhythm, trust the data, and be ready to tweak as your dog’s body tells you. With a steady plan and a dash of patience, you’ll turn that food intolerance mystery into a long‑term solution.

FAQ

What are the earliest signs that my dog might be food intolerant?

First, look for skin or gut clues that keep popping up after meals. A shiny coat that suddenly feels dull, a scratch‑y rash that won’t clear even after baths, or a stomach that gurgles and then ends in loose stools – those are the red flags we see most often. It’s not about waiting for a vet diagnosis; it’s about noticing the pattern every time you feed.

How do I start tracking symptoms without feeling overwhelmed?

Grab a simple notebook, phone app, or sticky note – whatever feels natural. Jot the date, the exact brand, the batch number if you can, and any reaction that shows up within 24 hours. Keep it short: a line for the meal and a line for any itch, gas or belly. After two weeks you’ll have a map of triggers without the clutter.

What does it mean if my dog’s symptoms only appear after a new food brand?

That’s the classic “food‑trigger” clue. A sudden change in the kibble mix – like a new grain or protein – can upset a sensitive gut. If you notice scratching or bloating just after you swap brands, it’s worth putting that food on the elimination list and testing a more basic diet for a couple of weeks.

Can I trust an at‑home test to spot intolerance or should I go straight to the vet?

At‑home kits give you a clear, lab‑backed snapshot of what foods your pet reacts to, and they’re far more convenient than a clinic visit. They don’t replace a vet’s assessment – you still need a professional check‑up to rule out other health issues. But for most owners, the kit is a practical first step to cut through the noise.

What’s the best way to re‑introduce foods once I’ve found a safe base?

Start with a single item at a time. Give your pup a small bite of the new food and wait seven days before adding another. Use the same diary style – note any itch, gas or change in energy. If nothing pops up, you can add another safe ingredient; if a flare occurs, you’ve found the culprit again and should keep it out of the mix.

How often should I repeat the test if my dog’s diet changes?

Every time you introduce a new ingredient, especially after a long period of stability, run a fresh sample. A quarterly check keeps the data up to date and lets you stay ahead of any shifts in tolerance that can happen with age or stress.

Conclusion

So, after all the digging, you’ve got a clearer picture of what might be ruffling your pet’s gut or skin. The evidence is in the diary, the lab data, and the subtle shifts you’ve watched.

What matters most is turning that evidence into a steady routine. Pick one safe base diet, keep a quick log, and let each new ingredient sit for seven days before re‑introducing another.

Remember, consistency beats perfection. A tidy notebook or a simple spreadsheet will do. Colour‑coding symptoms keeps the picture vivid, so you don’t get lost in the details.

If you spot a pattern that lines up with a specific food, it’s a sign your pet’s body is sending a clear message. Use that insight to build a menu that feels right for them, not just for you.

And don’t forget the human side: a calmer, happier pet means more walks, more cuddle time, and fewer vet visits. That’s the real win.

Next step? Review your findings weekly, tweak portions, and keep the dialogue open with your vet. A partnership that uses data makes every decision stronger.

You’ve got the tools, the knowledge, and the drive. Now it’s just a matter of patience and a little persistence. Your pet will thank you with wagging tails and a smoother tummy.

foods dogs can eat when on elimination diet uk: a practical how-to guide for UK dog owners

Ever stood in the kitchen, staring at a bag of kibble and wondering if it’s safe for your dog while you’re running an elimination diet?

You’re not alone. Most UK dog owners hit that moment of doubt when the pantry looks like a maze of potential triggers – chicken, wheat, dairy – and the vet has just suggested a short‑term trial to pinpoint the culprit.

What we’ve learned at UK Pet Food Intolerance is that the key isn’t to starve your pup of flavour, but to swap in a handful of simple, single‑ingredient foods that are universally tolerated. Think of it as a culinary reset button.

Here are three go‑to options that fit neatly into a typical 10‑day elimination plan:

  • Boiled white rice – easy to digest, low in allergens, and works as a neutral base for mixing with a protein source.
  • Lean turkey or chicken breast (skin‑less, unseasoned) – provides high‑quality protein without common fillers like soy or corn.
  • Steamed sweet potato – gentle on the stomach, rich in fibre, and offers a subtle sweetness that many dogs love.

Start by offering a small portion (about a tablespoon per 5kg of body weight) twice a day. Keep a simple log: note the time, amount, and any reaction – a few extra poops, a hint of itching, or a sudden burst of energy.

And remember, consistency is king. Avoid treats, table scraps, or flavour enhancers during the trial. If you need a quick snack, a slice of banana (yes, dogs can have that in tiny amounts) or a few green beans work as safe, low‑calorie treats.

Real‑world example: Emma from Brighton swapped her Labrador’s regular dry food for a mix of boiled rice, turkey, and sweet potato for 12 days. By day ten, the persistent skin itch had noticeably calmed, prompting a follow‑up test that identified a wheat sensitivity.

Want a step‑by‑step guide that walks you through the whole process, from choosing the right protein to re‑introducing foods safely? Check out our Dog Food Intolerance UK: A Practical Guide for Pet Owners – it breaks the plan down into daily tasks and includes a printable checklist.

So, grab a pot, a cutting board, and give your dog a calm, predictable menu. Within a couple of weeks you’ll have a clearer picture of what truly fuels their health.

TL;DR

If you’re unsure which safe bites to serve your pup during an elimination diet, this guide outlines the core foods dogs can eat when on elimination diet uk.

Log each meal, steer clear of hidden triggers, and you’ll notice better digestion and calmer skin in just a few weeks again.

Step 1: Establish the baseline for your dog’s elimination diet

First thing’s first – you need a clear picture of what your pup is eating right now. It might sound obvious, but many dog owners forget to jot down the sneaky bits: a handful of kibble from the floor, a stray chicken bone, or even a spoonful of cottage cheese from the kitchen counter. Those hidden calories can throw your elimination trial off track.

Grab a small notebook or, better yet, open a notes app on your phone. Create three columns – time, food, and reaction. Every meal, every treat, and every little nibble gets recorded. Trust me, the habit of logging feels a bit like keeping a diary for your dog, and it pays off when you start spotting patterns.

Now, decide on your baseline menu. In our experience at UK Pet Food Intolerance, the safest starting point is a single, easily digestible protein paired with a bland carbohydrate. Think boiled chicken breast (no skin, no seasoning) and plain white rice – both are low‑allergen, inexpensive, and widely available across the UK.

Measure the portion size carefully: roughly a tablespoon of rice plus a similar amount of protein for every 5kg of body weight, split into two meals a day. This consistency removes the variable of portion size, so any change you see is more likely linked to the food itself.

While you’re serving this simple fare, eliminate everything else. No treats, no table scraps, no chew toys that might be coated in flavour enhancers. Even a tiny bite of cheese can introduce casein, a common trigger. If you have multiple dogs, feed them in separate rooms to avoid accidental sharing.

Here’s a quick checklist to keep you on track:

  • Prepare a fresh batch of rice and protein each day – freshness reduces the risk of bacterial growth.
  • Use the same bowl for each meal to avoid cross‑contamination.
  • Keep the feeding area quiet and calm; stress can mimic allergy symptoms.

And here’s where the video comes in – it walks you through the exact cooking method for rice and chicken, so you don’t over‑cook or under‑cook anything.

After the video, give the food a solid 48‑hour run‑in before you start noting any reactions. Look for subtle changes: a calmer coat, fewer trips to the garden, or a steadier appetite. Don’t panic if you don’t see an immediate miracle – the gut needs time to adjust.

When you do notice something, be specific in your log. Instead of writing “itchy,” note “itchy on right hind leg, started 2 hours after lunch.” The more detail you capture, the easier it is to pinpoint the culprit later on.

Finally, remember that this baseline is a temporary reset, not a permanent diet. Once you’ve established a stable period of 10‑12 days with no adverse reactions, you’re ready to move on to the re‑introduction phase, where you systematically add back one new food at a time.

Sticking to this method might feel a little like a science experiment, but the payoff is a clearer understanding of what truly works for your four‑legged friend.

Step 2: Safe protein options and compliant ingredients

Now that the baseline is locked down, you can move on to the part that feels a bit like grocery shopping for a mystery menu. Picking the right protein is the cornerstone of a successful elimination diet, and it doesn’t have to be rocket science.

What makes a protein truly safe for an elimination diet? The magic word is “novel” – something your dog hasn’t nibbled before.

Choosing a single novel protein

Think about proteins that sit outside the usual chicken‑and‑beef lineup. Duck, venison, rabbit, even kangaroo are popular choices in the UK because they’re rarely used in commercial kibbles. The goal is to give your pup a clean slate, so avoid anything that might have slipped into treats or occasional table scraps.

Once you’ve selected a protein, keep it simple: boil or steam it plain, no oil, no garlic, no onions – those are common irritants. A handful of skinless duck breast, or a cup of cooked venison, chopped into bite‑size pieces, works perfectly. Remember, you’re looking for a single, pure source, not a mixed‑meat medley.

Picking a compliant carbohydrate

Carbohydrates follow the same novelty rule. Single‑ingredient carbs like sweet potato, quinoa or green peas are easy on the gut and unlikely to have been part of your dog’s regular diet. Peel and cube the sweet potato, steam until soft, and serve in the same measured portion as the protein.

Why stick to one carb? Mixing several starches at once can mask a reaction, making it harder to pinpoint the true culprit later on.

Why single‑ingredient matters

When you feed a single protein and a single carb, any change you see – a calmer coat, steadier stools, fewer itchy scratches – can be traced straight back to that one new ingredient. That clarity is the whole point of an elimination diet.

  • One protein, one carb = clear cause‑and‑effect.
  • Consistent portions (about 1 tbsp per 5 kg body weight) keep calories steady.
  • No seasonings, no hidden fillers, no treats.

Portion control is key. Use a kitchen scale or a measuring spoon; a tablespoon of cooked duck or sweet potato per 5 kg of weight is a good starting point. Adjust gradually if your dog is very active or a senior with a slower metabolism.

Check the packaging of any pre‑prepared meat or veg you buy. Even “plain” products can hide additives like maltodextrin or soy flour, which would defeat the purpose. If you’re unsure, a quick glance at the ingredient list should show only the name of the meat or veg you’ve chosen.

For a deeper dive into selecting truly novel ingredients, see this guide on elimination diets. It walks you through the science behind novelty and offers a handy checklist.

When you serve the meals, keep the bowl clean and the feeding area free from stray crumbs. Any accidental slip of a previous food could muddle the results, and you’ll end up resetting the clock.

A photorealistic kitchen scene showing a British terrier owner preparing a single‑ingredient dog meal on a wooden countertop. The plate holds boiled duck breast pieces and steamed sweet potato cubes, with a measuring spoon beside it. Sunlight streams through a typical London flat window, highlighting the simple, clean setup. Alt: photorealistic image of safe protein and carbohydrate meal for a dog on elimination diet in the UK.

Action step: write down the protein and carb you’ve chosen, note the exact weight you’ll feed each day, and set a reminder on your phone to record any skin or digestive changes. Stick to this combo for at least eight weeks – that’s the sweet spot for most sensitivities to reveal themselves.

Step 3: Carbohydrates and fibre for elimination diet dogs in the UK

Alright, you’ve nailed the protein – now it’s time to think about the carbs and fibre that will keep your dog’s tummy calm while you hunt for the hidden trigger.

Why does fibre matter at all? Think of it as the gentle broom that sweeps the gut, helping stool pass smoothly and giving the gut lining a chance to reset. Too much fibre can cause gas, too little can leave the digestive system feeling raw. The sweet spot is a single, easily digestible carbohydrate that also supplies a modest fibre boost.

Choosing the right carb

In the UK, the safest bets are ingredients you’ve never seen on the bag of kibble before. That novelty reduces the chance you’re re‑introducing a hidden allergen.

Here are three crowd‑pleasers that fit the bill:

  • Sweet potato – naturally sweet, low‑glycaemic, and delivers about 2.5 g of fibre per 100 g.
  • Quinoa – a gluten‑free seed that’s actually a complete protein, with roughly 2.8 g of fibre per 100 g.
  • Green peas – tiny, bright, and provide about 5 g of fibre per 100 g, plus a bit of plant‑based protein.

All three are single‑ingredient, so you won’t accidentally mix in wheat, barley or soy. If you’ve ever fed your dog a commercial “vegetable blend”, ditch it – you need purity.

How much to feed

Measure roughly a tablespoon of cooked carb for every 5 kg of body weight, twice a day. That mirrors the protein portion you’re already using and keeps calories stable.

Cooking tip: steam or boil the carb plain. No butter, no garlic, no onion – those are classic irritants that can masquerade as a food reaction.

Do you wonder whether the carb is actually helping? Keep an eye on stool consistency and any changes in coat sheen. A smoother stool and a shinier coat after a week are good signs that the fibre is doing its job.

Fibre boost without risk

If you need a little extra fibre, sprinkle a pinch of psyllium husk (about ½ tsp) into the meal. It’s soluble fibre, so it won’t add bulk that could upset the gut, but it does help bind water and calm loose stools.

Remember, consistency is king. Once you choose a carb, stick with it for the full 8‑12 week elimination window. Swapping between sweet potato and quinoa mid‑trial is a recipe for confusion.

Need a quick reference? The table below sums up the basics.

Carbohydrate Fibre (g/100 g) Why it works
Sweet potato 2.5 Low‑glycaemic, gentle on stomach, familiar to UK pet owners.
Quinoa 2.8 Gluten‑free, complete protein, easy to digest.
Green peas 5.0 Higher fibre, adds a bit of plant protein, bright colour encourages appetite.

What if you hit a snag and your dog still seems itchy or gassy? That’s where a professional eye helps. Platforms like the Ultimate Pet Foods guide walk you through the science of novelty and give a handy checklist for carb selection.

So, what’s the next move? Write down which carb you’re committing to, measure the daily portion, and add a quick note in your log each time you feed. Stick with it, watch the gut settle, and you’ll be one step closer to pinpointing the true food trigger.

Step 4: Implementing meals at home – shopping lists, meal prep, and feeding routine

Alright, you’ve settled on the single protein and carb that sit nicely on the list of foods dogs can eat when on elimination diet uk. The next hurdle is turning that list into a fridge‑full, ready‑to‑serve routine that doesn’t feel like a full‑time job.

1. Build a simple shopping list

Start with a one‑page cheat sheet. Write the protein name, the carb, and any optional add‑ons (a pinch of psyllium husk, a splash of low‑sodium broth). Keep quantities in grams – a kitchen scale is worth its weight in gold. For a 20 kg Labrador, you’ll need roughly 4 g of protein and 4 g of carb per meal, twice a day.

Tip: colour‑code the list – green for veg, pink for meat – so you can spot accidental cross‑contamination at a glance.

2. Batch‑cook on a weekday

Pick a low‑stress evening – maybe Wednesday after work – and cook a week’s worth in one go. Boil the protein in plain water until it’s just cooked through; steam or boil the carb until soft. Divide everything into individual freezer bags or airtight containers. Label each bag with the date and the exact gram weight.

Why batch‑cook? It removes the daily “what’s for dinner?” question and stops you from reaching for a bag of kibble out of habit.

3. The prep‑day checklist

  • Check the freezer for a fresh batch.
  • Weigh out the portion for today’s meals (use the same scale each time).
  • Warm the food gently – a microwave for 20‑30 seconds or a steam‑bath works fine. No oil, no seasoning.
  • Mix the protein and carb together in a clean bowl. If you’re using a tiny fibre boost, sprinkle it now.

Give the bowl a quick visual scan – any stray crumbs or leftover kibble could sabotage the trial.

4. Feeding routine that sticks

Set two fixed times – say 07:30 am and 06:00 pm – and stick to them. Dogs thrive on predictability, and a steady schedule helps you spot changes in stool or skin more accurately.

When you serve the meal, sit with your pup for a minute. Watch their body language: a relaxed tail, eager nose, no frantic gulping. That’s a good sign the food is tolerable.

After each feeding, jot a quick note in your log: “07:30 – 30 g turkey, 30 g sweet potato, no itching”. A single line per meal keeps the log painless but valuable.

5. Dealing with leftovers

If you’ve got a few meals left over at the end of the week, freeze them immediately. Thaw only what you need for the next day – refreezing can affect texture and, more importantly, may encourage bacterial growth.

And if you ever notice a reaction – a soft stool, a bit of scratching – pause the trial, note the exact time, and consider consulting a vet. A brief interruption is better than pushing through and confusing the results.

6. Quick reference guide

Here’s a printable snapshot you can tape to the fridge:

  • Protein: skinless duck breast – 4 g per meal
  • Carb: steamed sweet potato – 4 g per meal
  • Add‑on (optional): ½ tsp psyllium husk
  • Meal times: 07:30 am, 06:00 pm
  • Log column: Date | Time | Portion | Reaction

Having it in sight turns the whole process from “I‑hope‑I‑remember” to “I‑just‑do‑it”.

7. Where to get reliable guidance

If you’re looking for a deeper dive into the science behind these choices, the elimination diet guide from My Pet Nutritionist walks through protein‑carb pairing and offers a few extra recipe ideas that stay within the safe‑food list.

Remember, the goal isn’t gourmet cuisine – it’s consistency, clarity, and a tidy log. Once the 8‑12 week window is complete, you’ll have a crystal‑clear picture of which foods your dog can tolerate and which ones to avoid for good.

So, grab that pen, fire up the freezer, and turn the “what‑to‑feed” question into a routine you can trust.

Step 5: Monitoring progress and interpreting signs of improvement

Now the meals are prepped, the freezer is stocked and the log is open – it’s time to become a detective again. Monitoring isn’t just “checking the box”; it’s about spotting the subtle shifts that tell you whether the foods dogs can eat when on elimination diet uk are actually doing their job.

What to record each day

Grab that notebook or phone app and note four things: time of feed, portion size, any visible reaction, and a quick gut‑feel rating (e.g., “normal”, “soft”, “gassy”). Keep the entries short – a line per meal is enough.

  • 07:30 am – 30 g duck, 30 g sweet potato – no itching, stool firm
  • 06:00 pm – same – a little extra tail‑wag, stool soft but formed

Seeing patterns across a week is far easier than trying to remember a vague “something felt off”.

Key signs of improvement

Most owners notice two clusters of change: skin and gut. For skin, look for less scratching, fewer hot spots, and a calmer coat. For the gut, aim for regular, formed stools and no vomiting.

VCA Hospitals notes that gastrointestinal signs often improve within two to four weeks, while skin issues can take eight to twelve weeks to settle according to their clinical guide. Use that timeline as a rough compass, not a hard deadline.

When to pause the trial

If you spot a sudden flare – a fresh rash, a bout of diarrhoea, or even a new bout of flatulence – hit pause. Note the exact time, revert to the previous “neutral” meal, and give your vet a heads‑up. A brief interruption is better than pushing through and muddling the data.

Remember, the trial is a controlled experiment. Even a tiny crumb of an old treat can reset weeks of progress.

Interpreting mixed signals

Sometimes you’ll see a softer stool but no skin irritation. That could simply be the fibre adjusting, especially if you added a pinch of psyllium husk. In those cases, give it another five days before deciding it’s a reaction.

Conversely, a clear improvement in skin while the stool stays a bit loose is still a win – the immune system is calming down faster than the gut. Keep the diet steady and let the digestive system catch up.

Using your log to decide the next step

After eight weeks, review the log column by column. Ask yourself:

  • Did any symptom disappear entirely?
  • Did any new symptom appear only after a specific meal?
  • Is there a consistent trend (e.g., stool firming after week three)?

If the answer is “yes” to the first two, you’ve likely identified a safe food. If the log is a jumble of “no change”, you may need to try a different novel protein – the Cotswold RAW guide suggests swapping to another single‑ingredient source after a full cycle for more tips.

Quick check‑list before you finish

• Log every meal, even the “nothing happened” days.
• Look for steady stool form and calmer skin.
• Pause at any sudden flare and consult your vet.
• After 8‑12 weeks, compare the log to the baseline you created in Step 1.

When the data lines up, you’ll have a crystal‑clear picture of which foods dogs can eat when on elimination diet uk are truly safe for your pup. Stick to the plan, and you’ll see real progress in weeks.

A photorealistic kitchen scene in a cosy British home, showing a dog owner measuring a portion of plain boiled duck breast and steamed sweet potato on a wooden board, with a tidy log notebook beside the bowl, soft morning light filtering through a window, highlighting the simplicity of an elimination diet routine.

Step 6: Reintroduction plan – how to reintroduce foods safely and interpret results

Reintroducing foods after an elimination trial isn’t a victory lap. It’s a careful, data‑driven process to confirm what your dog can actually tolerate without reigniting symptoms. So, what should you do next? Here’s a practical plan you can follow in our experience with UK pet owners who want real, usable results.

First, decide the order. Reintroduce one elevated protein or carbohydrate at a time, while keeping the baseline neutrals in place. This gives you a clear signal about cause and effect. Does this really work for you? If there’s no reaction after 5–7 days, you’ve likely found a tolerable addition. If a reaction appears, pause, revert to the neutral meal for 1–2 weeks, and test again later.

Next, choose the food that seems most likely to be tolerated first. Start small and progress slowly. If you’ve been testing proteins like duck or venison, or carbs such as plain potato, begin with a modest introduction rather than a full switch.

Then set the dose and schedule. A sensible approach is to offer a single new food for a defined period and monitor closely. Begin with a small portion and a steady daily routine for five days, recording any skin changes, digestive shifts, or energy level. If no issues arise, move toward a normal portion and keep observing for another 7–10 days. If you see a reaction, step back to the neutral diet and reassess before trying again.

Logging is non‑negotiable. Note the exact meal, portion, time, and any reaction in your log. A simple daily note is enough: “Duck – 25g – no itching; stool unchanged.” This clarity makes it easier to spot patterns over time.

Interpreting results takes patience. If a symptom flares after reintroducing a food, that item is likely not tolerated at any meaningful level. If tolerance holds, you can gradually increase the portion or frequency. After a couple of foods have been tested, review your log across all candidates to decide your ongoing plan. For a structured approach, you can follow the Canine Food Trial protocol as a reference point for timing and observations.

To help with interpretation, CNSLab’s guidance on gradual reintroduction emphasises testing one elevated food at a time and monitoring symptoms over several days. Use this as a framework to stay consistent while you work through different options. Canine Food Trial protocol and IgG‑based reintroduction guidance offer practical checkpoints you can adapt to your elimination plan.

Remember, you’re building a long‑term map of what works for your dog. If you’re unsure, a quick chat with your vet is wise. Platforms like UK Pet Food Intolerance make this easier by translating test results into concrete dietary steps you can actually follow at home.

FAQ

What exactly are “foods dogs can eat when on elimination diet uk”?

When we talk about foods dogs can eat during an elimination diet in the UK, we mean single‑ingredient, novel items that your pup hasn’t eaten before. Think plain boiled white rice, skinless duck breast, or steamed sweet potato – nothing added, no seasonings, no hidden grains. The idea is to give the gut a clean slate so any flare‑up can be linked to a specific ingredient.

How long should I feed each food before deciding if it’s safe?

Most vets recommend a minimum of 10‑14 days per novel ingredient, but eight weeks is the sweet spot for a full picture. During that time, keep the portion consistent – roughly 1 tbsp per 5 kg of body weight, twice daily – and log any changes in skin, stool, or energy. If nothing odd shows up after two weeks, you can move on to the next candidate.

Can I mix a protein and a carb together, or must they stay separate?

Mixing a single novel protein with a single novel carbohydrate is actually the standard practice. It gives your dog a balanced meal while still keeping the test simple. Just be sure both items are truly novel for your dog; if they’ve ever had chicken, don’t use chicken as your protein in the trial.

What should I watch for in my dog’s stool while on the diet?

Look for consistency – a firm, well‑formed stool is the goal. Too loose or watery could mean the fibre level is too high, while very hard stools might suggest you’re feeding too little moisture. Note the colour and any odour changes; a slight improvement in smell often means the gut is calming down.

Is it okay to give my dog a tiny treat like a banana slice during the trial?

Even a tiny fruit bite can introduce sugars or fibres that muddy the results, so it’s best to avoid treats altogether. If you really need a distraction, a few green beans or a pinch of plain pumpkin puree are safer because they’re low‑allergen and still single‑ingredient.

My dog has a chronic skin itch – will the elimination diet help?

Yes, many owners see skin improvements once the hidden allergen is removed. The gut‑skin axis means that a calmer digestive system often leads to fewer itching episodes. Expect skin changes to lag a bit behind gut changes – you might see stool normalise in a couple of weeks, while the coat takes eight to twelve weeks to settle.

Do I need a vet’s sign‑off before starting the elimination diet?

Getting a quick vet check‑up to rule out parasites, infections, or hormonal issues is wise. It doesn’t have to be a full work‑up, just a baseline blood panel and a look at the skin. Once those basics are cleared, you can confidently start the trial and use the log to show the vet what you’ve observed.

Conclusion

We’ve walked through everything you need to know about the foods dogs can eat when on elimination diet uk, from picking a single novel protein to logging every bite.

If you’re still wondering whether you’ve got the right baseline, remember the gut‑skin connection we mentioned – a calm tummy often means calmer skin, and the opposite is true too.

The key is consistency: stick to one protein, one carb, the same portion size, and record any change, no matter how tiny. A few seconds a day now saves weeks of guess‑work later.

When the eight‑to‑twelve‑week window closes, compare your log to the baseline we set in Step 1. If stools are firm and the coat looks less itchy, you’ve likely identified a safe food. If not, it’s time to try another novel ingredient – the process is iterative, not punitive.

What’s the next step for you? Grab your notebook, measure that single protein, and keep the routine steady. And if you want crystal‑clear guidance, a home‑testing kit from UK Pet Food Intolerance can turn those observations into a professional report you can share with your vet.

So, take the first bite of confidence today – the foods dogs can eat when on elimination diet uk are simple, affordable, and backed by real‑world results. Your pup’s comfort is worth the effort, and the payoff is a happier, healthier companion.

Elimination Diet Cat UK: A Practical Guide for UK Cat Owners

Ever caught yourself watching your cat stare at the food bowl, then suddenly dash to the litter tray with a look of distress? You’re not imagining it – many UK cat owners face baffling tummy rumblings, flaky skin or sneaky gas, and the culprit is often something hidden in the kibble.

That’s where an elimination diet comes in. In simple terms, you strip the diet down to a single, novel protein and carbohydrate that your feline has never tasted before, then re‑introduce other ingredients one by one. The goal is to spot the exact trigger that’s causing digestive upset or itching, without guessing.

Why does this matter for a cat in the UK? Our weather can swing from drizzle to heatwave, and many commercial diets contain fillers like wheat or soy that are common allergens here. A study by the British Veterinary Association noted that up to 30 % of cats with chronic diarrhoea improve after a properly supervised elimination trial.

Here’s a quick roadmap you can start today:

  • Pick a hypoallergenic base – think rabbit + sweet potato or duck + pumpkin, sourced from a reputable UK supplier.
  • Feed only that mix for 7‑10 days, no treats, no table scraps.
  • Keep a daily log of stool consistency, appetite, coat condition and any scratching episodes.
  • After the baseline period, re‑introduce one old ingredient every 3‑4 days, watching for a reaction.

Take Lucy, a three‑year‑old tabby from Manchester. Her owner noticed constant hairballs and a patchy rash behind her ears. After a two‑week elimination diet using duck + pumpkin, Lucy’s skin cleared up. When chicken was added back, the rash flared within a day – confirming chicken as the trigger.

If you’re unsure which novel protein to choose, our detailed guide How to Manage Cat Food Intolerance UK: A Practical Guide for Owners walks you through the safest options and how to read ingredient labels.

Tip: use a simple spreadsheet or a notebook – colour‑code “normal” days in green and “off” days in red. This visual cue makes spotting patterns almost effortless.

Ready to give your cat some peace of mind? Grab a low‑allergen starter food, set up your log, and let the science of elimination guide you to a happier, healthier mate.

TL;DR

An elimination diet cat uk lets you isolate the exact ingredient upsetting your feline by feeding a novel protein and carb for 7‑10 days, then re‑introducing old foods one at a time. Recording daily stool, coat and appetite changes, and optionally using a UK Pet Food Intolerance at‑home test, gives you clear evidence to create a long‑term, low‑allergen menu that keeps your cat comfortable and happy.

Step 1: Recognise Symptoms & Decide to Try an Elimination Diet

If you’ve got a cat who keeps scratching, vomiting, or suddenly changing their litter habits, you’re not imagining things. In our experience, the first real step is recognising that these symptoms might be linked to what’s in their bowl.

Think of it like a detective case. You’re looking for patterns in meals, not one-off oddities. It’s easy to feel overwhelmed, especially when weather, stress, and seasonal changes can muddy the signals, but you can decode it with a calm, steady approach.

So, is an elimination diet worth trying? If your cat shows recurrent digestive upset, itchy skin, gassiness, or loose stools, the answer is often yes. You’ll need to track what happens day by day and resist the urge to blame the latest treat or brand switch without evidence.

In our guideline, a baseline period of 7–10 days on a single novel protein and a single, compatible carbohydrate gives you a clean starting point. Duck + sweet potato or rabbit + potato work well for many UK cats as a safe first step.

During that baseline, record your observations in a simple log. Note stool consistency, appetite, coat condition, energy, and any scratching or licking. The act of writing things down makes patterns obvious—even on tired mornings when you feel like you’re chasing your tail.

After the baseline, re‑introduce one old ingredient every 3–4 days. Watch for any return of symptoms. If nothing happens, you might try the next ingredient; if symptoms flare, you’ve found a trigger. This is practical, evidence‑based thinking rather than guesswork.

What about tools? Some owners pair the diet trial with at‑home testing to guide which ingredients to recheck first. It won’t replace veterinary care for ongoing issues, but it can point you toward likely culprits. Platforms like UK Pet Food Intolerance make this easier by providing a simple at‑home test and clear online results to support your diet choices.

If you’re unsure where to start, pick a hypoallergenic base today, set a start date, and commit to the 7–10 day baseline. In 2026 you can build confidence with a methodical plan that reduces guesswork and keeps your feline comfortable over the long haul.

If vets have suggested diet changes, share your log with them. A concise record helps them see patterns you might miss in the waiting room. And remember, this approach is about practical, steady progress, not perfection.

A photorealistic UK kitchen scene showing a tabby cat beside a small bowl of hypoallergenic rabbit + sweet potato food, a logbook with days highlighted in green and red, and a pen on a wooden table; natural British daylight; Alt: cat elimination diet UK logbook and hypoallergenic food setup in a British home.

Step 2: Choose a Suitable Hypoallergenic Base Food

Okay, you’ve already grabbed that novel protein and set up your log – now comes the real choice: which hypoallergenic base will actually keep your cat happy?

Start with the basics

Look for a formula that sticks to one single animal protein you know your cat hasn’t eaten before – duck, rabbit, even kangaroo are popular in the UK. Pair it with a carbohydrate that’s also novel, like sweet potato or pumpkin. The idea is simple: fewer ingredients mean fewer chances of an accidental trigger.

Why does that matter? Most commercial kibbles hide wheat, soy or dairy under fancy names. Those hidden culprits are the usual suspects for itching skin and upset tummies.

What to hunt for on the label

First, check the ingredient list. If it says “duck meat” rather than “duck by‑products”, you’re getting a higher‑quality protein. Second, make sure the carb isn’t a grain disguised as “potato starch”. Sweet potato, peas or pumpkin are the safest bets.

Third, avoid artificial colours, flavours or preservatives – they can irritate a sensitive gut just as much as the main protein.

Top UK brands that fit the bill

Two names keep popping up in our community: Teepee Grain Free and Easterbrooks. Both are made by The Pet Experience, a specialist shop that curates hypoallergenic lines with clear, limited‑ingredient lists. You can read more about their range in a quick guide to hypoallergenic cat food options.

What we love about these brands is the transparency – you’ll see exact percentages of meat and the specific carb source, so there’s no guesswork.

Wet or dry? (or both?)

If you’re wondering whether to go wet, dry, or a mix, the answer depends on your cat’s preferences and any health issues. Wet food brings a higher moisture level, which can help cats prone to urinary problems or dehydration. Dry food is convenient for portion control and fits nicely into automatic feeders.

Gables Vets point out that wet food contains about 70 % water compared with roughly 10 % in dry kibble, a factor worth considering if your feline tends to drink little water wet versus dry cat food. Choose whichever you can stick to consistently for the trial – consistency is king in an elimination diet.

How to transition without drama

Start by mixing a tablespoon of the new hypoallergenic food into your cat’s current bowl. Over the next seven days, gradually increase the new food while decreasing the old one. By day ten, it should be 100 % the novel base.

Watch the bowl closely: if you see any vomiting, diarrhoea or sudden scratching, pause the transition and note it in your log. Small setbacks are normal – the key is to keep the diet pure once you’re fully switched.

Practical checklist before you buy

  • Single, novel protein (duck, rabbit, kangaroo)
  • Single, novel carb (sweet potato, pumpkin, pea)
  • No grains, dairy, soy, or artificial additives
  • Clear labelling of meat percentage and carb source
  • Available in both wet and dry formats if you need flexibility

Tick all those boxes and you’ve got a solid base for your elimination diet.

Quick tip for the sceptical

If you’re still on the fence, try a small test pack first. Feed it for a couple of days while you keep the log – if nothing goes wrong, you’ve saved yourself a lot of waste and money.

Remember, the goal isn’t to find the “perfect” food forever, just a neutral starting point that lets you spot the real trigger later on.

When you’ve nailed down the base, the next step is to keep detailed notes and watch for patterns. That’s where the magic of the elimination diet really shines.

Step 3: Conduct the 8‑Week Elimination Trial

Alright, you’ve got the novel protein base all set – now it’s time to put it to the test for a solid eight weeks. That might sound like a long stretch, but think of it as a marathon for your cat’s gut, not a sprint.

Set a firm start date

Pick a day when you know you’ll be home enough to feed the same bowl at each meal. Mark it on your calendar, set a reminder on your phone – anything that stops you from slipping back into old habits.

Why eight weeks? The British Veterinary Association explains that food‑related skin issues can take up to six weeks to clear, while digestive signs often settle within two weeks. The official guidance from Nextmune outlines the eight‑week protocol in detail. Giving the trial a full eight weeks covers both bases and leaves a clear window for re‑introduction.

Keep the diet 100 % pure

From day one, every morsel has to come from the novel formula. No treats, no table scraps, no flavour‑enhanced water. Even a tiny bite of the old kibble can re‑introduce the allergen and muddy your results.

And here’s a tip: store the old food in a sealed container out of sight, then lock the new bag in a cupboard you only open for the trial. It sounds a bit dramatic, but a little theatre helps keep the discipline.

Log like a detective

Grab that notebook or spreadsheet you set up in Step 2 and record four things each day: stool consistency, appetite, coat shine, and any scratching or itching episodes. Use symbols – ✅ for normal, ❌ for off – so you can glance at a week and see patterns instantly.

Imagine Lucy from Manchester – her owner noticed a patchy rash after a week on duck + pumpkin. By day four the rash faded, and by day seven her stools were solid again. Those quick wins tell you the base is likely neutral.

What to watch for

Minor upsets are normal. A single loose stool or a brief bout of mild itching doesn’t mean the trial has failed – just note it and see if it recurs. If you see persistent vomiting, diarrhoea lasting more than two days, or a new skin flare, pause the trial and contact your vet.

And remember, stress can mimic food reactions. Keep other variables stable: same litter, same routine, no sudden changes in toys or environment.

Mid‑trial checkpoint

At the four‑week mark, take a step back. Review your log – are you seeing a steady improvement? If yes, keep going. If not, consider whether the novel protein might itself be a trigger; you can switch to another novel source and start a fresh eight‑week run.

Some owners find it helpful to run a quick at‑home intolerance test at this stage. Platforms like UK Pet Food Intolerance can give you a snapshot of potential sensitivities, adding confidence to your observations without replacing the trial.

Ending the trial

When week eight rolls around, you should have a clear picture: either the cat is thriving on the novel diet, or subtle issues still surface. If everything looks good, you’ve established a “neutral” baseline – the perfect platform for the re‑introduction phase.

When you move to re‑introducing old ingredients, do it one at a time, every three to four days, and keep logging. That’s where you’ll pinpoint the exact culprit.

Ready to start? Fill that bowl, set your timer, and give your feline friend eight weeks of steady, uncomplicated nutrition. The clarity you gain will save you months of guesswork and, ultimately, a happier, healthier cat.

Step 4: Reintroduce Foods & Identify Triggers

Now that your cat has spent eight weeks thriving on the novel protein, it’s time for the real detective work – putting the old ingredients back, one by one, and watching for a reaction.

Why the slow pace? Our gut isn’t a light switch; it needs a few days to show a flare‑up. Adding a new component every three to four days gives you a clear cause‑and‑effect window and prevents multiple triggers from overlapping.

1. Pick the first “old” food

Start with the ingredient you suspect the most – often the cheapest or the one that’s been in the bowl longest. Measure out a teaspoon of the original kibble or a spoonful of the treat and mix it into the neutral base. Keep the portion tiny at first; you’re just testing, not feeding a full meal.

2. Log the change

Open a fresh page in your notebook or spreadsheet. Note the date, the ingredient, the amount added, and any immediate observations (sniffing, excitement, hesitance). From here on, record four core signs each day: stool consistency, appetite, coat shine, and scratching or itching.

3. Observe for three to four days

During this window, your cat’s digestive system and skin will reveal whether the newcomer is a problem. If everything stays green – solid stools, normal appetite, glossy coat, no extra scratching – you’ve probably cleared that ingredient.

But if you notice soft‑pointed stools, a sudden dip in appetite, or a new patch of itchiness, tag that ingredient as a likely trigger. Pause any further additions, revert to the pure novel diet for a day, and note the reaction in your log.

4. Move on to the next ingredient

Once the three‑day “quiet period” passes without a flare‑up, wipe the slate clean and repeat the process with the next food. Remember the three‑to‑four‑day rule every time – consistency is the backbone of an elimination diet cat uk trial.

Preparing your re‑introduction log

A good log is more than a diary; it’s a pattern‑spotting tool. Colour‑code “good” days in green and “off” days in red – the visual contrast makes a reaction jump out at you. Some owners even add a simple emoji column: ✅ for normal, ❌ for off.

If you prefer digital, a Google Sheet with drop‑down menus for stool type (watery, soft, normal, hard) and coat condition (dull, shiny, flaky) saves time and lets you filter later.

The 3‑4 day observation window explained

Why not just look at the next day? Food‑related skin issues can take 48‑72 hours to manifest, while gut reactions often need a full 72‑hour cycle to settle. Giving the body the full window reduces false negatives and ensures you’re not chasing phantom triggers.

What a reaction looks like

Typical signs include:

  • Loose or mucous‑laden stools.
  • Increased licking, especially around the paws or belly.
  • New hairball clusters or a greasy coat.
  • Visible itching, scratching, or a fresh rash behind the ears.

Note the severity – a single soft stool might be a mild irritation, but three consecutive off‑days suggest a genuine intolerance.

When you’ve nailed the culprit

Once you’ve identified one or two problem ingredients, you have a clear recipe for a long‑term diet. Stick to foods that never sparked a red‑flag in your log, and avoid the flagged items entirely.

If you’re unsure whether the reaction is truly food‑related or just a stress response, a quick at‑home test from UK Pet Food Intolerance can give you a complementary picture. It’s not a replacement for veterinary advice, but it adds confidence when you’re finalising the safe menu.

Final checklist before you finish

  • All old ingredients re‑introduced one at a time?
  • Each ingredient observed for a full 3‑4 day window?
  • All reactions logged with dates and severity?
  • Confirmed safe foods listed for future meals?

Cross your fingers, fill the bowl with the approved mix, and watch your cat enjoy a calm, comfortable life – no mysterious trips to the litter tray, no endless scratching, just a happy feline who finally feels at home with its food.

Step 5: Managing Long‑Term Nutrition & Monitoring

Congrats, you’ve finally nailed down the safe foods for your cat. But the work isn’t over – the real challenge is keeping that calm, comfortable life going day after day. Think of it like maintaining a garden: you’ve planted the right seeds, now you need to water, prune and watch the seasons change.

Build a sustainable baseline diet

Start by making the approved mix your cat’s everyday staple. Choose a commercial hypoallergenic formula that matches the novel protein you discovered – duck + sweet potato, rabbit + pumpkin, whatever worked for you. Stick to the same brand and batch as long as possible; even tiny variations in ingredient sourcing can sneak a new trigger back in.

And if you ever feel the urge to add a treat, pause. A single stray morsel of a different protein can reset weeks of progress. Keep treats limited to the same novel protein, or use a vet‑approved hypoallergenic chew that lists the exact composition.

Rotate, but do it wisely

Many cat owners wonder, “Can I ever switch back to a regular diet?” The answer is yes, but only after a solid 3‑month period of stability. Then you can gradually rotate to another novel protein for variety, but always keep a 4‑week wash‑out on the original mix before you re‑introduce any old ingredient.

Here’s a quick rotation schedule you can copy‑paste into your notebook:

Phase What to feed Duration
Baseline Approved novel protein + carb 12 weeks
Rotation Switch to second novel protein (same carb) 4 weeks
Wash‑out Return to first novel protein 4 weeks

Stick to the table and you’ll avoid accidental cross‑contamination while still giving your feline a bit of culinary diversity.

Keep a living log

Remember those colourful logs from the trial? They’re still gold. Create a simple spreadsheet with four columns – date, stool type, coat condition, itching score. Use emojis if you like: ✅ solid, ❌ soft, 🌟 shiny coat, 🔴 scratch episode. Review it every two weeks; patterns pop up faster than you think.

Does your cat suddenly start grazing more on the side of the bowl? That could hint at a texture issue rather than an allergy, and a quick tweak in kibble size might solve it.

Schedule regular vet check‑ins

Even the best at‑home plan benefits from professional eyes. Book a check‑up every six months and bring your log along. Vets can run blood work or skin scrapings to rule out secondary infections that sometimes hide behind a food allergy.

And if you notice any new symptom – persistent vomiting, sudden weight loss, or a rash that won’t fade – call your vet straight away. Early intervention saves time and keeps your cat comfortable.

Use at‑home testing as a safety net

When you’re tempted to try a new commercial food or a homemade recipe, a quick at‑home intolerance test from UK Pet Food Intolerance can give you peace of mind. The kit analyses a small faecal sample and flags potential sensitivities, so you can avoid a costly trial‑and‑error mess.

It’s not a replacement for veterinary diagnosis, but it’s a handy second opinion that fits neatly into your long‑term monitoring routine.

Watch out for hidden allergens

Ingredients can be sneaky. Look for “hydrolysed protein” on labels – it’s broken down into tiny fragments that are less likely to trigger an immune response, as Royal Canin explains in their guidance on food‑allergy diets Royal Canin’s guidance on food allergy diets. However, if your cat has already shown a reaction to intact proteins, even hydrolysed versions can sometimes cause a flare‑up.

Always read the fine print for “by‑products”, “meal”, or “flour” – these can hide the very protein you’re trying to avoid.

A photorealistic scene of a British kitchen countertop with a sleek cat food bowl containing a novel protein diet, a small notebook open to a colour‑coded log, and a steaming mug of tea beside a window showing a rainy London street. Alt: cat long‑term nutrition monitoring elimination diet UK

Action plan in a nutshell: keep the approved diet consistent, rotate proteins only after a solid stability period, log every day, schedule semi‑annual vet visits, and pull out an at‑home intolerance test whenever you consider a new food. Follow these steps and you’ll give your cat a lifelong ticket to comfort – no mystery trips to the litter tray, no endless scratching, just a happy mate who knows exactly what’s in the bowl.

FAQ

What is an elimination diet cat uk and why should I try it?

In plain English, an elimination diet cat uk is a short‑term feeding plan where you give your feline a single, novel protein and carbohydrate for several weeks, then slowly add back old ingredients one at a time. The goal is to spot the exact food that’s causing itching, loose stools or tummy upset. It works because it removes the guess‑work and lets you see a clear cause‑and‑effect pattern.

How long do I need to keep my cat on the novel protein before I start re‑introducing anything?

Most vets recommend a minimum of eight weeks on the pure novel diet – that’s two months of consistent feeding. For skin‑related issues you may need the full eight weeks, while digestive signs sometimes become obvious after two weeks, but sticking to the full period gives you confidence that the baseline is truly neutral.

Do I have to stop all treats, supplements and medication during the trial?

Yes, any extra food or chew that isn’t part of the trial can re‑introduce hidden allergens and mess up your log. Stick to the prescribed bowl, plain water and only vet‑approved medications. If your cat needs a supplement, choose one that lists the exact same novel protein and carb – otherwise pause the trial until you can source a matching product.

What specific signs should I be watching for in my cat’s stool and skin?

Look for changes in stool consistency – soft, mucous‑laden or watery poops are red flags. On the skin side, note any new scratching, bald patches, flaky spots or a greasy coat, especially behind the ears or on the belly. Record each observation daily; even a single off‑day can be the clue that points to a trigger.

Can I use a home food intolerance test alongside the elimination diet?

Absolutely – a home test can give you a quick snapshot of likely sensitivities before you even start the trial, and you can run another test after the diet to confirm the results. Platforms like UK Pet Food Intolerance offer easy‑to‑use kits that analyse a small faecal sample in an accredited lab and return clear guidance, helping you choose the right novel protein from the start.

What if my cat doesn’t improve after the eight‑week trial?

If there’s no noticeable change, it could mean the issue isn’t food‑related, or the novel protein itself is a trigger. In that case, discuss the findings with your vet and consider a second trial using a different novel protein, or explore other causes such as parasites, environmental allergens or underlying medical conditions.

How often should I repeat the elimination diet if new symptoms appear later?

When new itching or digestive upset shows up after you’ve been stable for a few months, it’s worth resetting the diet for another eight‑week run. Keep the same log format, and only re‑introduce one ingredient at a time. Repeating the process every six to twelve months, or whenever a fresh symptom pops up, helps you stay ahead of hidden triggers.

Conclusion

If you’ve made it this far, you already know that an elimination diet cat uk isn’t magic – it’s a practical, evidence‑led roadmap that turns guesswork into clear results.

Remember the basics: pick a novel protein and carb, feed it exclusively for eight weeks, log stool, coat and appetite daily, then re‑introduce old ingredients one by one, watching for the tell‑tale signs.

Those colour‑coded pages you’ve been filling aren’t just paperwork – they become a visual fingerprint of what truly works for your feline. When a flare‑up appears, the log tells you exactly which food to pull.

If you ever feel stuck, a quick at‑home intolerance test from UK Pet Food Intolerance can give you a shortlist of likely triggers before you even start, saving time and kibble.

So, what’s next? Grab that novel protein, set up your notebook, and commit to the eight‑week window. Keep the routine, review the log, and when you’ve nailed the safe foods, you’ll have a long‑term menu that keeps scratching and upset tummies in the past.

Enjoy the peace of mind that comes with knowing exactly what’s in the bowl – a happier cat and a calmer you.

Finally, schedule a brief check‑in with your vet after the trial ends – they can confirm the diet’s nutritional adequacy and spot any hidden issues you might have missed. Maintaining that professional partnership ensures your cat stays healthy for years to come.

Elimination Diet Dog UK: A Practical Guide for Pet Owners

Ever watched your dog stare at the bowl, then suddenly sprint to the garden with a rumble in their tummy? You’ve probably wondered if that uneasy gut, the occasional itch, or those loose stools are just a quirky habit or something deeper.

Most of us assume it’s a simple case of “too much treats” or “a bit of excitement,” but for many UK pet parents the symptoms linger, and the frustration builds. You try switching brands, you cut out treats, yet the problem sticks around like a stubborn stain on a favourite jumper.

That’s where the idea of an elimination diet for dogs in the UK steps in. Think of it as a culinary detective mission – you temporarily remove potential culprits, then slowly re‑introduce them one by one, watching for reactions. It sounds a bit like a science experiment, but it’s actually a practical, home‑friendly method to pinpoint food sensitivities without endless guessing.

Imagine you’re preparing a simple, bland meal of boiled chicken and rice. Over the next week you watch your pooch’s stool, energy, and skin. If things settle, you add a new ingredient – maybe a small spoonful of sweet potato – and monitor. When a flare‑up appears, you’ve found a likely trigger.

Now, you might be thinking, “Do I really have time for this?” The truth is, an elimination diet doesn’t have to be a month‑long ordeal. Many owners see clear changes within two weeks, especially when they combine the diet with a quick at‑home food intolerance test. That test, analysed by an accredited lab, can give you a shortlist of proteins or grains that are most likely to cause trouble, saving you weeks of trial and error.

So, if you’re fed up with endless vet visits that only scratch the surface, or you’re a health‑conscious pet parent who wants to take control, an elimination diet dog uk approach could be the roadmap you need. It’s about listening to your dog’s body, simplifying the menu, and gaining confidence that you’re feeding what truly works.

Ready to give it a go? Let’s walk through the steps, from choosing the right baseline food to tracking results, so you can finally put an end to the mystery and enjoy a happier, healthier companion.

TL;DR

An elimination diet dog uk lets you pinpoint food triggers in a couple of weeks, cutting out endless vet visits and guesswork.

Combine a simple home test with a bland baseline meal, track stool, skin and energy, and you’ll know what to keep or drop for a happier, healthier pup.

Step 1: Identify Symptoms and Keep a Food Diary

First thing’s first – you need to know what you’re looking at. Is it a rumbling tummy after dinner, an itchy patch behind the ears, or a sudden bout of loose stool after a new treat? Those clues are the breadcrumbs that lead you to the culprit.

Grab a simple notebook or, if you prefer, a notes app on your phone. Write down the date, what you fed your dog (including treats and occasional table scraps), and any symptoms you notice that same day or the next. Keep the entries short – a line or two is enough. The goal is consistency, not prose.

Here’s a quick template you can copy:

  • Day/Date
  • Meal: protein, carb, treat
  • Stool: normal, loose, hard, colour
  • Skin: itching, redness, hot spots
  • Energy: hyper, lethargic, normal

It might feel a bit like detective work, but trust me, the pattern will start to emerge after a week or so.

And while you’re logging, consider adding a bit of tech to the mix. XLR8well offers a simple health‑tracking dashboard that lets you chart your pup’s daily mood, activity, and even gut‑related notes alongside your food diary. It’s not a replacement for a vet, but it gives you a visual trend line that’s easier to digest than a stack of scribbles.

Now, what counts as a symptom? Most owners focus on the obvious – vomiting, diarrhoea, itchy skin – but subtler signs matter too: excessive gas, a sudden change in coat sheen, or even a shift in how eager they are for walks. Keep an eye on those “quiet” cues; they’re often the first whisper of an intolerance.

Don’t forget the environment. If you’re feeding outside, a sunny spot can turn into a heat‑trap and stress your dog, amplifying digestive upset. A shaded, breezy feeding area can make a world of difference. Umbrello sells sturdy garden umbrellas that create a cool nook for meals – a small comfort that can help you isolate diet‑related issues from temperature‑related ones.

Once you’ve gathered a week’s worth of data, step back and look for patterns. Does the rash flare up after a specific treat? Does the stool soften whenever you add a new grain? Highlight those rows – they’re your hypothesis for the next phase of the elimination diet.

If you’re feeling a bit overwhelmed, you’re not alone. Many pet parents wonder, “Do I really need to track every bite?” The answer is yes, at least for the trial period. It’s the cheapest way to avoid months of guess‑work later.

And here’s a handy tip for itchy skin: a gentle lavender‑scented soap can soothe minor irritations without harsh chemicals. Read more about the benefits of lavender soap if you want a natural adjunct while you’re sorting the diet.

When you feel ready to move beyond observation, our own guide on how to use a home dog allergy test UK walks you through interpreting lab results and tailoring the next phase of the elimination diet.

Below is a quick video that walks you through setting up a basic food diary – it’s short, to the point, and perfect for a coffee break.

Take a moment after the video to jot down today’s meals and any immediate reactions. Remember, the more honest you are with yourself, the faster you’ll spot the trigger.

Finally, keep the diary somewhere you’ll see it daily – on the fridge, by the leash hook, or as a pinned note on your phone. Consistency is the secret sauce. In a couple of weeks you’ll have a clear map of what’s hurting your dog and what’s keeping them happy.

Ready to start? Grab that notebook, set up your feeding spot, and let’s get the clues on the table.

Step 2: Choose a Simple, Hypoallergenic Base

Now that you’ve got a tidy diary, the next puzzle piece is the food you’ll feed every day for the first week. Think of it as the “baseline” – a plain, predictable meal that gives your dog a clean slate to react to.

Why does a simple base matter? Because every extra ingredient is another potential trigger. If you toss in a grain, a dairy extract or a hidden flavour enhancer, you’ll never know which one set off the itch or the loose stool.

What makes a food truly hypoallergenic?

In practice, a hypoallergenic base has three hallmarks:

  • Single, novel protein – something your pup hasn’t eaten regularly (think venison, kangaroo or salmon).
  • Limited, easily digestible carbs – white rice or sweet potato are classic choices.
  • No common allergens such as wheat, soy, dairy, corn or artificial additives.

Both novel protein hypoallergenic diets and limited‑ingredient dog foods fit the bill, but the key is to keep the ingredient list short enough to read in under ten seconds.

Step‑by‑step: picking your base

1. Check the label. Look for a single animal protein at the top of the list. If the first three ingredients are “chicken, rice, peas” you’re on the right track. Anything with “by‑product” or “meal” should be avoided.

2. Match the protein to your test results. If your at‑home allergy test flagged beef as a suspect, steer clear of beef‑based formulas and opt for a novel protein instead.

3. Start with a modest portion. For an adult dog, a cup of dry kibble mixed with half a cup of cooked rice (no seasoning) works well. Puppies or seniors may need a smaller serving; adjust by weight and activity level.

4. Keep treats ultra‑simple. A few pieces of plain boiled chicken or a spoonful of canned pumpkin are fine, but avoid biscuits that contain multiple grains or flavourings.

5. Stick to the same brand for the whole week. Switching between two “hypoallergenic” brands defeats the purpose – you’ll introduce two different protein sources at once.

Practical tips from the front line

When I first tried this with my own Labrador, I grabbed a trial pack of a single‑protein kibble and mixed it with boiled chicken breast. The first two days were a bit messy – the dog was curious about the new texture, but by day three the stool had firmed up and the constant scratching on the ears stopped.

Another tip: use a kitchen scale. Measuring out exactly 100 g of food each meal removes the “guess‑and‑check” variable and makes your diary entries more reliable.

And don’t forget to note the feeding time. Some owners notice that an evening meal leads to a calmer night, while a morning feed can cause a quick‑fire reaction if the gut is still sensitive.

When to move on

If after seven to ten days you see fewer episodes of itching, tighter stools and steadier energy, you’ve likely found a solid baseline. That’s the moment you start the re‑introduction phase – adding one new ingredient every three to four days while watching the diary for any uptick in symptoms.

But if the signs persist – loose stools, skin flare‑ups or a noticeable drop in appetite – consider swapping the protein for another novel source and repeat the baseline week. It may feel a bit repetitive, but the extra clarity is worth the short inconvenience.

Remember, the goal isn’t to starve your dog of flavour; it’s to give you a clear window into what their body tolerates. A well‑chosen hypoallergenic base is the foundation of a successful elimination diet dog uk journey.

Step 3: Implement the Elimination Phase (7‑14 Days)

Now that you’ve nailed a bland baseline, it’s time to lock the kitchen door on everything else for a solid week or two. Think of it as putting your dog on a short‑term “food‑only‑passport” – no treats, no table scraps, no random chews.

Why the strict 7‑14 day window?

The gut needs time to reset, and most food‑related skin or gut flare‑ups start to settle within ten days. Veterinary specialists recommend at least two weeks of exclusion to see a clear improvement and to be confident the diet is truly the variable.

Step‑by‑step checklist

  • Pick a single, novel protein (the one you chose in Step 2) and a simple carb like rice or sweet potato.
  • Measure every meal with a kitchen scale – 100 g per serving is a good baseline for a medium‑size dog.
  • Feed at the same times each day; note the exact clock‑time in your diary.
  • Ban all treats, bones, and “just a lick” of human food. Even a tiny bite can re‑introduce a hidden trigger.
  • Offer fresh water only – no milk, broth, or flavored drinks.
  • Keep a close eye on stool consistency, skin scratching, ear redness, and energy levels. Record a brief line each day: “Day 4 – firm stool, no itch.”

Does this sound a bit extreme? It feels that way until you see the pattern emerge – a calmer pup, firmer poo, and a happier tail.

Dealing with the inevitable “what about my dog’s favourite chew?”

Most owners worry about losing the joy of a chew toy. The trick is to swap the chew for a plain, low‑protein rubber bone that contains no added flavours. If your dog insists, a small spoonful of the exclusion diet itself can double as a “chew” without breaking the trial.

And what if your dog refuses the new food?

First, check the temperature – room‑temperature meals are usually more appealing than cold kibble straight from the fridge. Second, try a gentle hand‑mix of a tiny amount of warm water to soften the texture. If refusal continues after three days, give your vet a quick call – persistent refusal can signal a deeper issue.

What to watch for each day

Day 1‑3: Expect a bit of sniffing curiosity; stool may still be loose as the gut adjusts.

Day 4‑7: Look for firmer stool (think “soft‑but‑not‑runny”), fewer scratches, and steadier energy after walks.

Day 8‑14: Ideally you’ll see a plateau – no new symptoms and a stable routine. That’s your cue to move on to re‑introduction.

But what if symptoms linger past day 10? It could mean the baseline protein isn’t truly novel for your dog. In that case, swap to another novel source (duck, kangaroo, or salmon) and repeat the 7‑day exclusion. The extra week feels repetitive, but the clarity it brings saves weeks of guessing later.

Quick tip: use a simple visual aid

Draw a three‑column chart on a sticky note: “Day”, “Stool”, “Skin”. Fill it in each evening – the visual cue makes patterns pop out faster than a paragraph of notes.

Finally, remember you’re not alone in this. Platforms like EatingWell’s elimination‑diet meal plan guide offer sample weekly menus that you can adapt to your dog’s calorie needs, helping you keep the diet bland but nutritionally balanced.

When the two‑week window closes and you’ve got a clean sheet of “no‑reaction” days, you’re ready for the next chapter: re‑introducing one ingredient at a time and watching the diary for any hiccup.

Step 4: Reintroduce Foods & Track Reactions

Alright, the baseline diet has been steady for a fortnight and your pup’s stool is finally behaving. That’s the green light to start slipping new foods back in, one bite at a time.

Pick the first challenger

Choose something you haven’t fed in the last six months – think sweet potato, pumpkin, or a tiny spoonful of plain yoghurt. Keep the portion tiny – roughly a teaspoon for a small dog, a tablespoon for a larger breed. The idea is to give the gut a whisper, not a shout.

Why start small? Even a novel protein can hide a hidden allergen if you go overboard. A modest dose lets you spot a flare before it turns into a full‑blown itch or diarrhoea.

Log every detail

Grab that notebook you used for the exclusion phase (or the phone app you love) and add a new column: “Challenge”. Record the date, the exact amount, and the time of day you served it. Then, for the next 48‑72 hours, jot down any change – softer stool, a new scratch, extra gas, or even a sudden burst of energy.

It helps to colour‑code the rows – green for “no reaction”, amber for “mild”, red for “clear flare”. Visual cues make patterns pop faster than a wall of text.

What to watch for

Typical signs appear within 1‑3 days, but some dogs take a week to show a skin response. Keep an eye on:

  • Stool that becomes looser or more mucky than your baseline.
  • New itching, especially around ears, paws or the belly.
  • Redness, hot spots or a sudden increase in ear wax.
  • Vomiting, excessive gas or a loss of appetite.

If anything pops up, pause the challenge for at least three days before trying the next ingredient. The pause gives your gut a chance to settle and prevents overlapping reactions.

Here’s a quick cheat‑sheet you can copy onto a sticky note:

Ingredient Re‑introduction interval What to watch for
Sweet potato (cooked, unseasoned) 3‑4 days Soft stool, itch around paws
Plain yoghurt (unsweetened) 5‑7 days Gas, ear redness
Rabbit mince (fresh) 7‑10 days Diarrhoea, skin flare

Feel free to swap the ingredients for ones that suit your budget or your dog’s palate – just keep the timing consistent.

One thing many owners overlook is the “hidden” foods that can sneak in via treats, toothpaste or even medication flavourings. The VCA article on the elimination‑challenge diet trial reminds us to keep those out of the equation until you’ve confirmed a safe list.

And if you’ve already run a home‑test, you might have a shortlist of suspect proteins. The official food‑trial guidelines suggest confirming those suspects during the challenge phase – a perfect way to turn a vague result into concrete evidence.

When a food passes the test – no reaction after the observation window – mark it as “tolerated” and feel free to keep it in your regular rotation. If it fails, cross it off and avoid it forever, or at least until your dog’s sensitivities change (which can happen over time).

Remember, this step is where the mystery finally unravels. It can feel a bit like detective work, but each successful re‑introduction is a win for you and a calmer, happier dog.

A photorealistic scene of a British family kitchen table with a dog owner writing notes in a notebook while a Labrador looks at a small bowl of newly added food, soft natural light from a window, realistic style. Alt: Dog owner tracking food re‑introduction during an elimination diet dog uk.

Step 5: Common Pitfalls and When to Call the Vet

So you’ve made it through the exclusion phase and are now adding ingredients back in one by one. It feels like you’re finally getting a handle on the mystery, but a few sneaky pitfalls can still trip you up.

Pitfall #1: Forgetting the “wash‑out” period

When you switch from the baseline diet to a new challenge, give your pup at least 24‑48 hours of plain food before the next ingredient appears. Skipping this gap can blur the line between two potential triggers, leaving you with a vague diary entry that says “something’s off” but not “which food”.

In practice, I once saw a Labrador owner add sweet potato on day 3 and then jump straight to a small spoonful of turkey on day 4. The stool stayed loose for three days, and they blamed the turkey – when in reality the sweet potato hadn’t had time to clear.

Pitfall #2: Over‑looking hidden sources

Treats, chew toys, toothpaste, and even medication flavourings can re‑introduce proteins or grains you thought you’d eliminated. A quick glance at the label can save you weeks of confusion.

One owner thought the problem was the new chicken broth, but the real culprit was a dental chew that contained a trace of wheat flour. Once they removed the chew, the itching vanished.

Pitfall #3: Ignoring subtle skin signs

Most people focus on stool, but a tiny patch of redness behind the ears or a bit of ear wax can be the first whisper of a food reaction. Record any change, no matter how small, in your diary.

We’ve seen a Border Collie develop a mild hot‑spot after introducing pumpkin – the owner only noticed the spot because they were already jotting down ear observations from the exclusion phase.

When to call the vet

If any of these red flags appear, give your vet a heads‑up:

  • Persistent diarrhoea (more than 48 hours) despite a stable diet.
  • Sudden, severe itching or hot‑spots that don’t settle within 24 hours.
  • Vomiting, lethargy, or loss of appetite that lasts more than a day.
  • Weight loss or dehydration signs – dry gums, sunken eyes.

Veterinarians can run a quick blood panel or suggest a short‑term medication to ease the flare while you keep the trial going. They might also recommend a professional elimination diet if home‑based attempts keep stalling.

Quick checklist to avoid the common traps

1. Plan the calendar. Write the exact start and end date for each challenge on a sticky note.

2. Keep treats ultra‑simple. Use plain boiled chicken or a single‑ingredient chew with no additives.

3. Record everything. Include time of day, amount, and any tiny skin or ear changes.

4. Pause if you’re unsure. When a reaction shows up, stop adding new foods for at least three days before the next trial.

5. Know the warning signs. If your dog’s condition worsens, don’t wait – call your vet.

Remember, the elimination diet is a marathon, not a sprint. A few hiccups are normal, but catching them early keeps the process moving forward and brings you that calm, happy tail‑wag you’re aiming for.

Step 6: Maintaining a Balanced Long‑Term Diet

You’ve finally cracked the trigger list – congratulations! But the journey doesn’t end with a single “no‑more‑itch” moment. How do you keep the peace between your dog’s gut and the bowl for the long haul?

Stick to the baseline, but add variety wisely

Think of your elimination diet as a solid foundation. You want to keep the novel protein and single‑source carb that proved gentle, then sprinkle in other ingredients slowly. A good rule of thumb is one new item every 10‑14 days, just like the re‑introduction phase, so you can spot any delayed reactions.

For example, if duck and sweet potato became the go‑to combo, you might try a handful of green beans or a spoonful of pumpkin next. Keep the portions tiny at first – a tablespoon for a medium dog – and watch the diary.

Make the diet nutritionally complete

Even a simple, hypoallergenic meal can fall short on vitamins or minerals if you stay on it forever. That’s where a balanced supplement or a commercial limited‑ingredient kibble can help. The ultimatepetfoods guide suggests pairing your base with a vet‑approved multivitamin or rotating to a nutritionally complete limited‑ingredient formula once the trigger is clear.

Remember, the goal is to keep the gut happy without sacrificing essential nutrients.

Keep the feeding routine consistent

Dogs thrive on routine. Feed at the same times each day, use the same bowl, and avoid sudden temperature changes. If you need to warm the food, do it gently – no microwaving at full blast.

Consistency also means limiting treats to the same simple ingredients you’ve already vetted. A piece of boiled chicken or a tiny chew with a single protein is perfect.

Monitor and adjust seasonally

Winter coats, summer heat, and activity spikes can all affect digestion. During colder months you might add a bit more fat for energy; in summer, a splash of water can keep meals palatable.

Keep an eye on stool consistency, skin condition, and energy levels as the seasons change. A quick note in your diary – “April: softer stool, added a drizzle of fish oil” – can save you weeks of guesswork later.

Know when to bring the vet back in

Even with a perfect plan, something can slip through. If you notice recurring itch, loose stools, or a sudden drop in appetite, it’s time for a professional check‑up. Your vet might suggest a follow‑up blood panel or a tailored veterinary diet.

And if you ever feel stuck, a refresher on safe food switches can be handy. The FluffPost guide walks you through gradual transitions that keep the gut steady.

Bottom line? Treat the elimination diet as a living document, not a one‑off experiment. Keep the baseline, add new foods slowly, stay consistent, and tweak as your dog’s life changes. That way, you’ll enjoy many more calm, wag‑filled days together.

Conclusion

If you’ve made it to the end, congratulations – you’ve turned a confusing gut mystery into a clear plan. Your elimination diet dog uk journey is now a living document you can tweak as life changes.

Remember the basics: a simple hypoallergenic base, a strict exclusion window, and meticulous re‑introduction notes. Stick to the same feeding times, keep treats ultra‑simple, and watch for even the tiniest skin shift.

If a flare‑up pops up, pause, note the reaction, and give your pup a few days of baseline before the next trial. That pause is the safety net that keeps the diary honest and the diet effective.

In our experience, pairing the diet with a home allergy test from UK Pet Food Intolerance speeds up the detective work, giving you a shortlist of likely culprits before you even start re‑introducing.

So, what’s the next step? Keep that notebook handy, stay consistent, and enjoy watching your dog’s coat glow and stool settle.

When the diet feels right, you’ve earned a calmer, happier companion – and a roadmap you can trust for years to come.

Finally, don’t forget to revisit the plan seasonally; a splash of fish oil in winter or a cooler meal in summer can keep things balanced. A quick check‑in every few months ensures the diet grows with your dog’s changing needs.

FAQ

What exactly is an elimination diet for dogs in the UK?

An elimination diet is a short‑term feeding plan where you give your dog a single, novel protein and a simple carb – think boiled chicken and rice – and strip out every other ingredient. Over 7‑14 days you watch stool, skin and energy for any changes. If the symptoms settle, you then re‑introduce foods one at a time to pinpoint the trigger.

How long should the exclusion phase last before I start re‑introducing foods?

Most vets and pet nutritionists recommend at least ten days, but we’ve seen clearer results after a full two‑week window. That gives the gut enough time to reset and any delayed skin reactions to surface. If you notice improvement before day ten, you can still wait until day fourteen – it’s better to be sure than to risk overlapping reactions.

Do I need a vet’s approval before starting an elimination diet dog uk?

It’s always smart to have a quick chat with your vet, especially if your dog has chronic issues or is on medication. The vet can rule out underlying infections and confirm that the diet you choose meets basic nutritional needs. In most cases, though, the plan is safe to do at home as long as you keep meals balanced with a protein, carb and a vitamin supplement if you’re staying on the diet for more than a month.

Can I use a home food‑intolerance test to shorten the trial?

Absolutely. A home test from UK Pet Food Intolerance gives you a shortlist of proteins or grains that are most likely to cause trouble. You can then choose a novel protein that isn’t on that list for your baseline meal, which often means you spot the real culprit faster during the re‑introduction phase. Just remember the test is a guide, not a definitive diagnosis.

What should I do if my dog refuses the bland baseline food?

First, check the temperature – room‑temperature meals are usually more appealing than cold kibble straight from the fridge. Warm the food gently in a microwave (10‑15 seconds) or add a splash of warm water to improve texture. If refusal continues after three days, call your vet – persistent picky eating can signal a deeper issue that needs professional attention.

How can I tell whether a reaction is from a food trigger or something else?

Keep your diary meticulous: note the exact time, amount and type of any new ingredient, then watch for changes over the next 48‑72 hours. Skin flare‑ups often appear a day or two after the food, while digestive signs (loose stool, gas) usually show up within 24‑48 hours. If you see symptoms pop up without a new food, consider environmental factors like pollen or a new cleaning product.

When is it time to call the vet during the elimination diet?

If your dog has diarrhoea lasting more than 48 hours, severe itching that doesn’t calm within a day, vomiting, lethargy or signs of dehydration (dry gums, sunken eyes), pick up the phone. Those red flags mean a medical issue could be brewing, and the vet may need to run blood work or suggest a short‑term medication while you continue the diet trial.